The Half-Crunchy Mama

Trying to live a natural life with balance


2 Comments

Zasta with Tomatoes and Goat Cheese

Zasta with tomatoes and goat cheese | The Half-Crunchy Mama

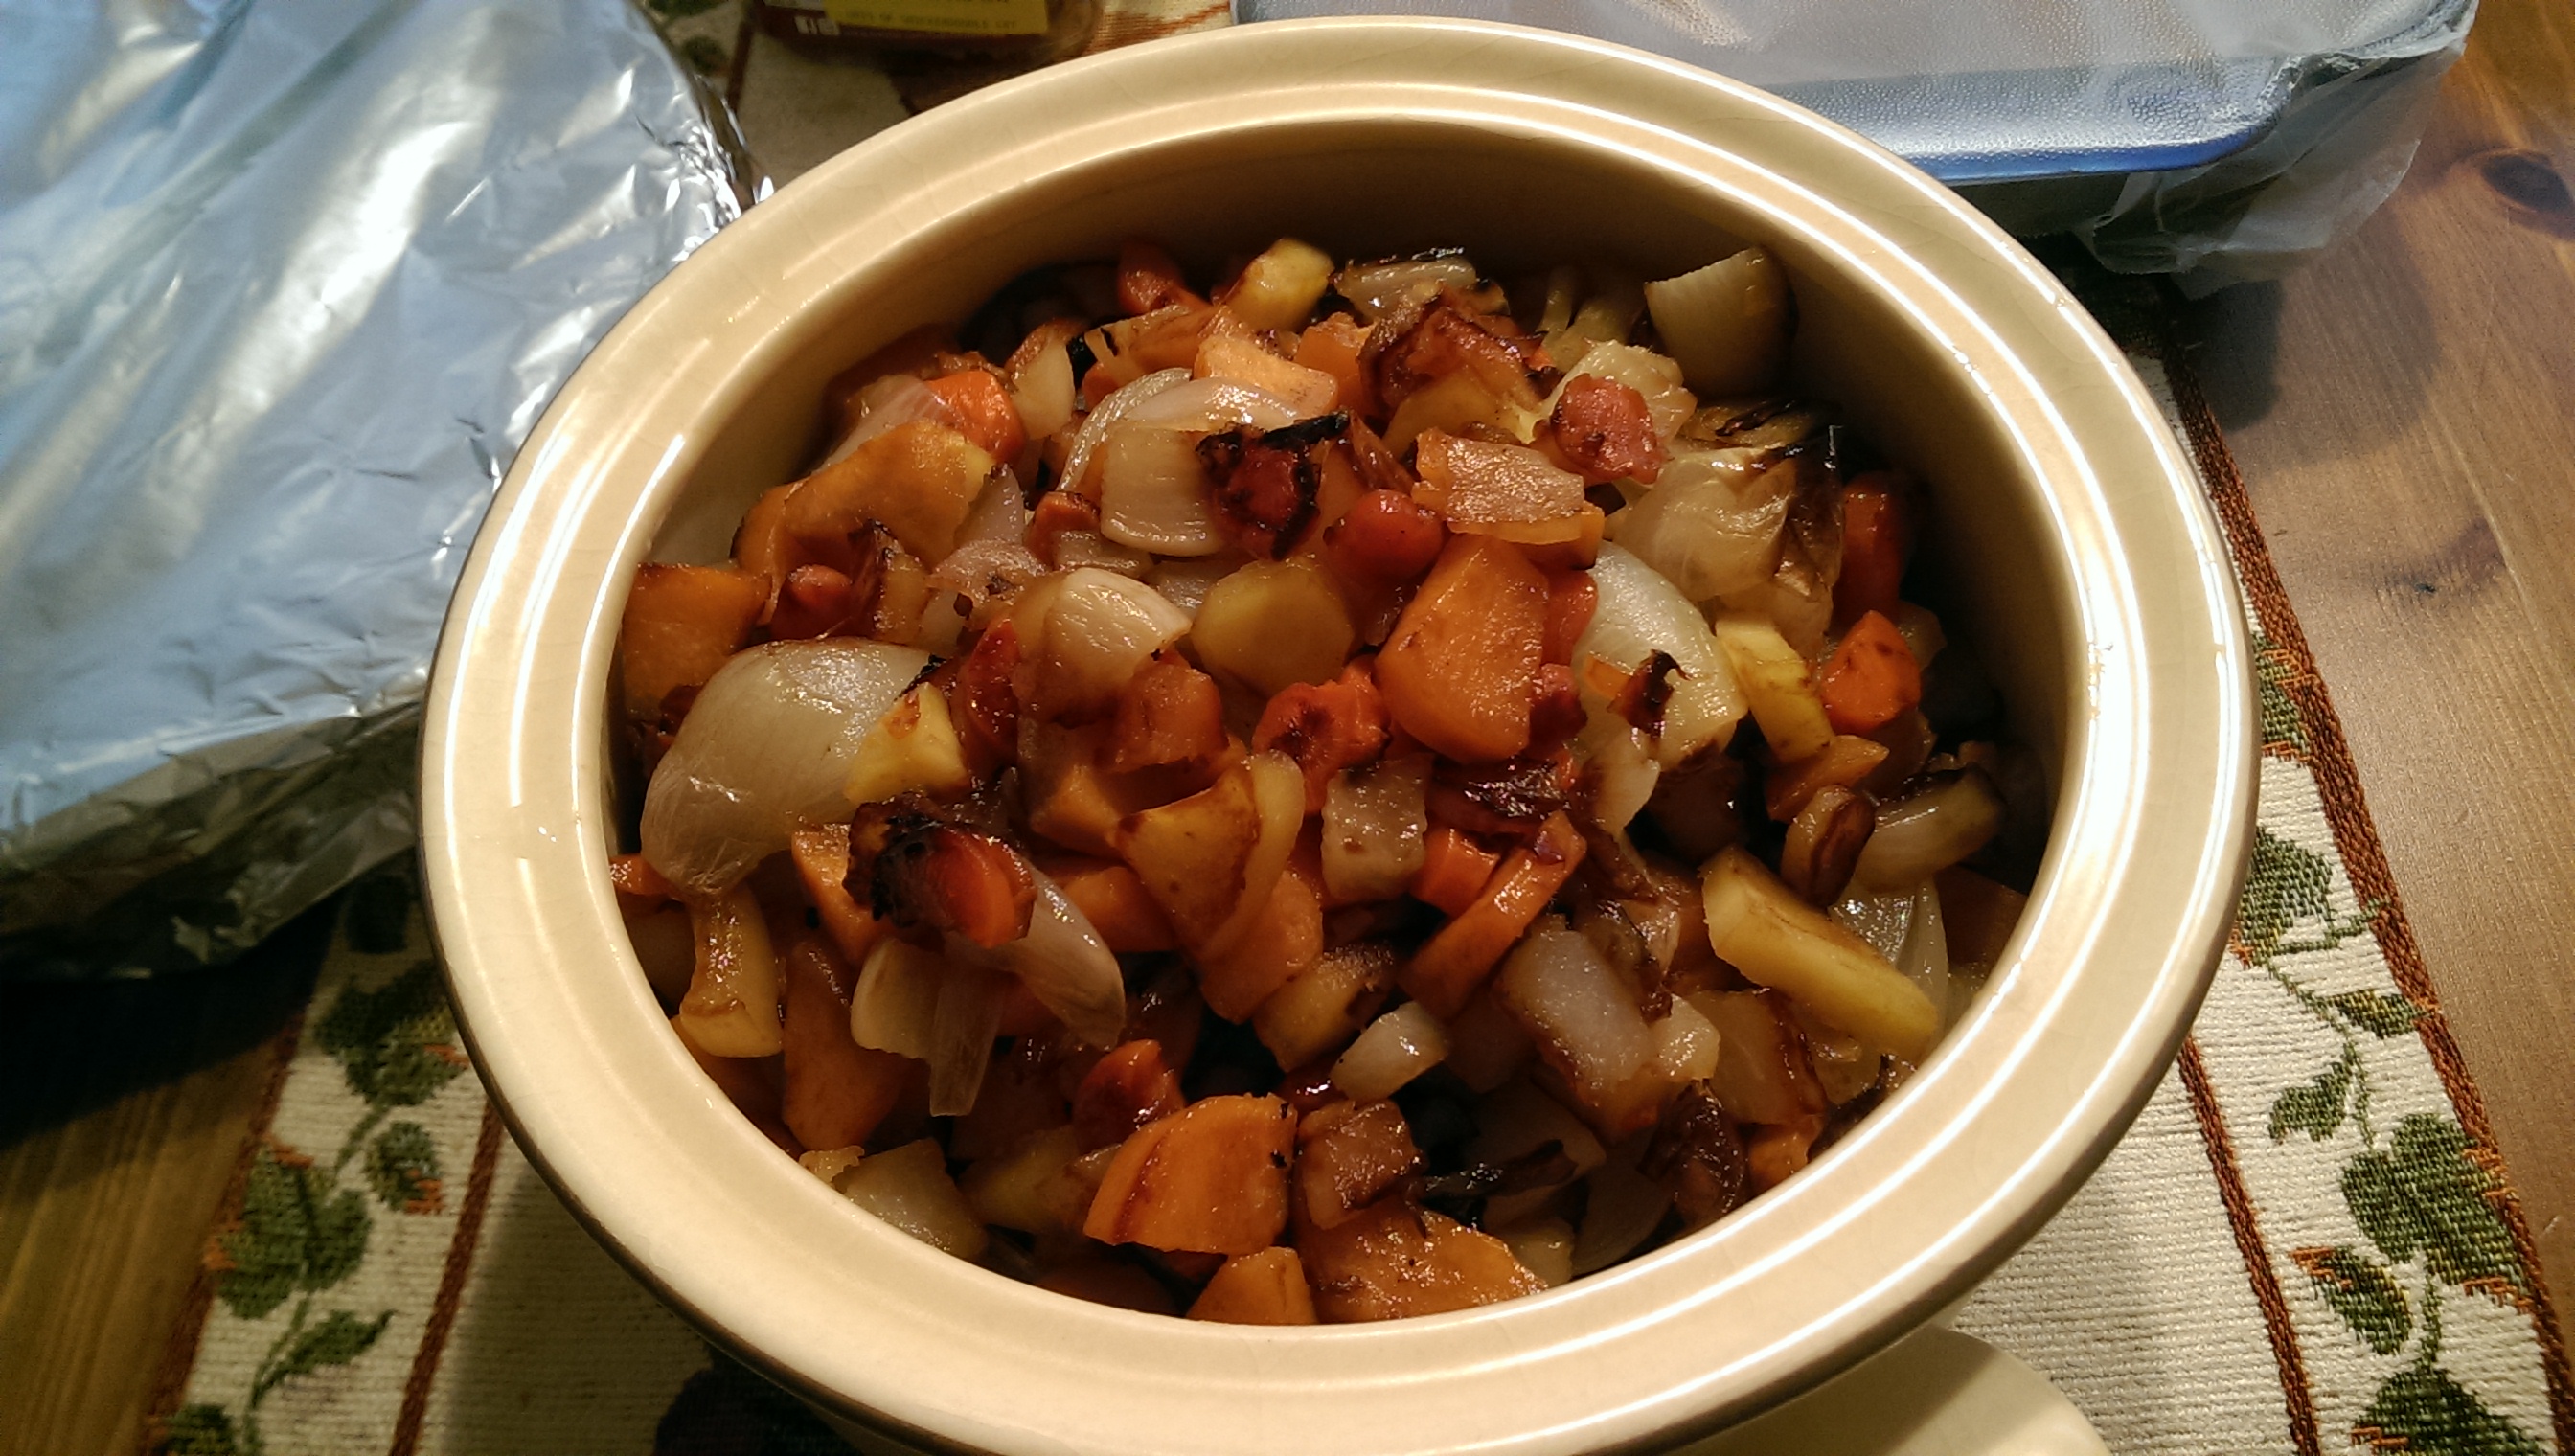
My garden has been very productive this year. I’m quite proud of myself as each year I have learned something new that has led to this year’s success. I’m picking 1-3 dozen cherry tomatoes every day. I’ve had eggplants, zucchini, lots of jalapenos, and plenty of crookneck squash. This has led to some very delicious meals! And mostly free 🙂

Zasta with tomatoes and goat cheese | The Half-Crunchy Mama

This was two weeks ago…it’s even fuller now!

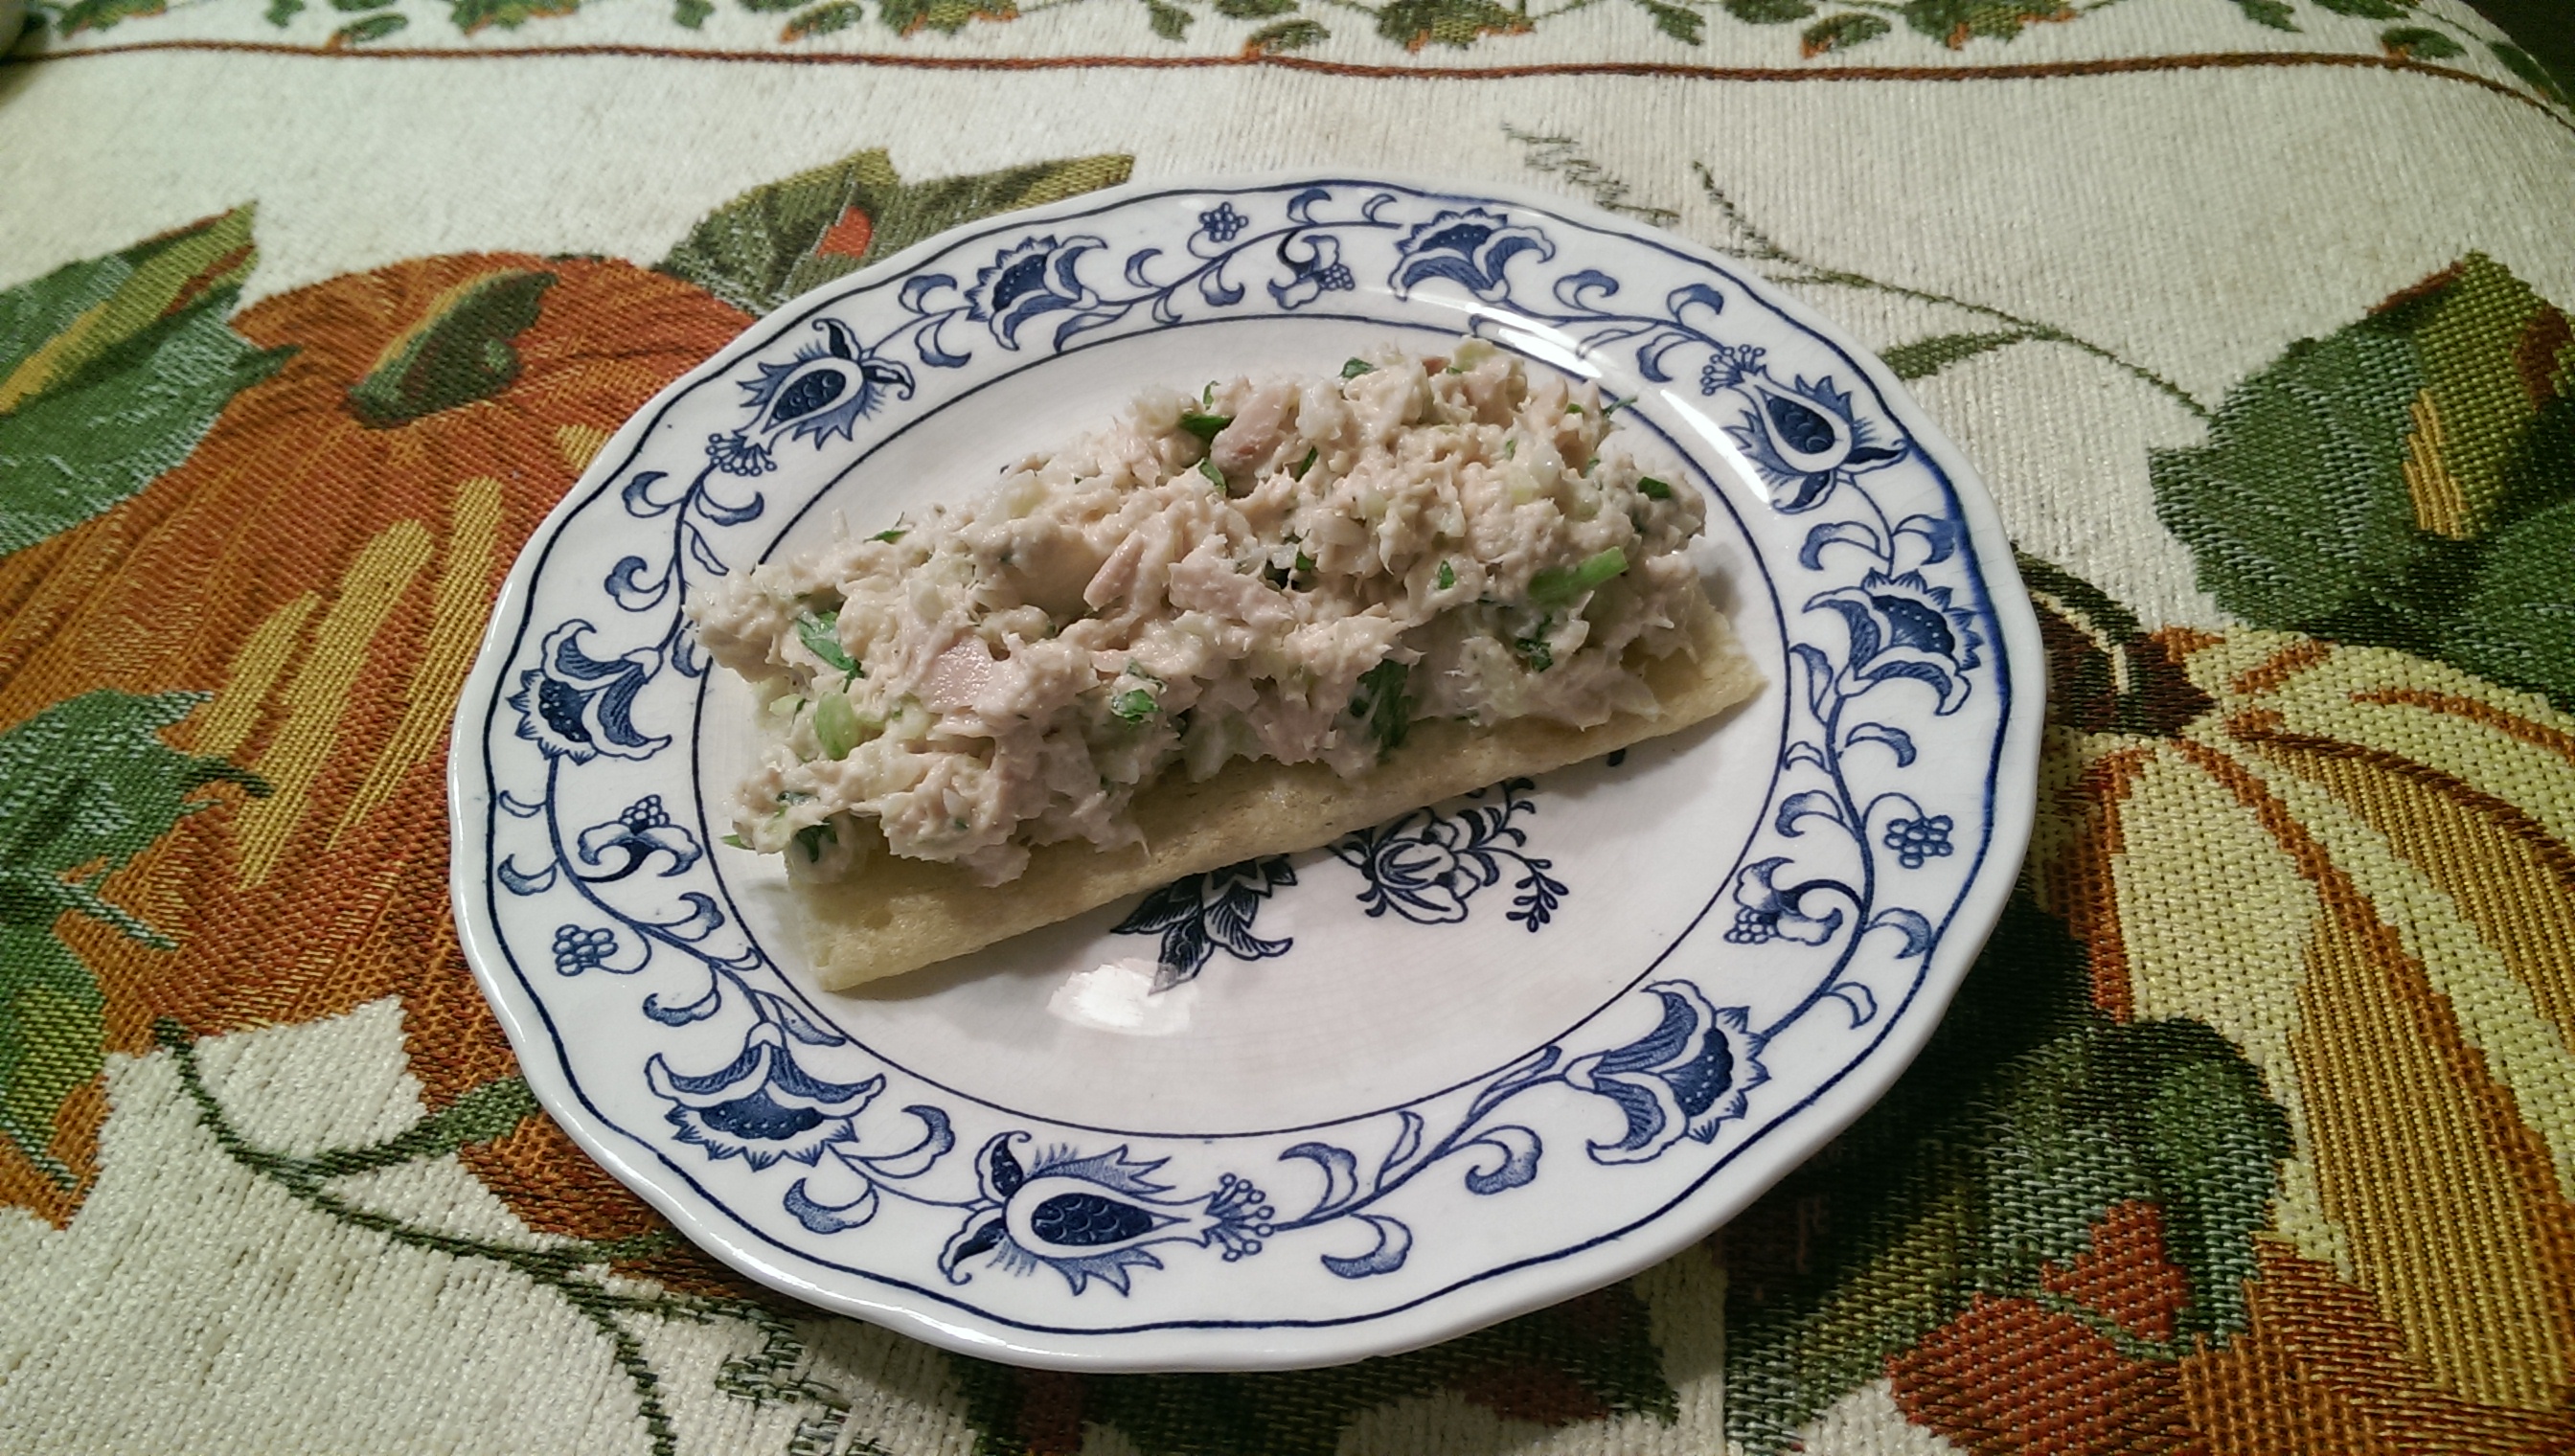
While I’m still waiting for cucumbers and bell peppers to emerge, I’m enjoying the literal fruits of my labor. Most of the time, I’m throwing a bunch of fresh veggies into my breakfast, but not the other night. Two large zucchini, a ton of cherry tomatoes, and a stalk of basil, all from the garden, were sitting on the counter calling to me. So I listened. And ate them up.

Zasta with tomatoes and goat cheese | The Half-Crunchy Mama

As a cheesemonger, nothing makes a meal better than adding cheese. In this case, it was goat cheese. I love the depth of flavor that goat cheese adds to dishes. The Russian and I ate the entire thing between the two of us. So fast, and of course my other two favorite dinner adjectives, cheap and easy, make this one a keeper and one worthy enough of blogging. After all, it’s been over 6 months since my last post! Obviously, life has gotten busy and with summer almost over here in Georgia, I’m ready to have time to start dedicating to this space. Can’t wait! Although it’s bittersweet…the increase of available time to dedicate comes with the fact that Sugar Bee is off to kindergarten in 2 1/2 short weeks. Time flies.

Before I get to the recipe details, short as they are, I need to give proper credit to the term “zasta” that I’m using. The daughter of friends of mine had the same thinking as me and didn’t care for the term “zoodles” so she came up with “zasta.” I love it and will forever refer to zucchini noodles as zasta. I hope you enjoy this meal as much as we did!


Zasta with tomatoes and goat cheese

Super fast and easy with very little cost, especially if you have a rockin’ garden this year, this vegetarian meal will be a keeper!
INGREDIENTS
  • 1-2 Tbsp extra-virgin olive oil
  • 1 shallot, finely diced
  • 2 cloves of garlic, minced
  • 2 dozen or more cherry tomatoes, halved
  • 1 roasted red pepper, diced small (jarred okay)
  • 2 zucchini, spiralized into noodles
  • 4 oz crumbled goat cheese
  • salt and pepper, to taste
  • Fresh basil, 1-2 Tbsp chopped
DIRECTIONS
  1. Heat EVOO in large skillet over medium heat. Add shallots and saute for 2-3 minutes. Add garlic and cook an additional minute or two until fragrant.
  2. Add tomatoes and cook 3 minutes or until skins start to wrinkle. Add red pepper and simmer 2 more minutes.
  3. Add zucchini, salt, pepper, and a bit more EVOO, tossing to coat evenly. Don’t cook too long or all the water will release from the zucchini. You want a little bit of juicy, saucy goodness, but not soup! (See last picture below. We loved the sauce!)
  4. Add almost all of the goat cheese (reserve 1-2 Tbsp for topping when serving) and stir to toss completely and melt the cheese.
  5. Divide between two plates and top with basil and remaining goat cheese. Serve immediately. Enjoy!
Zasta with tomatoes and goat cheese | The Half-Crunchy Mama

Sweet, saucy deliciousness


Leave a comment

Mexican Squash

IMG_20151207_204651It’s Day 7 of this kick I’ve been on over at my Facebook page, sharing recipes to help you get hot meals on the table during these busy holiday weeks. Monday night, I made up one of my own to share. I dug around and just used what I had in the fridge and pantry, and I will offer other ingredient ideas below that you can include depending on what you have on hand. I also tailored this a bit to Sugar Bee’s tastes as she was the one that chose between Mexican and Italian as options for the spaghetti squash that The Russian had cooked up for me the night before. (I ran out of steam to finish cooking dinner Sunday night, so I stashed it in the fridge to use the following night.)

It was actually even faster to make this dish than it usually would be because the squash was precooked (but not pulled into threads). I just put it in a closed container and popped it in the fridge that night. It was all set to get spaghettied and thrown into the pan when the time came the following night. Even better was that I didn’t have to worry about burning my hands off after the squash came out of the oven because I’m too impatient (and often pressed for time) to allow it to properly cool off. And it’s amazing as leftovers because the flavors have time to meld together. Play around with this one. I’m sure it will be slightly different every time I make this!IMAG7154


Mexican Squash

After purchasing a spaghetti squash and 1-1.5 pounds of ground beef, sift through your pantry and see what you come up with. You could use diced tomatoes (I would have included a can of fire-roasted, but Sugar Bee is on this “no tomatoes” kick these days and I’m picking my battles), taco seasoning instead of the spices I used, enchilada or tomatillo sauce in place of the tomato sauce, sliced black olives (again, Sugar Bee or they would have been in there), or kidney beans. Then from the fridge, you could add shredded carrots (when you start the onions), sliced scallions (when you top with cheese), or sour cream to mix in. The possibilities are endless! You could even swap the beef for shredded chicken or lose the meat completely and triple the beans instead. This one-pan meal is perfect for a busy weeknight, especially if you cook the squash earlier in the day or even the night before!

IMG_20151207_205016

INGREDIENTS
  • 1 medium-large spaghetti squash
  • 1 Tbsp bacon fat/lard/ghee/EVOO
  • 1 medium onion, finely chopped
  • 1.35 lbs ground beef
  • 2-3 Tbsp of chili powder, depending on desired spice level (I used 3)
  • 2-3 Tbsp of cumin
  • 2 tsp dried oregano
  • 2 tsp garlic powder (I was actually out of garlic or this would be 2-4 cloves of minced garlic)
  • 4-oz. can of diced, fire-roasted green chilies (I use Ortega as there’s not a lot of junk in their stuff)
  • 15-oz. can of black beans, drained and rinsed
  • 8-oz. can of tomato sauce
  • Salt and pepper, to taste
  • 2 cups shredded cheese (I prefer a Mexican blend)
DIRECTIONS
  1. Preheat oven to 375°F. Cut squash in half and scoop out seeds. Rub insides with a little olive oil and place cut side down onto a cookie sheet. Bake for 25-35 minutes. Squash is ready when skin gives slightly when pressing on it. Try not to overcook or you will get mush instead of spaghetti strands. Remove and allow to cool.*
  2. When squash is finished cooking and is waiting to be pulled into spaghetti, melt fat or oil in large, oven-safe skillet (broiler proof, preferably) over medium-high heat. Add onions and saute for a few minutes until softened.
  3. Add ground beef and spices to pan. Cook until meat is almost finished and you can’t see any pink. Preheat broiler on high.
  4. Add chilies, beans, and tomato sauce, stirring well to combine.
  5. Shred the squash into spaghetti strands with a fork and add to meat mixture. You may want to taste and see if you need to add more spices once everything is coated and combined. Add salt and pepper to taste.
  6. Even out the squash and meat mixture so it’s flat. (If you don’t have a pan that can be used under the broiler, transfer to a broiler-safe baking dish.) Top with shredded cheese and place under broiler for 3-4 minutes until top is golden brown. Serve with some sour cream, chopped fresh cilantro, and/or sliced scallions. Enjoy!

* You can do this the night before and store in the refrigerator in a sealed container until ready to use. Just don’t shred it until you are about to throw it into the pan!


1 Comment

Sweet Potato Black Bean Chili

IMG_20151109_190639

Rain. We have seen enough rain this fall in Georgia to last us all winter. Once the rainy days turned cold, it got worse. I knew yesterday was supposed to be the last day of this dreary weather until next week, but there was such a chill in the air that I knew that soup was what was needed for dinner. So here’s a down-and-dirty, super-short, no-frills post with the recipe.

This was originally inspired by a recipe in the magazine that I receive from Kaiser Permamente as an insured member (they actually have some good recipes in there!), but of course I have made several changes to it, improvements, if you will. It’s hearty and full of vitamin A thanks to the sweet potato, while the black beans fill you up with fiber and deliver almost all of the magnesium and iron that you need for the day. Between the two, you get 100% of your daily intake of potassium in a serving of each (one cup of each).

The best part? Fast, cheap, and easy (my favorite things) and only one pot to clean. Sure, there’s a cutting board and a knife, but that’s really it. This honestly does only take about 30 minutes, start to finish. Yippee!


Sweet Potato Black Bean Chili

Super fast, cheap, and easy meal for any day of the week, especially a cold one. Almost no mess and very little prep time, this one is sure to be a keeper! Even Sugar Bee likes it 🙂

INGREDIENTS
  • 2 Tbsp extra-virgin olive oil, butter, ghee, or other oil of your choice
  • 2 cups of peeled and diced sweet potatoes; 1 large or 3 small
  • 1 large onion, diced
  • 6 cloves of garlic, minced
  • 2 Tbsp smoked paprika
  • 2 Tbsp ground cumin
  • 1 Tbsp tumeric
  • 1 Tbsp chili powder
  • 2.5 cups vegetable broth (or chicken stock if not vegetarian and you want a richer taste)
  • 2 15-ounce cans of organic black beans, rinsed
  • 2 14.5-ounce cans of fire-roasted diced tomatoes (I use one can of regular dice and one can of petite dice)
  • Juice from 2 limes
  • 1 cup chopped fresh cilantro
  • Shredded cheese for topping (optional)
DIRECTIONS
  1. Heat oil in a Dutch oven over medium-high heat. Add sweet potato and onion and cook, stirring often, until the onion softens, about 4 minutes.
  2. Add spices (garlic, paprika, cumin, tumeric, chili powder) and cook, stirring constantly, for about 30 seconds.
  3. Add the broth and bring to a simmer. Cover and reduce heat to maintain a gentle simmer. Cook until the sweet potato is tender, about 10-12 minutes.
  4. Add the beans, tomatoes, and lime juice. Increase heat to high and return to a simmer, stirring often.
  5. Reduce heat and simmer until slightly reduced, about 5 minutes.
  6. Top with cilantro and cheese, if desired. Enjoy!

IMAG6668


Leave a comment

Baked Cheesy Cauliflower Tots

Baked Cheesy Cauliflower Tots | The Half-Crunchy MamaTater tots. We all used to look forward to them that one day out of the week when the cafeteria would serve them up for lunch. Of course that deep-fried goodness isn’t particularly a part of my family’s current eating lifestyle and I actually have no means (or clue) on how to deep fry anything. Sorry, South. Guess I’m still a Yankee.

I don’t have anything against potatoes and I love a few good french fries once in a blue moon, but when I first heard about swapping white potatoes out with cauliflower in tot form, I was definitely excited about trying them. I have been making different varieties of mashed cauliflower for years now, so this seemed to be the logical next step. So far, I have made two batches of cauliflower tots from different recipes on the web, but both times, The Russian was far from enthusiastic about the taste and Sugar Bee wouldn’t even try one. She’s the cauliflower freak (raw with hummus, of course) and I thought she was going to be the perfect tester. Nope. I ended up eating both batches (these were two very separate instances) and I felt like there was a thing or two missing from each recipe. Which brings me to last week when I finally decided to play around and create my own version of cauliflower tots. They are so fast, cheap, and easy (my three favorite things) that you will hit yourself on the head as to why you haven’t tried any of the many recipes out on that Pinterest thing.

Take out food processor, chop cauliflower into rice-like pieces……Baked Cheesy Cauliflower Tots | The Half-Crunchy Mama …put in bowl with all of the other ingredients and mix thoroughly…Baked Cheesy Cauliflower Tots | The Half-Crunchy Mama…spoon into greased mini muffin pan and bake.Baked Cheesy Cauliflower Tots | The Half-Crunchy MamaSeriously so freaking easy. Just try it tomorrow. Or maybe even tonight.Baked Cheesy Cauliflower Tots | The Half-Crunchy MamaDid I mention that they are delicious?? The Russian easily ate a third of the batch after tasting his first one. Not only did Sugar Bee try one, she ate three of them at dinner. And I could have eaten the whole batch. This version has cheese and I am going to work on a dairy-free version next, inspired by a comment from my Instagram of this success.Baked Cheesy Cauliflower Tots | The Half-Crunchy Mama


Baked Cheesy Cauliflower Tots

Ditch the deep-fried potato goodness and give these healthier baked tots a try. Extremely high in Vitamin C and a great source of B-6, magnesium, iron, and calcium, a head of cauliflower also offers you around 11 grams of protein. After you make these, it will be easy to eat half of a head in one meal as you fill your belly with this kid-approved tater tot replacement.

INGREDIENTS
  • One small head of cauliflower (or 2/3 of a large head)
  • 1 cup shredded cheese of choice (I have used both a Mexican and an Italian cheese blend)
  • 1 egg
  • ¼ cup almond meal
  • ½ tsp ground mustard
  • 1 tsp onion powder
  • 1 tsp garlic powder
  • 1 tsp kosher salt
  • a few grinds black pepper
DIRECTIONS
  1. Preheat oven to 400ºF. Lightly grease a mini muffin tin with cooking oil or spray.
  2. Remove main stem from head of cauliflower and break into pieces. Place in food processor and pulse until finely shredded. Smaller stems are okay to include.
  3. Place the shredded cauliflower in a kitchen towel to remove excess moisture. (Note: I let mine sit out and get room temperature before working with it and I find that there is less moisture released, so this step can be avoided if time allows.)
  4. In a large bowl, combine the shredded cauliflower with all of the remaining ingredients, stirring well to distribute evenly.
  5. With a spoon, scoop the mixture into each muffin cup, pressing down firmly with your fingertips as you go.
  6. Bake for 20 minutes until golden. Enjoy!


Leave a comment

Maple Spiced Pecans

This recipe has been such a hit, that I have decided to only make double batches from now on. If I bring them out while guests are over, I will end up with an empty container. But I love feeding those I love, especially when it’s something that is healthy and nutritious. The Russian and Sugar Bee alone could eat the whole batch, so I can’t fault my friends for loving these nuts.

This is so super easy; one bowl and a foil-lined pan means minimal cleanup. That makes me happy. These would be awesome in the fall and around the holidays because of the flavors, but my BFF’s mom had sent her several bags of pecans harvested from their grove (Gerry’s Pecan Grove) and she shared a few bags with me this spring. So I went to work messing with a recipe from the chia seed book I’ve mentioned in previous recipes (Lemon Chia Balls and Cinnamon and Spice Sweet Potato Chips). Now I’m buying pecans all the time from Aldi just so I can keep up with our habit. I will be emailing the grove for more soon and see if I can get set up with a regular shipment. I’m thinking these would make nice Christmas presents this year. 🙂

Maple Spiced Pecans | The Half-Crunchy MamaIn a large bowl, whisk together maple syrup, cinnamon, nutmeg, cloves, and sea salt. Then stir in pecans, chia seeds, and chopped cranberries until everything is well coated. Maple Spiced Pecans | The Half-Crunchy Mama Transfer to a baking sheet lined with foil and spread out in a single layer. Bake for 15 minutes, stirring every 5 minutes.Maple Spiced Pecans | The Half-Crunchy MamaOnce they are done in the oven, transfer them to waxed paper and let cool completely (if you can).Maple Spiced Pecans | The Half-Crunchy MamaStore in an airtight container…if they are not all eaten that day.


Maple Spiced Pecans

The health benefits from the pecans, cranberries, and chia seeds make this snack a great choice. Its sweet crunch is addicting and I have yet to find someone who doesn’t fall in love. This can easily be split in half if you are making this snack for one….then you would use 1/4 cup plus 2 Tablespoons of maple syrup.

INGREDIENTS
  • 3/4 cup pure maple syrup
  • 1+ teaspoon ground cinnamon
  • A few shakes of ground nutmeg
  • A good shake of ground clove
  • 1/4 teaspoon kosher sea salt
  • 4 cups pecan halves (raw are best)
  • 1 cup dried cranberries, chopped
  • 1/2 cup chia seeds
DIRECTIONS
  1. Preheat oven to 325°F.
  2. In large bowl, whisk together the maple syrup with the spices and salt. Stir in the pecans, cranberries, and chia seeds, tossing until well coated.
  3. Lay the mixture out in a single layer on a foil-lined baking sheet. Bake for 15 minutes, stirring every 5 minutes.
  4. Transfer the mixture to a large piece of waxed paper and allow to cool completely.
  5. Store in an airtight container in a cool place and enjoy while they last!


Leave a comment

Garlic and Herb “Spaghetti”

Garlic and Herb "Spaghetti" | The Half-Crunchy Mama
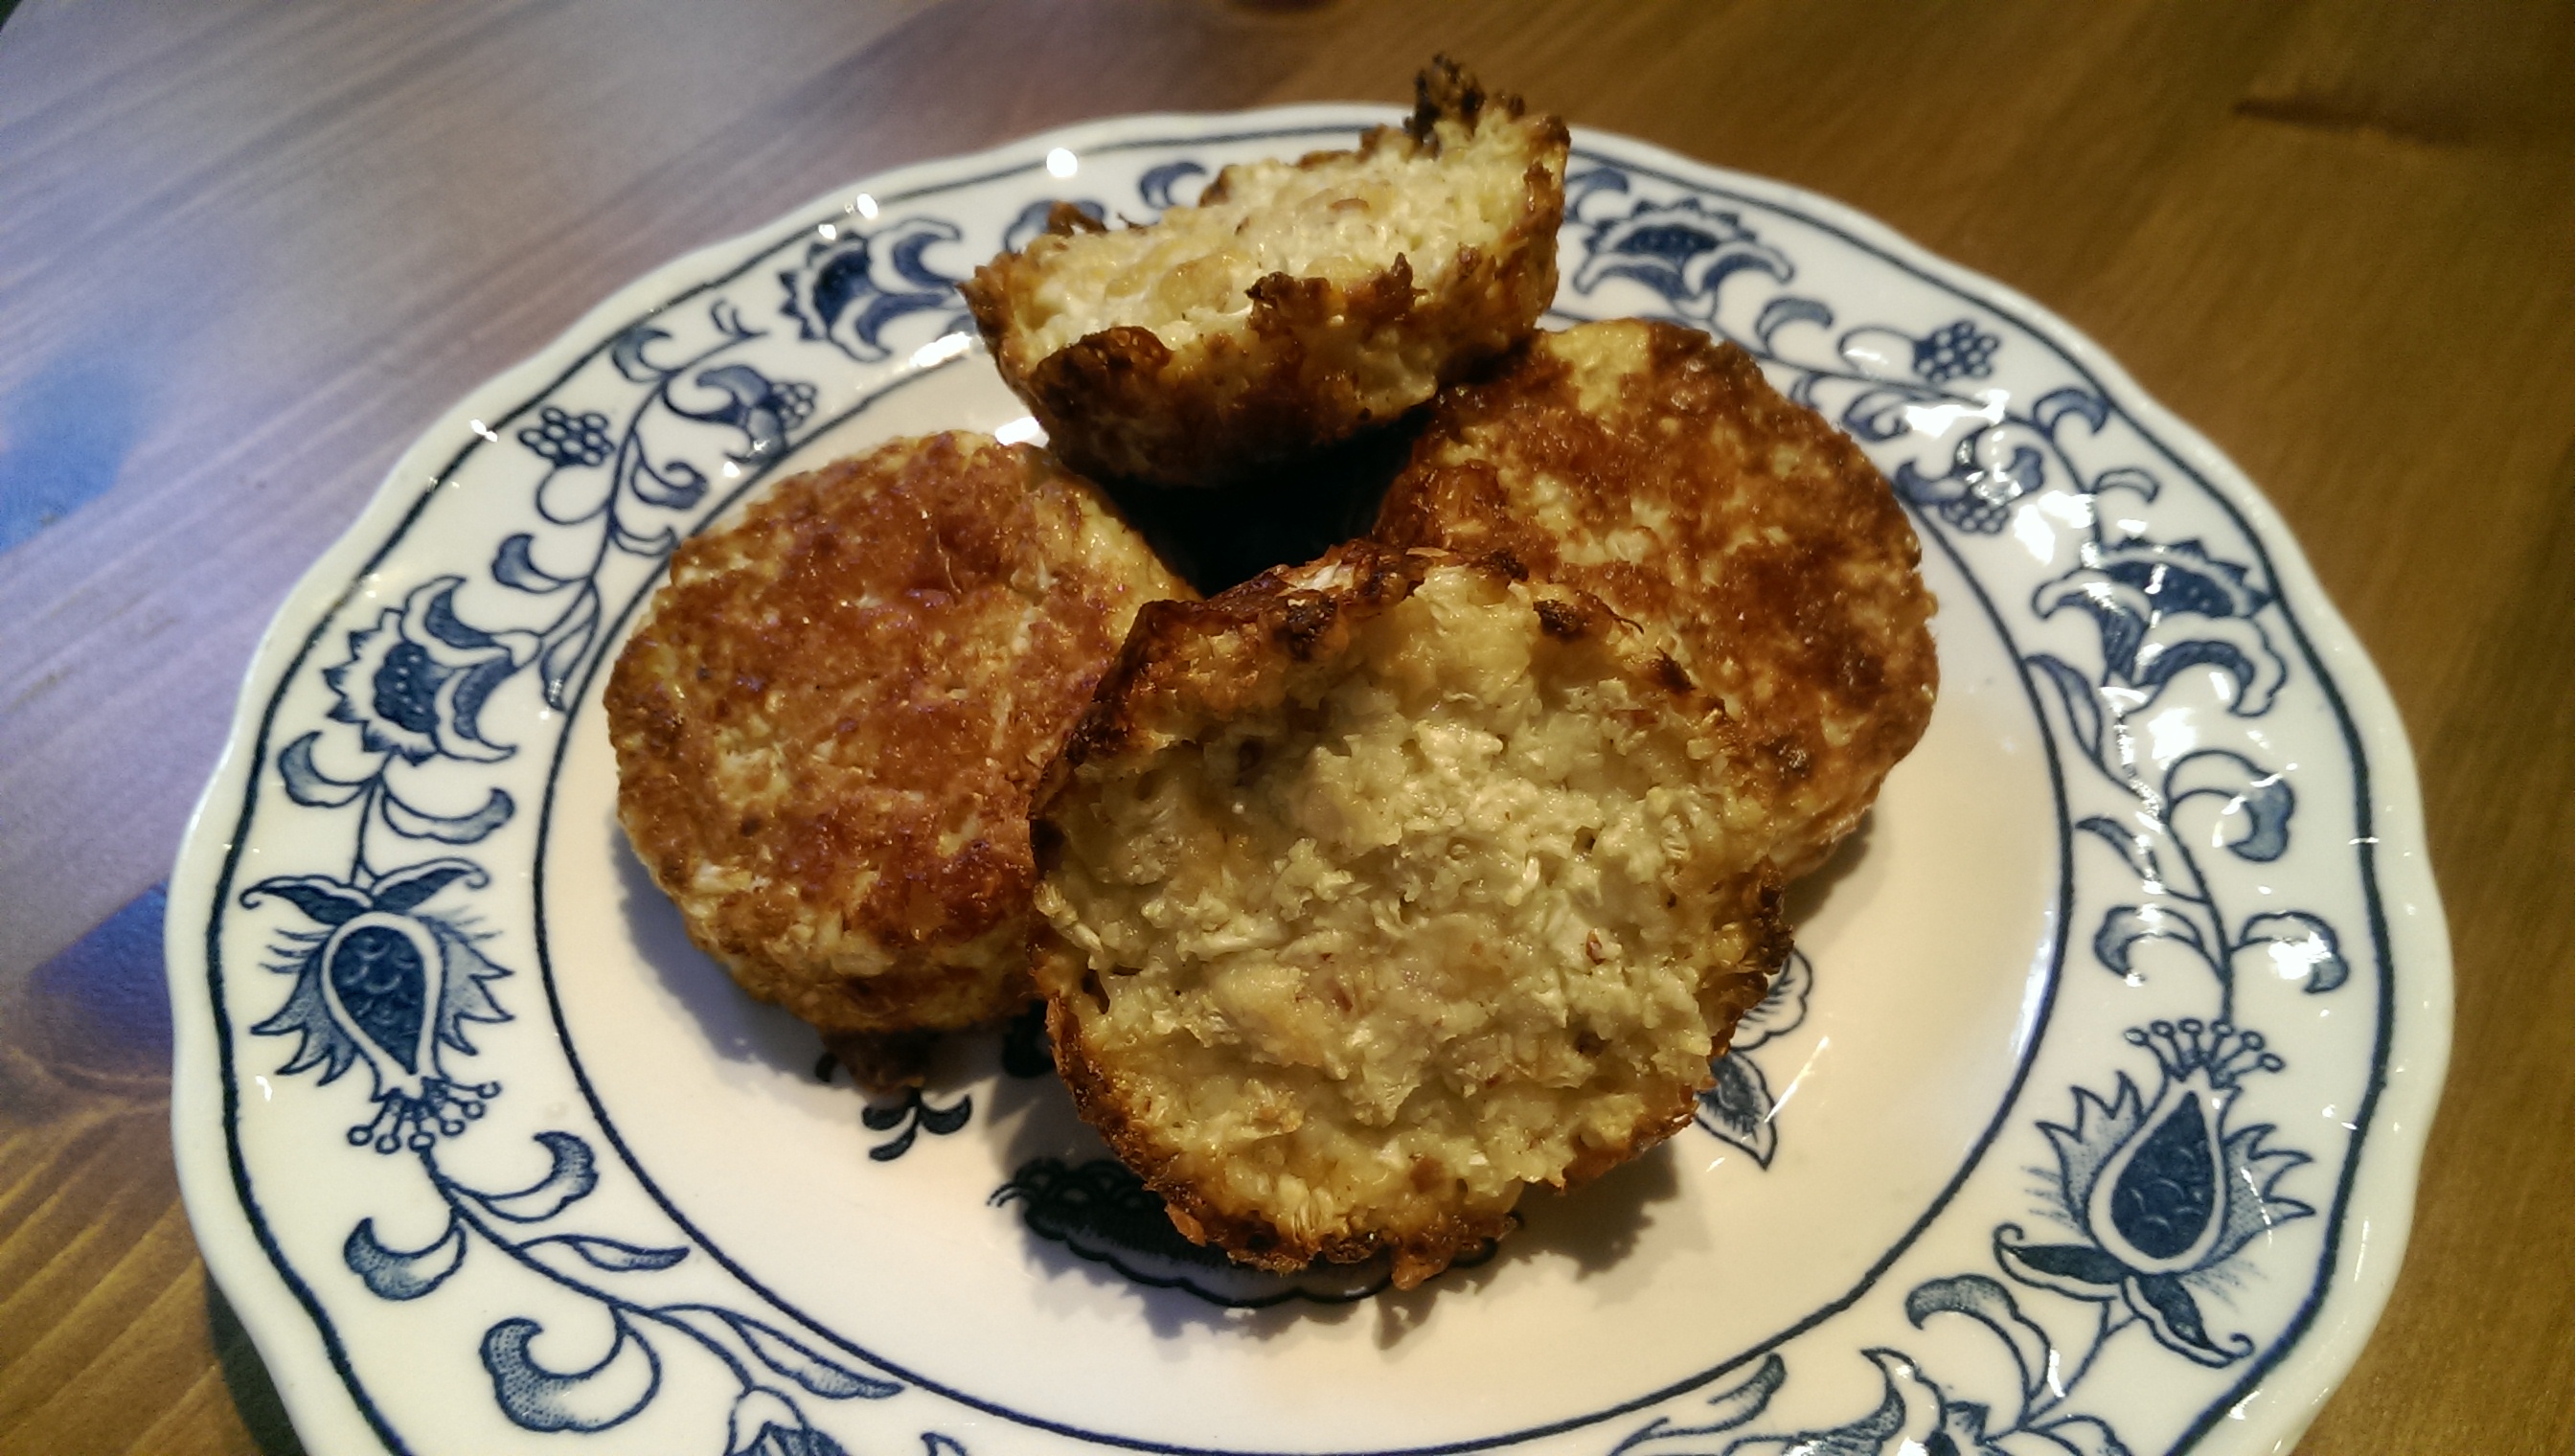
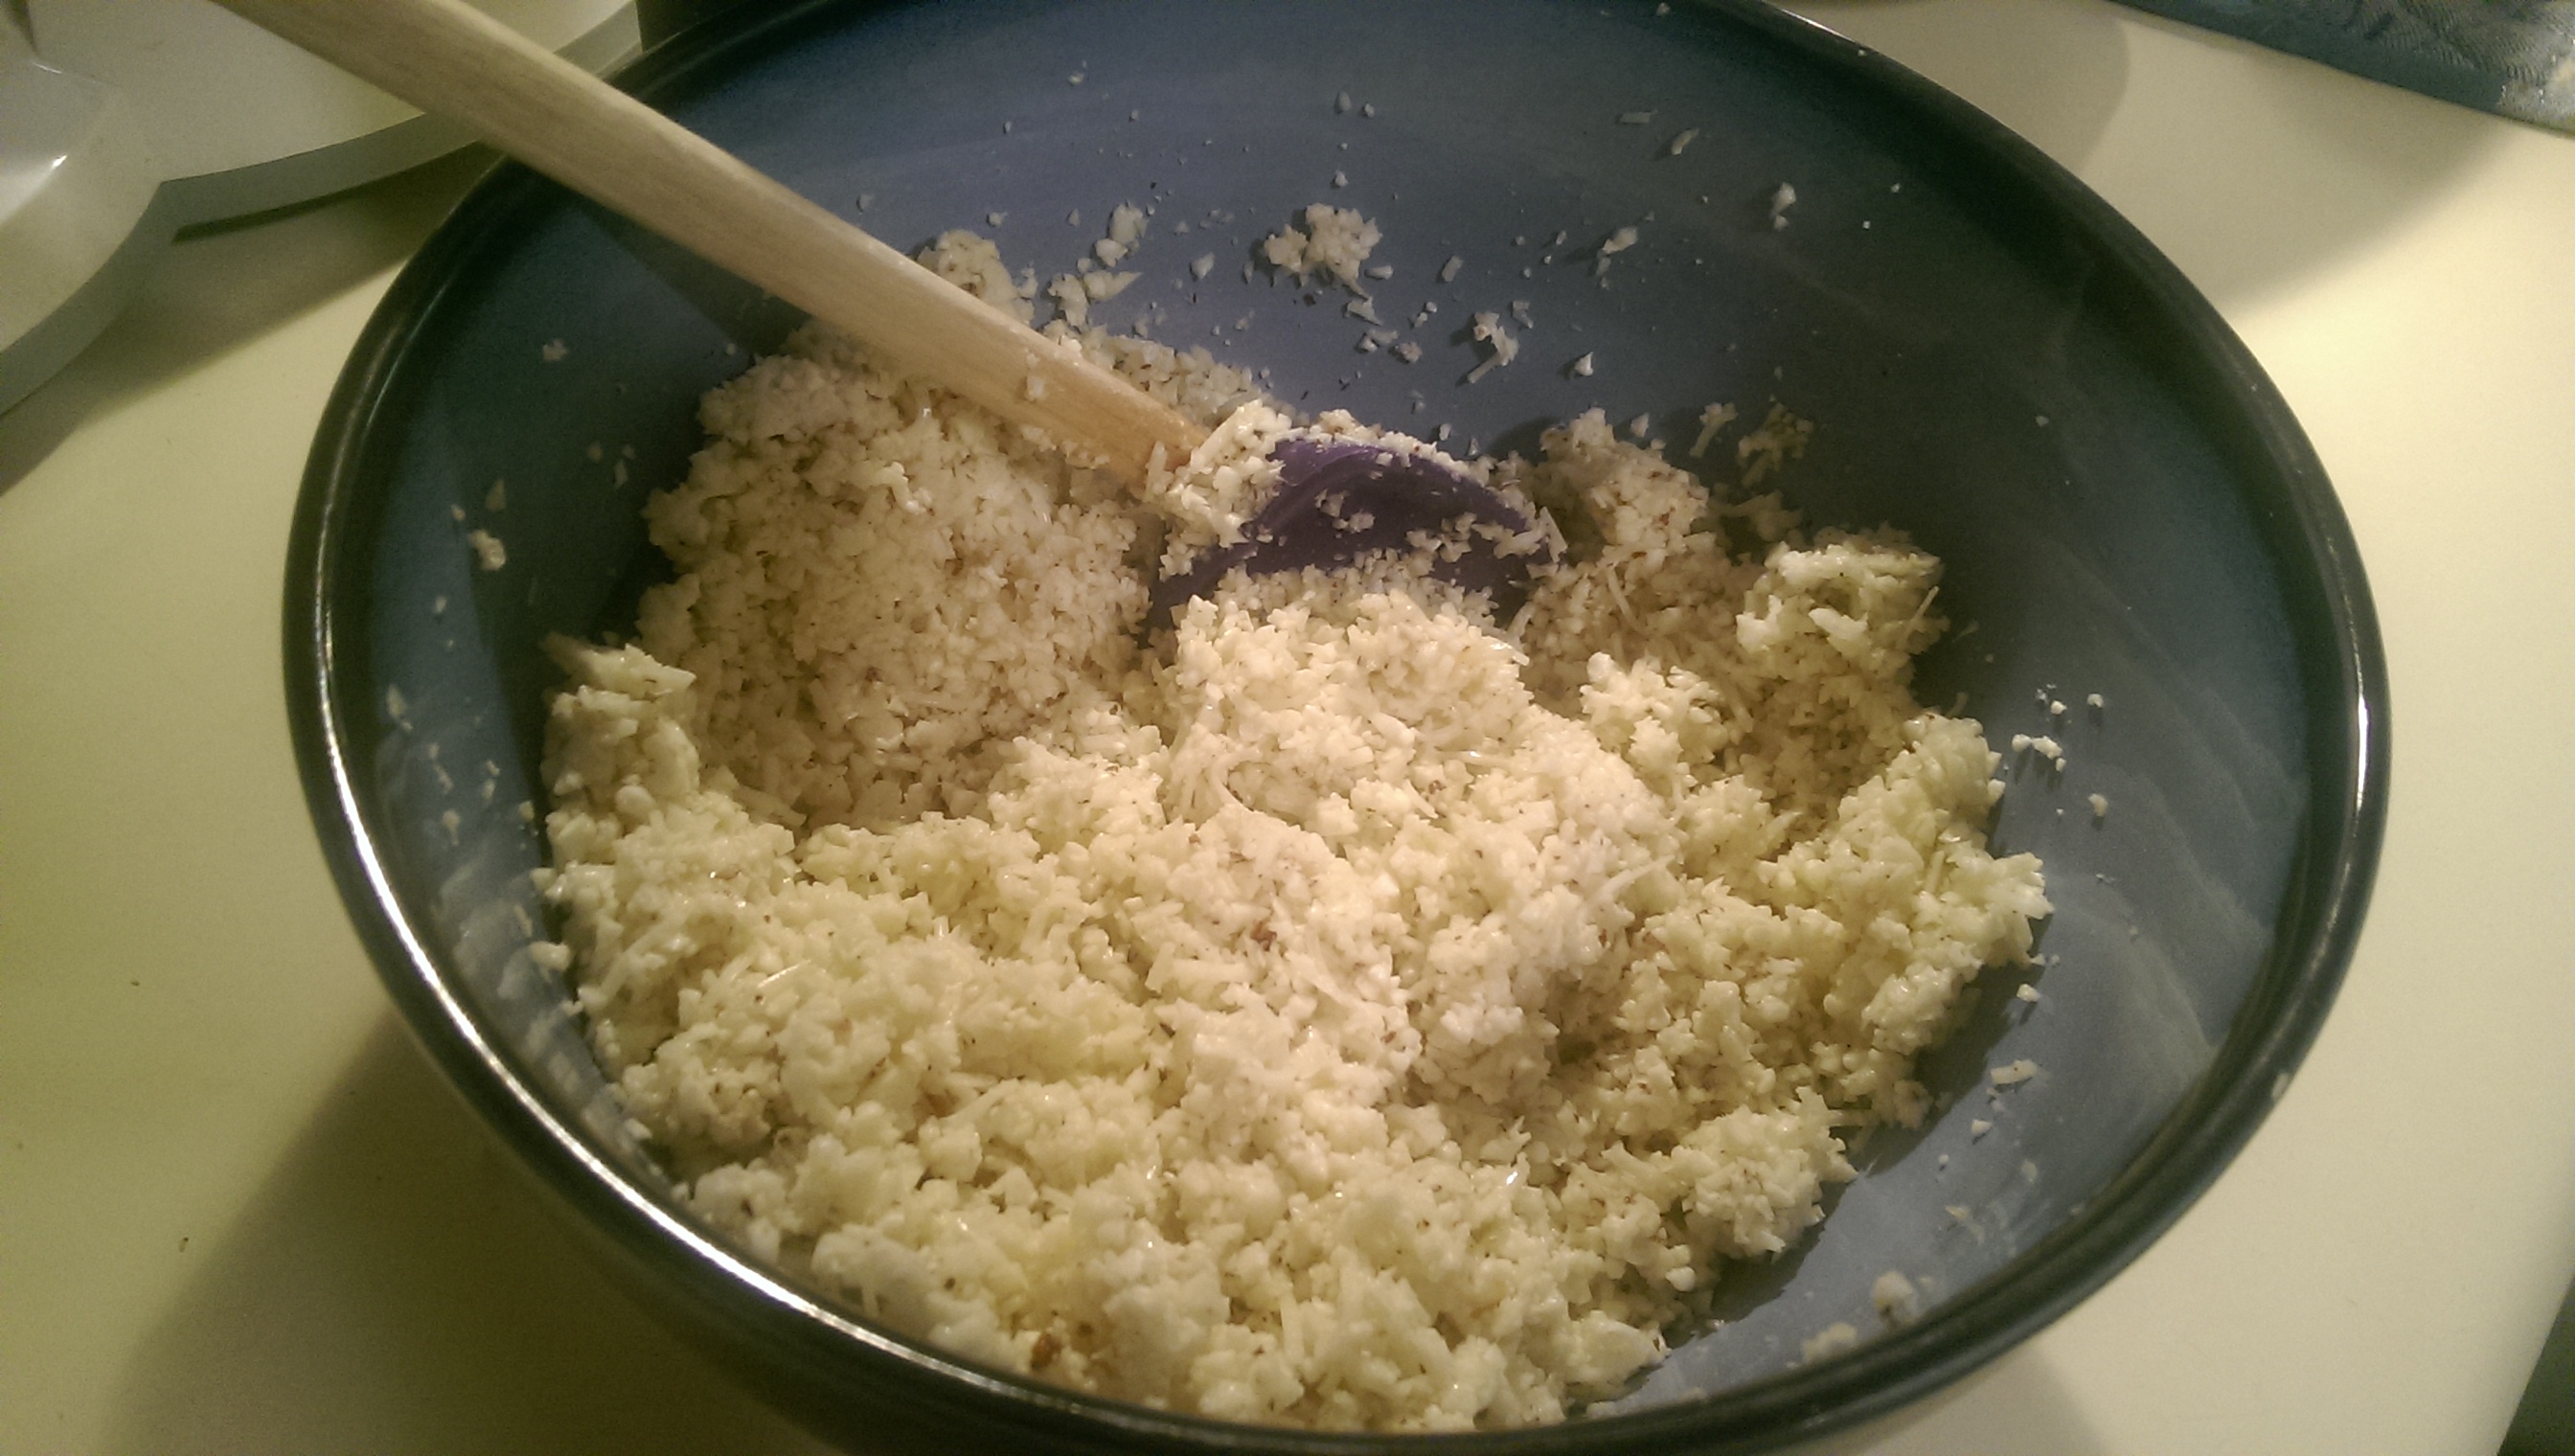
If you still have not tried spaghetti squash, whether it’s because you are intimidated by the thought of cooking a food that is new to you or you think it’s too healthy or have an aversion to food that is good for you, stop right now and go get one at the store. It is so easy to cook up spaghetti squash and use it in place of pasta for any dish. I first started using it for my Eggplant Ragout several years ago. As it turns out, it’s a good thing that I love using it in my meals because it has been a blessing with Sugar Bee and her wheat issues. Squash is an even better alternative than any gluten-free pasta that I could give her. When she was one, she would double-fist feed herself with my ragout over “spaghetti” and was the talk of her school. I have even made a quiche using spaghetti squash as a crust. It’s just awesome. And so easy.

Slice the squash in half, being very careful as I’m always certain that this time will be the time I lose a finger doing it, and scoop the seeds and rough, stringy parts out. Coat the insides with extra-virgin olive oil and place cut-side down onto a baking sheet. Bake in a preheated oven at 450ºF for about 30 minutes. It is done when the skin gives as you press down on it. I like mine to be a little more roasted like in this picture, but be careful not to cook it too long or it will be more like spaghetti mush instead of spaghetti strands.Garlic and Herb "Spaghetti" | The Half-Crunchy MamaWhile that’s in the oven, prep your onion and herbs. Chop one small onion into fairly small dice. I used the herbs that I had on hand, but feel free to experiment with other flavors and what you have in the house or garden. I chopped one tablespoon of fresh thyme, and two tablespoons each of fresh parsley and basil. I also included five cloves of minced garlic, but I would probably push it to at least six because as I’ve said before, we LOVE garlic here.Garlic and Herb "Spaghetti" | The Half-Crunchy MamaWhen the spaghetti squash is finished and cooled enough to handle, strip out the strands with a fork. It should look something like this. Garlic and Herb "Spaghetti" | The Half-Crunchy MamaMelt about two tablespoons of Kerrygold butter over medium heat. Add the onions and cook for about 5 minutes, until softened. Add the garlic and stir, cooking about a minute. Throw in the “spaghetti” and fresh herbs, and add some sea salt and fresh ground pepper, stirring well to combine. I added some freshly grated Parmesan cheese since I’m allowed a bit of hard cheese now and then. Butter and Herb "Spaghetti" | The Half-Crunchy MamaI served this as my side dish with a delicious salmon burger from Costco. Wild-caught salmon and very few other ingredients (some oil and spices), without any wheat to hold them together. It was such an easy meal to throw together. And nutritious!Garlic and Herb "Spaghetti" | The Half-Crunchy Mama(The Russian doesn’t mind his food touching, so this one was his)


 Garlic and Herb “Spaghetti”

Spaghetti squash is a great alternative to pasta for any recipe and can also be a side dish or meal on its own. Depending on what it’s served with, I usually get 3-4 servings out of a medium squash. This is a flavorful way to serve it up and you can add almost anything you want to this basic recipe.

INGREDIENTS
  • 1 medium-large spaghetti squash
  • 1-2 Tbsp extra-virgin olive oil, however much is needed to coat the inside of the cut squash
  • 2 Tbsp Kerrygold butter, ghee, or oil of your choice
  • 1 small onion, diced small
  • 4-6 cloves of garlic, minced (to your preference)
  • 1 Tbsp fresh thyme, chopped
  • 2 Tbsp fresh basil, chopped
  • 2 Tbsp fresh parsley, chopped
  • Sea salt and fresh ground pepper
DIRECTIONS
  1. Preheat oven to 375ºF
  2. Cut the spaghetti squash in half lengthwise. Scoop out and discard the seeds and stringy threads.
  3. Coat the insides and cut edges of the squash with EVOO. Place the halves cut side down on a baking sheet and bake for about 30 minutes. Squash is done when skin gives from a poke with your finger. Turn over squash halves and set aside to cool until able to handle.
  4. Melt butter in skillet over medium heat. Add onions and cook 5 minutes until soft.
  5. Meanwhile, pull spaghetti strands from squash with a fork, pulling the fork through the flesh lengthwise from one end to the other. (Use a potholder to hold the squash if still too warm to handle.)
  6. Add garlic and stir, cooking until fragrant, about a minute.
  7. Toss squash and the fresh herbs in the pan with the onions and garlic, mixing well to combine.
  8. Add salt and pepper to taste. Enjoy!


Leave a comment

Southwest Black Bean Soup

Southwest Black Bean Soup | The Half-Crunchy Mama

It’s that time of year when all I want is warm soup. Even if it’s not that cold in Georgia, it’s still winter. And the temperature swing from midday to midnight can easily be 30 degrees. I’m really trying to lower our food budget, so soups are also budget-friendly and you end up with several meals worth when it’s done. Sugar Bee, my three year old, loves beans, especially black beans, so she’ll pretty much eat any soup now that has beans. I have even been known to add some beans to my chicken soup for her eating enjoyment. Here is another winner for her.

This one is also a time-saver. I usually make bean soups in the crock pot since I try to cook my own beans as much as possible. Not only is it a lot cheaper to soak and cook dried beans yourself (and you get to control the amount of salt), it also helps make them a less musical fruit if they are freshly cooked. Freshly soaking the beans loosens the skins, and releases the gas causing agent (oligosaccherides). When you dump that gassy water from the overnight soak and cook them with fresh, clean water, you end up with less gas. (Here’s a great post about how to cook and soak your own beans.) That aside, because I used canned beans for this recipe, I can see being able to throw this together for a last-minute dinner on a weeknight. Cheap, fast, and easy…just how I like my meals.


 Southwest Black Bean Soup

Cheap, fast, and easy. That’s how I like my meals. Soups are a great way to get more out of your food budget. Bean soups are even more thrifty. This recipe uses canned beans, but you can easily swap the cans for a pound of presoaked beans, throw everything in the slow cooker, and set it for 8 hours on low. Either way, this is a perfect meal for a winter’s night.

INGREDIENTS
  • 2 Tbsp oil (I used expeller-pressed coconut oil)
  • 2 onions, diced
  • 6 cloves of garlic, minced
  • 1 generous Tablespoon chili powder
  • 1 generous Tablespoon cumin
  • Four 15 oz cans black beans
  • 32 oz broth (I used vegetable broth)
  • 2 large roasted red peppers, chopped
  • 2 Tablespoons tomato paste
  • 2 bay leaves
  • Fresh ground black pepper, to taste
  • Juice of one lime
  • Fresh cilantro, chopped
DIRECTIONS
  1. Heat oil in large stock pot over medium heat. Add onions and cook for 5-7 minutes, until softened, but not browned. Add garlic and cook until fragrant, about a minute.
  2. Add cumin, chili powder, and beans, stirring to coat everything in spices.
  3. Add broth, peppers, tomato paste, bay leaves, and pepper, and bring to a boil.
  4. Reduce heat, cover, and simmer for 25 minutes. Add fresh lime juice and stir.
  5. Spoon into bowls and garnish with fresh cilantro.

Southwest Black Bean Soup | The Half-Crunchy Mama

(Optional: Add spoon of sour cream like The Russian did)


2 Comments

Lemon Chia Balls

Lemon Chia Balls | The Half-Crunchy MamaI have already shared one of the recipes that I regularly make from from this book, the Cinnamon and Spice Sweet Potato Chips, but this one is even more popular. I rambled on a bit in that post about the health benefits for chia seeds and why they have become such a thing these days. I don’t like to repeat myself, so please go check that post out for some great information about this great little superfood.

As with all the recipes that I use from other people, there are a few tweaks here and there. The author calls for raw nuts, but that’s just not usually in my budget. I will tell you that regular ones from Trader Joe’s, Costco, or wherever will work fine. Ideally, you want the raw, so if that’s in your budget, go for it!

A great deal that I have been able to get at Costco is on pitted dates. A ginormous three-pound container ended up being about half the cost after doing the math, depending on where you shop. If you see this at your local Costco, pick it up! They were gone last time I went, but I was able to get a huge bag of Kirkland pitted dates for a steal, too. If you are cooking and baking with dates a lot, this is the way to go. Not all dates are equal, and I have only bought and used these or Medjool, so I would steer away from regular “pitted dates” from the store.Lemon Chia Balls | The Half-Crunchy Mama

Why dates? Dates add the sweetness to baked (or no-bake goods in this case) without added sugar. The simple sugars from fruits are less likely to exacerbate your inflammation, acne, etc, and as dates are also high in fiber, they are digested slower than typical sugars to make it easier on your blood sugar. Medjool and other quality dates are also a good source of copper, potassium, magnesium, and manganese that many people are not getting in their diet anymore. Add the benefits of the dates with the protein and healthy fats from the nuts and chia seeds, and this is a satisfying snack for when you want something sweet.

This recipe is so quick, the only annoying part is making the balls. They are so sticky {get your mind out of the gutter} that it makes it a real pain, but they are SO worth it in the end. I promise. Just put everything into a heavy-duty food processor (I specify that because I’m fairly certain that this is what broke my smaller one 😦 ) and once it looks like this, it’s time to make the balls.

Lemon Chia Balls | The Half-Crunchy Mama

Take a heaping tablespoon of the mixture to make each ball. It’s more like smooshing together instead of rolling into balls, and I usually have to rinse my hands a few times during this stage to unstick my hands. As you make each one, roll them in finely shredded coconut to coat them entirely. Don’t use regular shredded coconut as it doesn’t stick well to the balls. I know this from experience. They were still delicious, but they are so much better with a finer shred of dried coconut.
Lemon Chia Balls | The Half-Crunchy Mama

And just look how pretty they are! Everyone loves them, even Sugar Bee, and no one can have just one! They are also trainer approved as I brought two to the gym one day. Try this and see for yourself!

Lemon Chia Balls | The Half-Crunchy Mama


Lemon Chia Balls

Combining the benefits of fiber- and mineral-rich dates with protein and healthy fats from the nuts and chia seeds, you will get a satisfying snack that is perfect for when you want something sweet. This one is loved by everyone and yields about 20 balls.

INGREDIENTS

  • 1.5 cups pitted dates
  • 1 cup almonds (raw, if possible)
  • 1/2 cup cashews (raw, if possible)
  • 2 Tbsp chia seeds
  • 1-3 Tbsp fresh squeezed lemon juice (I have found more is better, especially if the nuts are not raw)
  • 1-2 tsp lemon zest
  • 3+ Tbsp of finely shredded dried coconut

DIRECTIONS

  1. Combine all ingredients except for coconut in a food processor. Pulse into a coarse and slightly sticky mixture. If too dry, add a bit more lemon juice and process again. If too watery, add a few more nuts and process. (It should stick together when you press it between your fingers.)
  2. Roll about a tablespoon at a time into a ball.
  3. Coat it in coconut.
  4. Store in an airtight container. Enjoy!


1 Comment

A Half-Crunchy Thanksgiving

If everything had gone according to my plan, this would have been finished up on Tuesday or Wednesday. Life. It gets in the way sometimes. So what am I cooking this year?

For the past several years, we have been celebrating Thanksgiving with Sugar Bee’s Godparents and their boys. They are an extension of our family and we love them very much. What’s even better is that we all eat in a similar way. There’s not a lot of questions about what we can make or what the other family can eat, so it becomes pretty easy to celebrate with them. No awkwardness about our diets, as in the way we nourish our bodies, not a “diet” as most people think. It’s the way we live.

So every year we split up the responsibilities so that neither family is responsible for the entire meal. This year, I am in charge of two desserts, three sides, and biscuits that we can all eat without getting all sorts of digestive issues. I’m throwing this quick post together of what I’m making (some I have already made ahead yesterday…WIN!), so you can pin them for next year. Actually, some of these will get made again for the Christmas season, too 🙂 You can find them all on my Pinterest Holiday board.

Tuesday night, I made the cranberry sauce. It was done in the slow cooker and is Paleo-friendly. YUM! With fresh cranberries, pears, ginger, and orange with honey and coconut sugar to sweeten, this recipe was so easy and is the perfect one for me to bring to dinner. 2014-11-25 19.29.37

2014-11-26 08.51.01

Paleo slow cooker cranberry sauce

The next thing I made is my usual for both Thanksgiving and Christmas Eve dinner, Spiced Sweet Potato Casserole. I LOVE this recipe, not only because it’s super easy and only requires me to dirty my KitchenAid stand mixer (fast cleanup!), but you can assemble this the night before and just finish it off in the oven the next day before dinner.2014-11-26 23.15.31 The next thing that I was able to cross off the list was a request. I made these for the first time last year. They are Pecan Pie Bars from Paleomg and they are amazing! I think that they are going to be even better this year because I made them yesterday, so they have had lots of time to firm up.

2014-11-26 18.41.25

They spent several hours in the freezer yesterday afternoon and they have been in the fridge since last night. Can’t. Wait.

2014-11-26 23.16.20

After getting home from Thanksgiving Eve beverages last night with my friend, I assembled my first ever breakfast casserole. Why in the world have I never made one of these things before?!?! Of course, it’s a gluten-free recipe so Sugar Bee can eat it, and let me tell you…with all the cheesy, bacony goodness, you would never know OR care! Oh my LORD it was good!

2014-11-26 23.13.00I assembled it, covered it, and put it in my garage fridge overnight. When I got up this morning, all I had to do was take it out and leave it on the counter while I preheated the oven. Once the oven reached 325 degrees, this amazing mess was ready for us to eat in less than an hour. Make this. I used the light GF white bread from Whole Foods because I figured that the consistency of their gluten-free bread would be perfect and I was 100% right. This one is a keeper!

2014-11-27 09.17.59Now for the things that I have left to make. (I will try and remember to update this post tonight or tomorrow with pictures of my finished products.)

This will be my second dessert, Crustless Pumpkin Pie by Gluten Free Easily. I’m really looking forward to this one!

My other side is going to be Honey-Roasted Root Vegetables. I’ve been making this other dish for holiday dinners for the past several years, Roasted Root Vegetables with Maple Glaze. I decided to try one of the others that I saved and have never tried. Here’s the recipe for the honeyed version.

The last thing that I will be making are GF biscuits. I have made these before with a great mix that I buy at Aldi. It calls for shortening (yuck), so I will be swapping that out with some expeller-pressed coconut oil. Expeller-pressed doesn’t have the coconut flavor that could ruin the biscuit taste. This is the one that I use.2014-11-27 11.55.25Happy Thanksgiving to you all! I will be getting back to more regular posts now that life and travel have both calmed down. Whew! October and November kept me BUSY!! Have a blessed day!!

***UPDATED***December 2, 2014

A few more pictures….

The Honey Root Veggies were so good that my husband only got leftovers the first night. I ate all the rest.

2014-11-27 15.32.40

This is the crustless pumpkin pie. Oh. My. God. As my friend said, it was so good that you really don’t even miss the crust. It was just incredible. And easy! Mine looks much darker than in the photo from the posted recipe, but I think this is because I didn’t use fresh pumpkin and I don’t really measure spices.

2014-11-27 15.33.06

No picture of the biscuits (although they looked the same as when I made them a few months ago and posted on Instagram), but I advise to either add flavor to them if using the expeller-pressed coconut oil over the shortening, or use Kerrygold butter in place of the shortening like I did the first time. They still had a great texture, but no flavor. At all. We have been putting Nutella on all the leftover ones, so they are still getting eaten.

Hope your Thanksgiving was as wonderful as mine!


Leave a comment

A Twist on Gram’s Tuna Salad

A twist on Gram's Tuna Salad | The Half-Crunchy Mama

Me and Gram in her kitchen – circa 2003

Gram was a Depression-era kid. She knew how to make the best and most delicious things out of anything and wasted nothing. Her soups, egg sammies, applesauce, chicken paprikash (BEST. EVER.), and her tuna salad are the first ones to come to mind. As I mentioned in the post for my Smoked Salmon and Goat Cheese Frittata, I often feel like she’s with me in the kitchen. As the anniversary of her passing is coming up (has it really been 5 years?!), I thought this would be a good time to share my Gram-inspired tuna salad recipe. She always made the best tuna salad and I was privy to a few of her “secret” ingredients. Through the years I have made some of my own twists to the recipe, but I always think of her when I’m making a batch. The Russian loves when I make it, often asking for it, so I usually make 2-3 cans at a time. It still doesn’t last and I’m lucky to see half of it. But that is what makes me happy…content bellies full of my food.

A word about the tuna I use. I no longer splurge on the white albacore filet kind. What I have learned is that you should look for the cheap stuff that is made from baby tuna. They have had less exposure to the environment, so the theory is that they will have less toxic things in them, like mercury(1),(2). So I get the huge pack of cans from Costco of regular old Chicken of the Sea chunk light in water. Or whatever is on sale at the supermarket. It’s best to pick up tuna in water in order to retain most of the naturally occurring omega-3s in the fish. When it’s packed in oil, the omegas can leach out into the oil (oil to oil) and you end up pouring this down the drain, but when packed in water, the omega oils stay with the fish – oil and water don’t mix.

On to the recipe. I vary this off and on based on my mood, but this is a good base recipe. Leave out anything you don’t like and add in things that you think would make it better. I love to play around with canned tuna and salmon, switching things up now and then to play around. Here are the basics: tuna, celery, onion, mayo, Dijon, horseradish, parsley, garlic powder, salt and pepper. Gram used to add pickle juice (one of the “secrets”) and I do the same if I have some in the fridge. The veggies are the key. Gram always used fresh vegetables in everything and what a difference they make to the flavor. In a pinch, I have added celery flakes and dried onion pieces from the spice cabinet along with some pickle relish, but fresh is always best.

A twist on Gram's Tuna Salad | The Half-Crunchy Mama

Celery is one of those things that I only buy organic. Because of this, it doesn’t always last as long and it sometimes looks a little uglier than the rest at the store. If there are some ugly spots, I just shave the celery with a peeler and then it’s perfect and ready to use.

A twist on Gram's Tuna Salad | The Half-Crunchy Mama

 Take the cans, drain them, and put them in a large bowl to flake with a fork.

A twist on Gram's Tuna Salad | The Half-Crunchy Mama

I LOVE my mini chopper that I have shared with you in the past. This cuts down chopping time and makes the celery and onions come out so finely diced that they blend perfectly with the tuna. Chop up 2-3 stalks of chopped celery (don’t forget the leaves as they add lots of extra flavor!) and a good half of a onion. Add them to the tuna and combine. I like to combine a few things at a time because I feel that it mixes better.

A twist on Gram's Tuna Salad | The Half-Crunchy Mama

Then add a few tablespoons of chopped parsley. Stir again.

A twist on Gram's Tuna Salad | The Half-Crunchy Mama

For three cans, I add about 2-3 teaspoons of horseradish, 2-3 teaspoons of Dijon mustard, and several tablespoons of mayo…maybe 4? I’m sorry, but in case you haven’t learned by now, I am not much of a slave to measurements while I’m cooking. This is why I don’t care much for baking. It’s too rigid and I can’t be free to play. And this picture was the first round of condiment additions…I pretty much doubled what you see here after tasting. Then came the garlic powder, salt and pepper, also done to taste. I would guess a good 1+ teaspoon of each. Taste and find what works for you.

A twist on Gram's Tuna Salad | The Half-Crunchy Mama

So many ways to eat tuna salad. You can put it on a salad of greens, in a wrap, on bread with tomato and cheese and then broiled…mmm…I love tuna melts. Or try one of the following options. I ended up putting a slice of cheese on this oversized tuna cracker because cheese is my downfall.

A twist on Gram's Tuna Salad | The Half-Crunchy Mama

Served on one of Gram’s plates. I inherited the set 🙂

The next day, I hollowed out this amazing tomato form the market, filled it with the tuna salad, put a slice of cheddar on top, and baked it in my toaster oven, finishing it off with a quick broil at the end to brown the cheese a little. Yum!

A twist on Gram's Tuna Salad | The Half-Crunchy Mama

Another serving option


 A Twist on Gram’s Tuna Salad

Following in the footsteps of my Gram, I whip up some pretty darn good tuna salads. Here is one of my many versions that I wanted to share. So many variations and different ways to eat tuna. This recipe is for three cans, but you can easily cut the quantities if you are only making one or two cans. I hope you like it!

INGREDIENTS

  • Three cans of chunk light tuna in water, drained and flaked
  • 2-3 stalks of finely chopped celery, including leaves
  • Generous half of a sweet onion, finely chopped
  • 2 Tbsp chopped fresh parsley
  • 2-3 tsp of horseradish
  • 2-3 tsp of Dijon mustard
  • 4-5 Tbsp of mayonnaise
  • 1+ teaspoon garlic powder
  • Salt and fresh ground pepper to taste

DIRECTIONS

  1. In a large bowl, combine flaked tuna with celery and onion. Then add chopped parsley and stir to combine.
  2. Add the horseradish, Dijon, and mayo, stirring well until evenly distributed.
  3. Add garlic, salt, and pepper, tasting to find what works for you.
  4. Make a melt, a green salad, a wrap, or whatever comes to mind. Enjoy!