Rain. We have seen enough rain this fall in Georgia to last us all winter. Once the rainy days turned cold, it got worse. I knew yesterday was supposed to be the last day of this dreary weather until next week, but there was such a chill in the air that I knew that soup was what was needed for dinner. So here’s a down-and-dirty, super-short, no-frills post with the recipe.
This was originally inspired by a recipe in the magazine that I receive from Kaiser Permamente as an insured member (they actually have some good recipes in there!), but of course I have made several changes to it, improvements, if you will. It’s hearty and full of vitamin A thanks to the sweet potato, while the black beans fill you up with fiber and deliver almost all of the magnesium and iron that you need for the day. Between the two, you get 100% of your daily intake of potassium in a serving of each (one cup of each).
The best part? Fast, cheap, and easy (my favorite things) and only one pot to clean. Sure, there’s a cutting board and a knife, but that’s really it. This honestly does only take about 30 minutes, start to finish. Yippee!
Sweet Potato Black Bean Chili
Super fast, cheap, and easy meal for any day of the week, especially a cold one. Almost no mess and very little prep time, this one is sure to be a keeper! Even Sugar Bee likes it 🙂
INGREDIENTS
2 Tbsp extra-virgin olive oil, butter, ghee, or other oil of your choice
2 cups of peeled and diced sweet potatoes; 1 large or 3 small
1 large onion, diced
6 cloves of garlic, minced
2 Tbsp smoked paprika
2 Tbsp ground cumin
1 Tbsp tumeric
1 Tbsp chili powder
2.5 cups vegetable broth (or chicken stock if not vegetarian and you want a richer taste)
2 15-ounce cans of organic black beans, rinsed
2 14.5-ounce cans of fire-roasted diced tomatoes (I use one can of regular dice and one can of petite dice)
Juice from 2 limes
1 cup chopped fresh cilantro
Shredded cheese for topping (optional)
DIRECTIONS
Heat oil in a Dutch oven over medium-high heat. Add sweet potato and onion and cook, stirring often, until the onion softens, about 4 minutes.
Add spices (garlic, paprika, cumin, tumeric, chili powder) and cook, stirring constantly, for about 30 seconds.
Add the broth and bring to a simmer. Cover and reduce heat to maintain a gentle simmer. Cook until the sweet potato is tender, about 10-12 minutes.
Add the beans, tomatoes, and lime juice. Increase heat to high and return to a simmer, stirring often.
Reduce heat and simmer until slightly reduced, about 5 minutes.
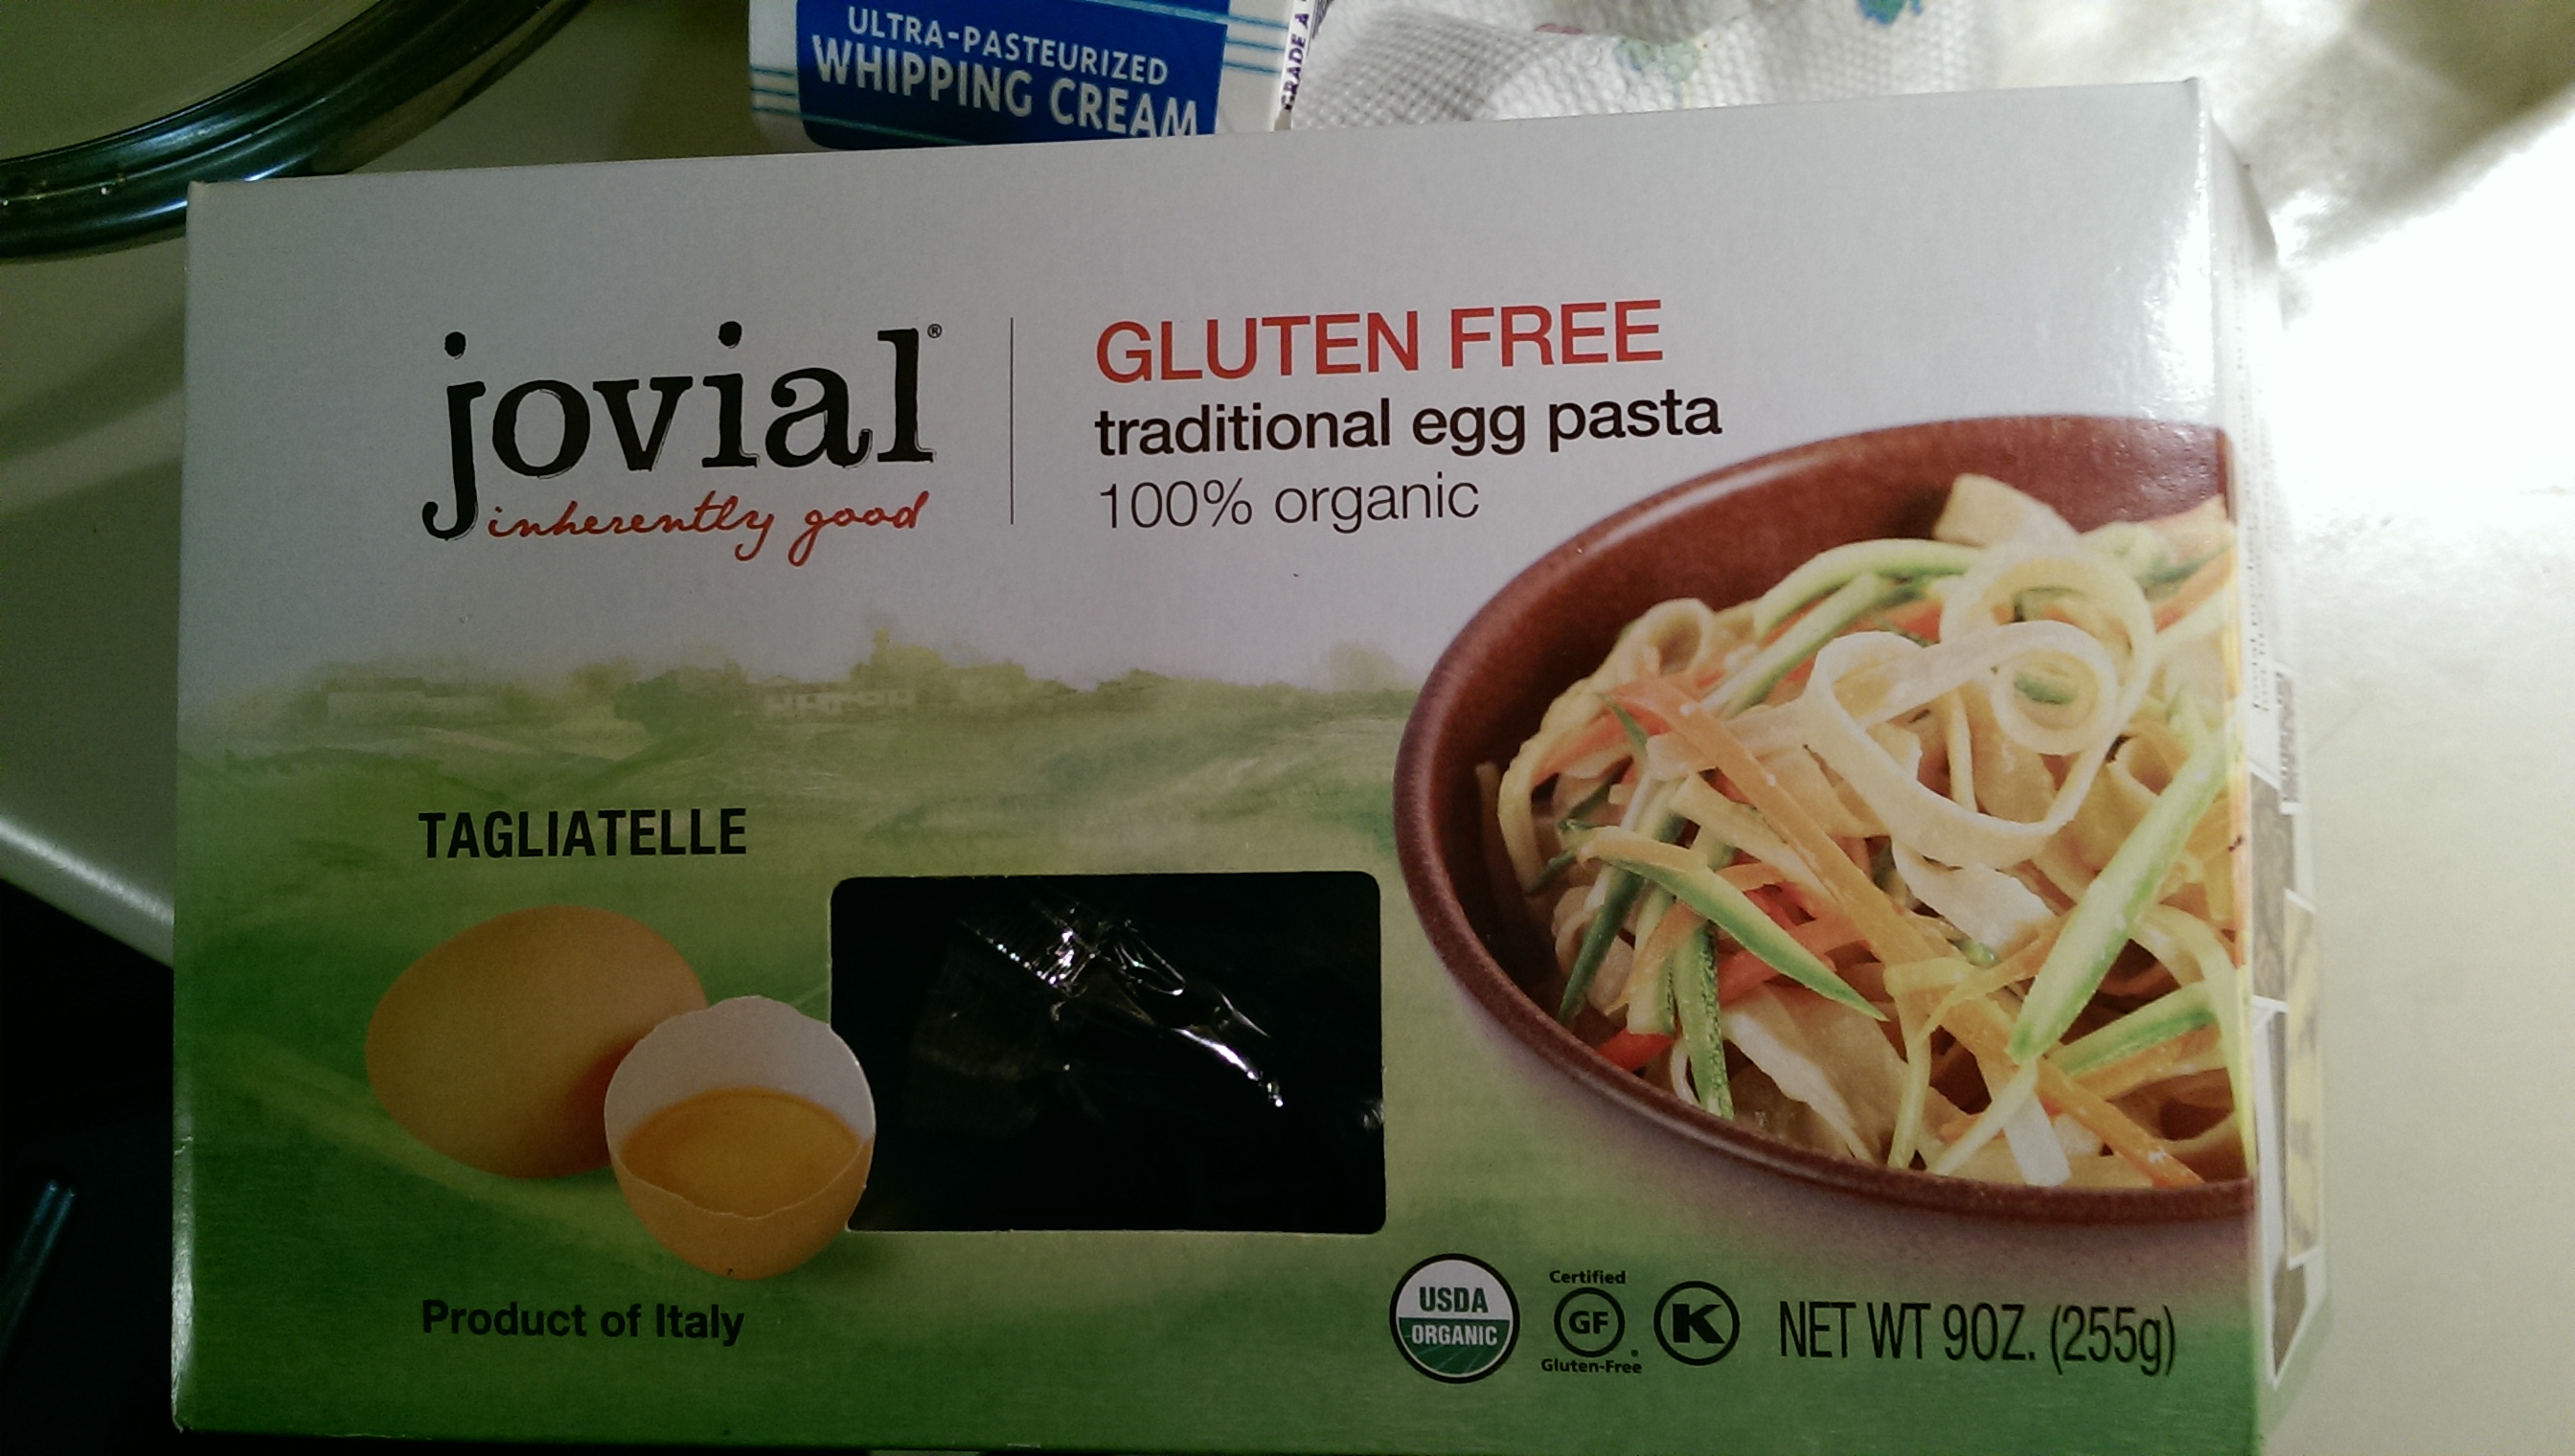
How I came up with this recipe is twofold. It was partially due to what I was craving and knew I had in the house, and the rest was inspired by a recipe used for the photo on this box of pasta. I had found myself scoping out the egg pastas as I was craving some egg noodles, hoping to find some gluten-free ones so that Sugar Bee would be able to eat whatever I ended up making. All of the ones at the particular store I was at contained wheat. This was my very first time trying this brand (whether egg or plain pasta) and the success from this meal was the reason I ended up using this brand for my Eggplant Ragout one night. My thoughts that I shared in that post about choosing the spaghetti are identical to when I first picked this box up. In fact, I’m pretty sure that this was my first experience with Jovial pasta, but egg pasta IS different from regular (as regular as GF can be), so I think those thoughts are still valid here. I took one look at the box and between the “100% organic” and “Product of Italy” on the label, I was sold. Italians know what they are doing with pasta, glutened or not.
Upon further inspection of the recipe on the box, I realized I had most of the ingredients at home and I could make a dish like this with minimal investment during this trip to the store. I was getting close to payday, so of course I was short on funds and looking to maximize my spending. This was so cheap, fast, and easy…just how I like my weeknight meals to be.
I took a large zucchini and julienned it, giving me about 3 cups of shredded zucchini. Then I sliced a sweet onion into pieces that mimicked the shreds. That was the extent of my prep work.
I melted 3 tablespoons of Kerrygold butter in a pan over medium heat. I threw in the onion and about 2 teaspoons of minced garlic from a jar, and sauteed for about 2 minutes. I threw in the zucchini shreds and about a cup and a half of matchstick organic carrots from a bag (no prep!), tossing everything in the butter to coat. After adding some sea salt and fresh ground pepper, I let this all cook for about three minutes until the veggies started to soften a little, but kept their bright colors. I removed the veggie mixture from the pan with a slotted spoon, leaving behind any leftover butter drippings.
I cooked the pasta according to the directions on the box and then returned the saute pan to the stove over low heat. I added 3/4 cup of regular whipping cream and a cup and a half of grated Parmesan-Pecorino cheese, stirring until the cheese had melted. I then returned the veggies to the pan, tossing to coat them well in the creamy cheese sauce.
After cooking and draining the pasta, I returned the noodles to the pot and poured the creamy veggie sauce over them, combining well to plate a perfect summer pasta dish.
The absolute best part? This dish reheated PERFECTLY, unlike a typical Alfredo or cream sauce that you would make for a pasta dish. Bonus!
Creamy Veggie Tagliatelle
A jazzed-up version of a recipe on a box of pasta, with extra cheese, added garlic, and lighter cream. I would think you could serve this over spaghetti squash, too, in case you are living completely grain free.
INGREDIENTS
3 Tbsp butter or ghee
1 onion, quartered and thinly sliced
2 tsp minced garlic (I used jarred)
1 large zucchini, julienned (about 3 cups)
1.5 cups matchstick carrots (bagged is perfect)
3/4 cup whipping cream (heavy cream not necessary)
1.5 cups grated Parmesan-Pecorino cheese
Sea salt and fresh ground pepper
DIRECTIONS
Melt the butter in a saute pan over medium heat. Add the onions and garlic, cooking for 2 minutes.
Add the zucchini, carrots, salt, and pepper, and toss well to combine and coat in butter. Cook for 3 minutes. Remove from pan with a slotted spoon and set aside.
Cook the GF tagliatelle according to package directions. When finished, drain and return to pot.
While the pasta is cooking, return the saute pan to stove over low heat. Add the cream and grated cheese. Heat until the cheese is melted. Return the veggie mixture to the pan and toss to coat in the sauce, heating until warmed through.
Pour creamy veggie sauce over the cooked pasta and stir to combine well. Serve and enjoy! (Even leftover!)
Brussels sprouts. Yes, they are spelled with an ‘s’ on the end, as in the capital of Belgium. I didn’t realize that until I started cooking them as an adult. Usually people love or hate these little baby cabbages. We LOVE them. In fact, I have always liked them, even as a kid. My mom would cook some for dinner every now and then, and my dad and I were the only ones that would really eat any. My sister would hide hers in the bottom of her milk to escape eating the few that she was given. The ones my mom cooked weren’t even fresh and I still ate them. Crazy, if you ask me.
I make them all the time in a variety of ways, but they are almost always roasted one way or another in the oven. Roasting them makes them soften and caramelize a little to give them a slight bit of sweet. Through the years, I have fed many a friend at my house. Feeding people makes me happy. Silence at my dinner table fills me up, knowing that everyone is just enjoying the meal. All too often I have heard, “I can’t believe I am eating Brussels sprouts….and I like them!” People can always trust me, especially when it comes to food. I will never lie about food. I take food very seriously.
This particular night, I didn’t have my usual ingredients handy for my favorite and most popular Roasted Brussels Sprouts with Pecans (with a few modifications), so I got creative. Balsamic vinegar adds such depth to foods, so I figured it should be a good choice for the sprouts.
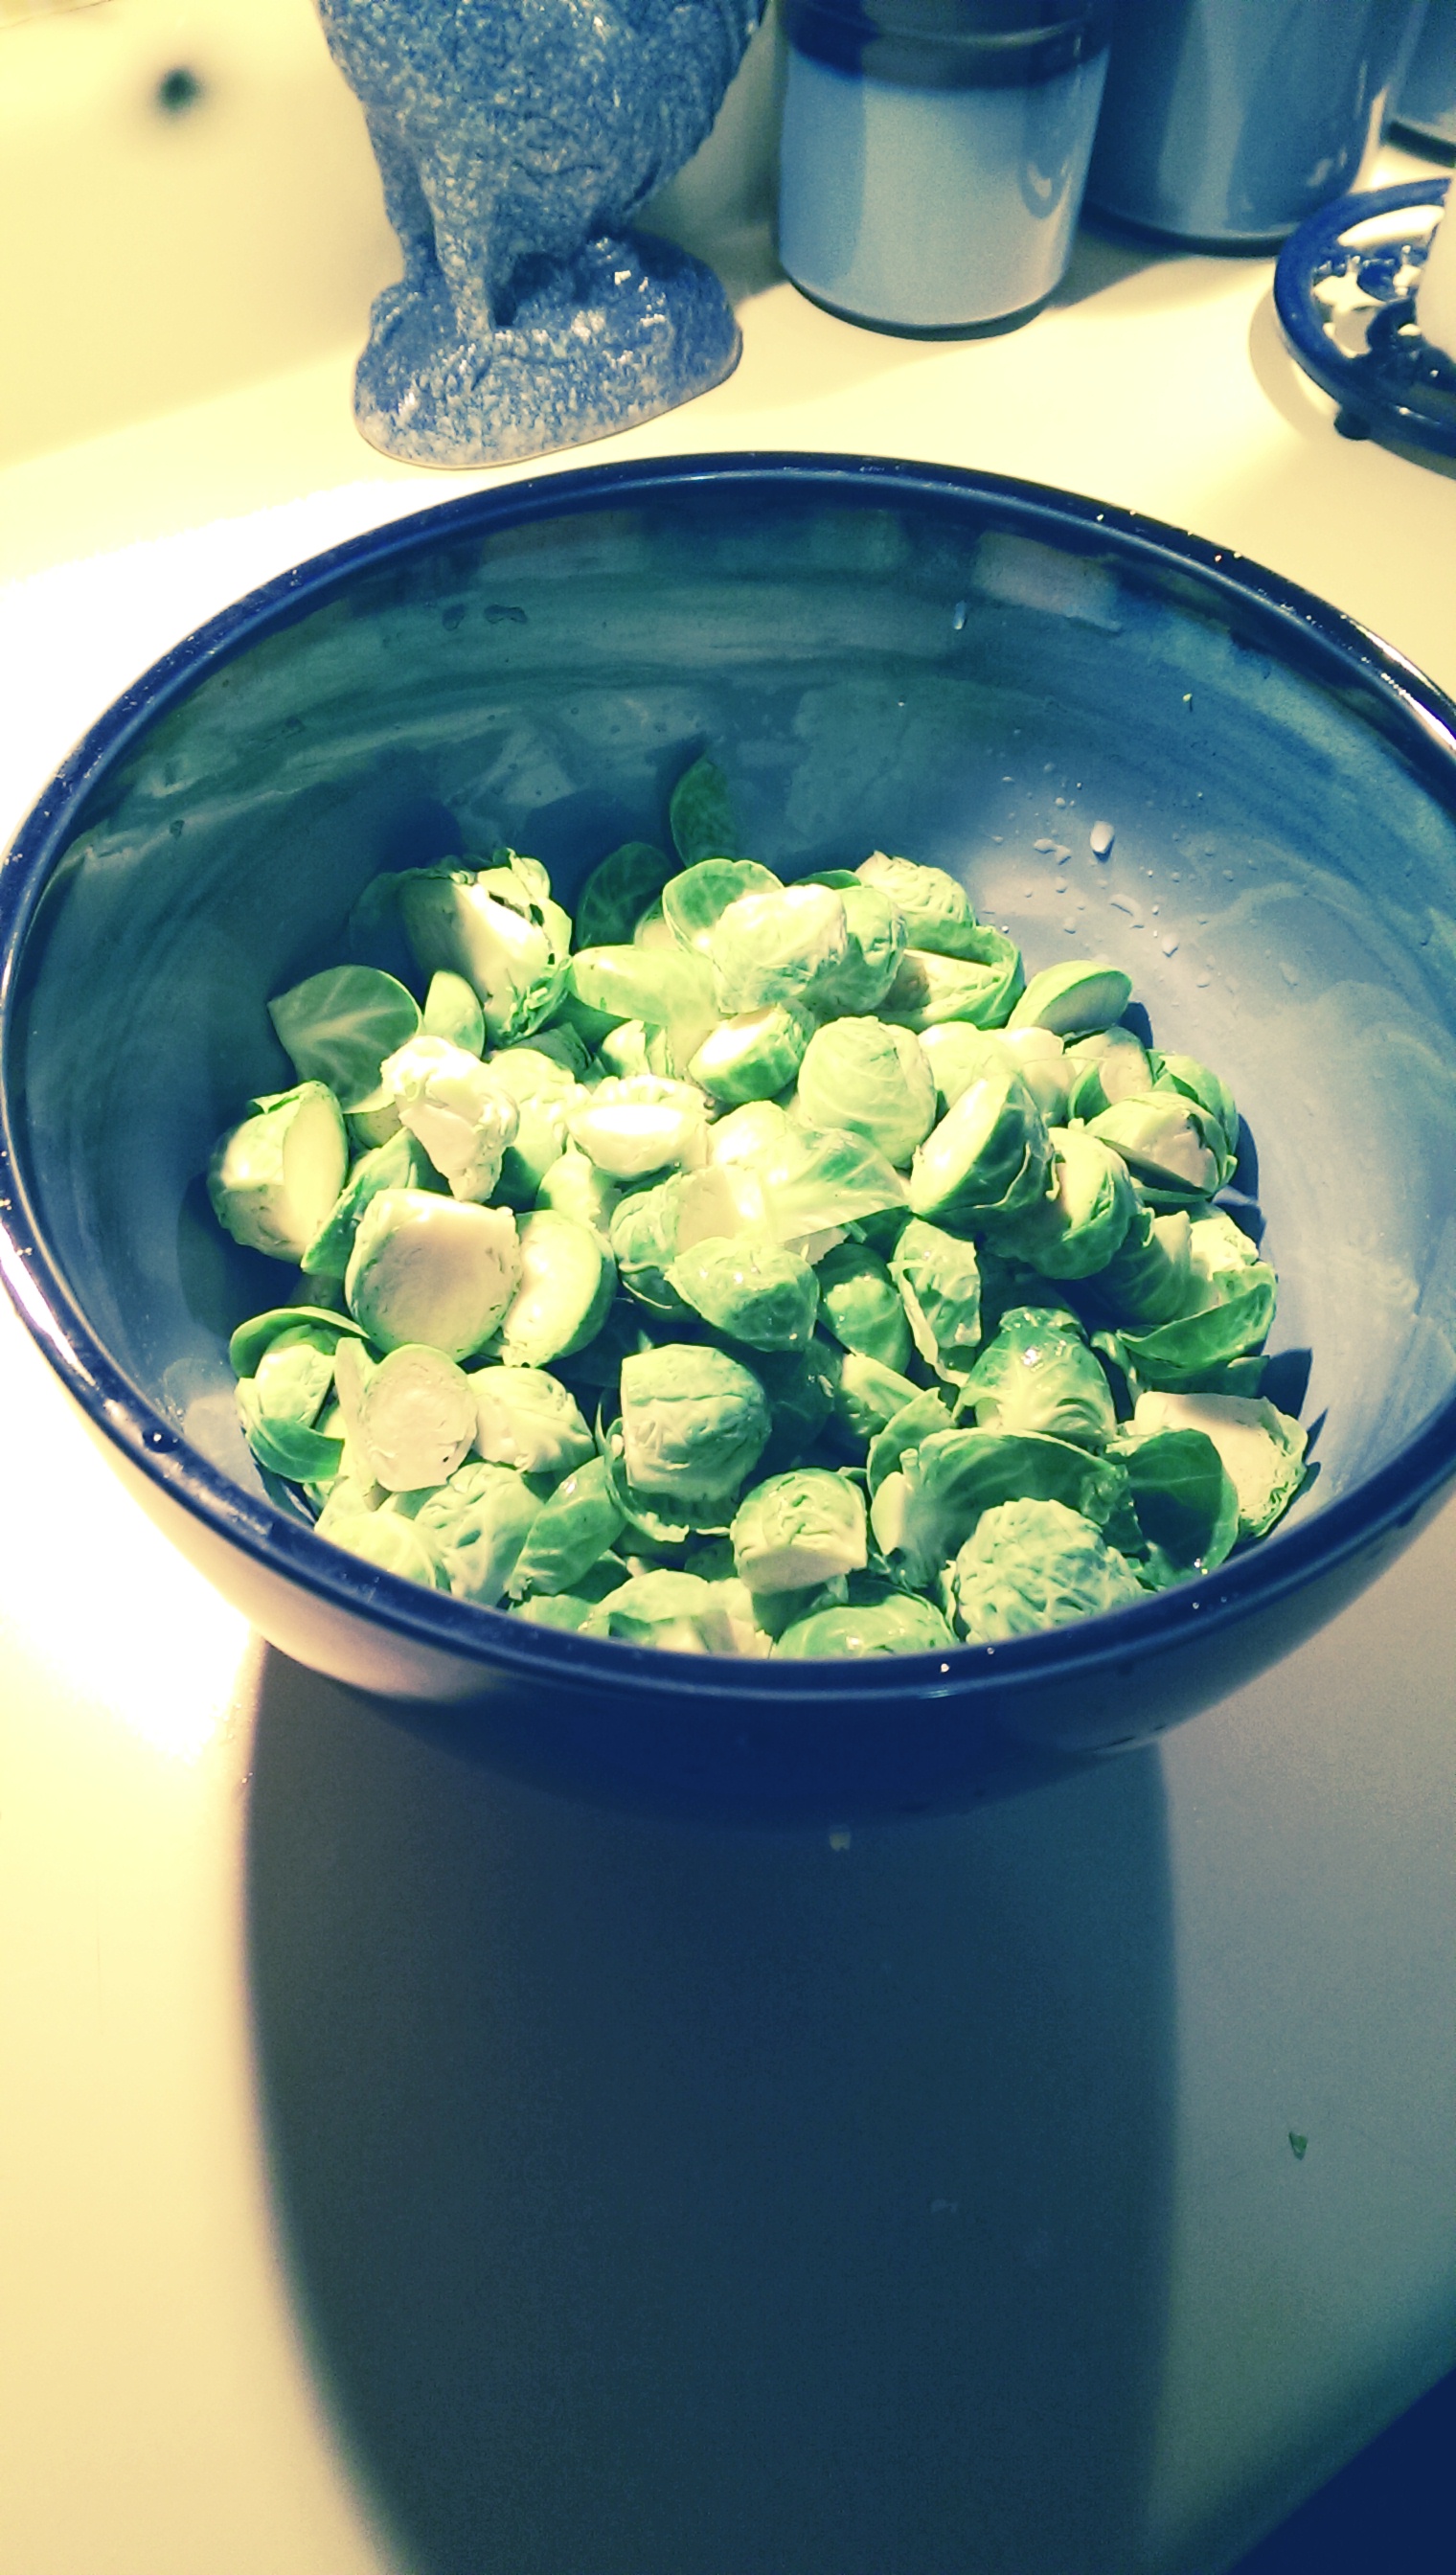
First off is to wash the sprouts. Obvious, I know, but I mention this because I do a little more than just rinse them off. I let them soak for a few minutes in a bowl of water. Those layers of leaves can store a little more dirt than you would think. Then I take a few out at a time to the cutting board, cut the bottoms off, and halve them. The outer layer of leaves often fall off and that’s just fine. I usually want those to fall off because if they don’t, I remove them anyway. If leaves aside from those outer ones fall off, I just scoop those up and place them in the bowl with the halved sprouts. They crisp up something delicious in the oven.
Toss them in the bowl with extra virgin olive oil, salt, and fresh pepper. Spread them out on a jelly roll pan (the technical name for this type of baking sheet) and place them cut side down.
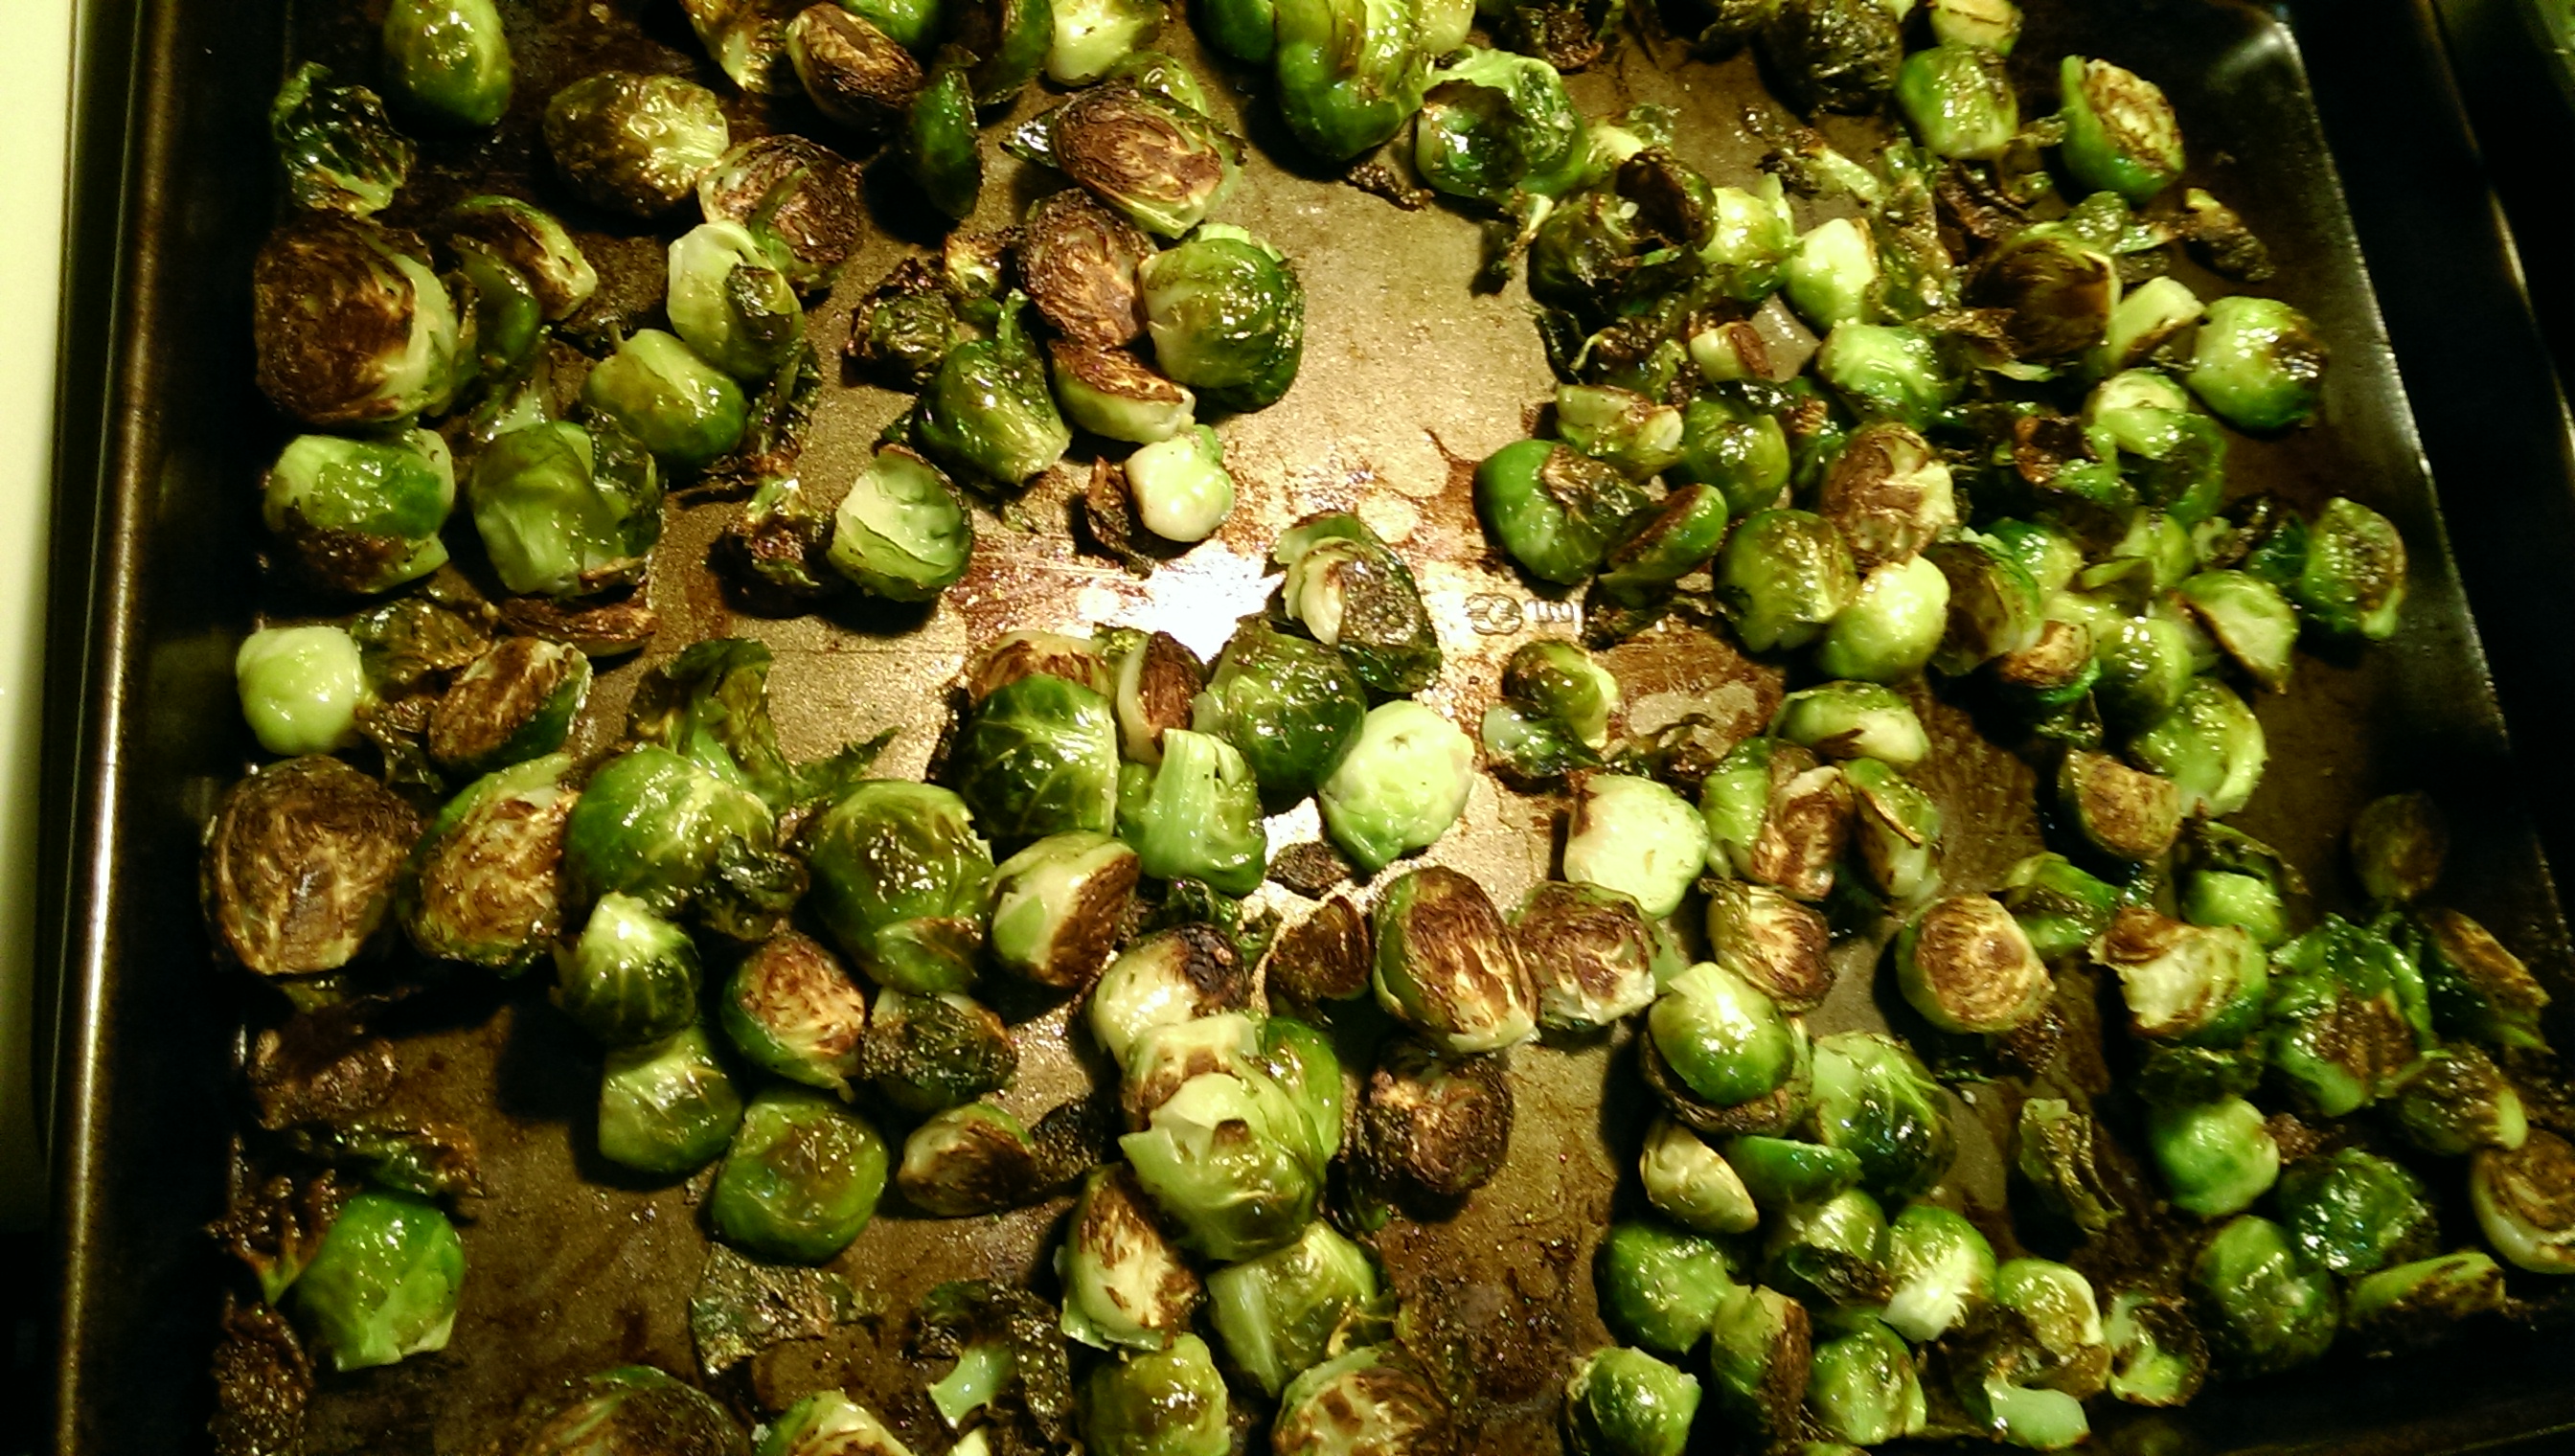
Bake in a preheated oven at 375ºF for 20-25 minutes. They should look like this when they are almost finished:
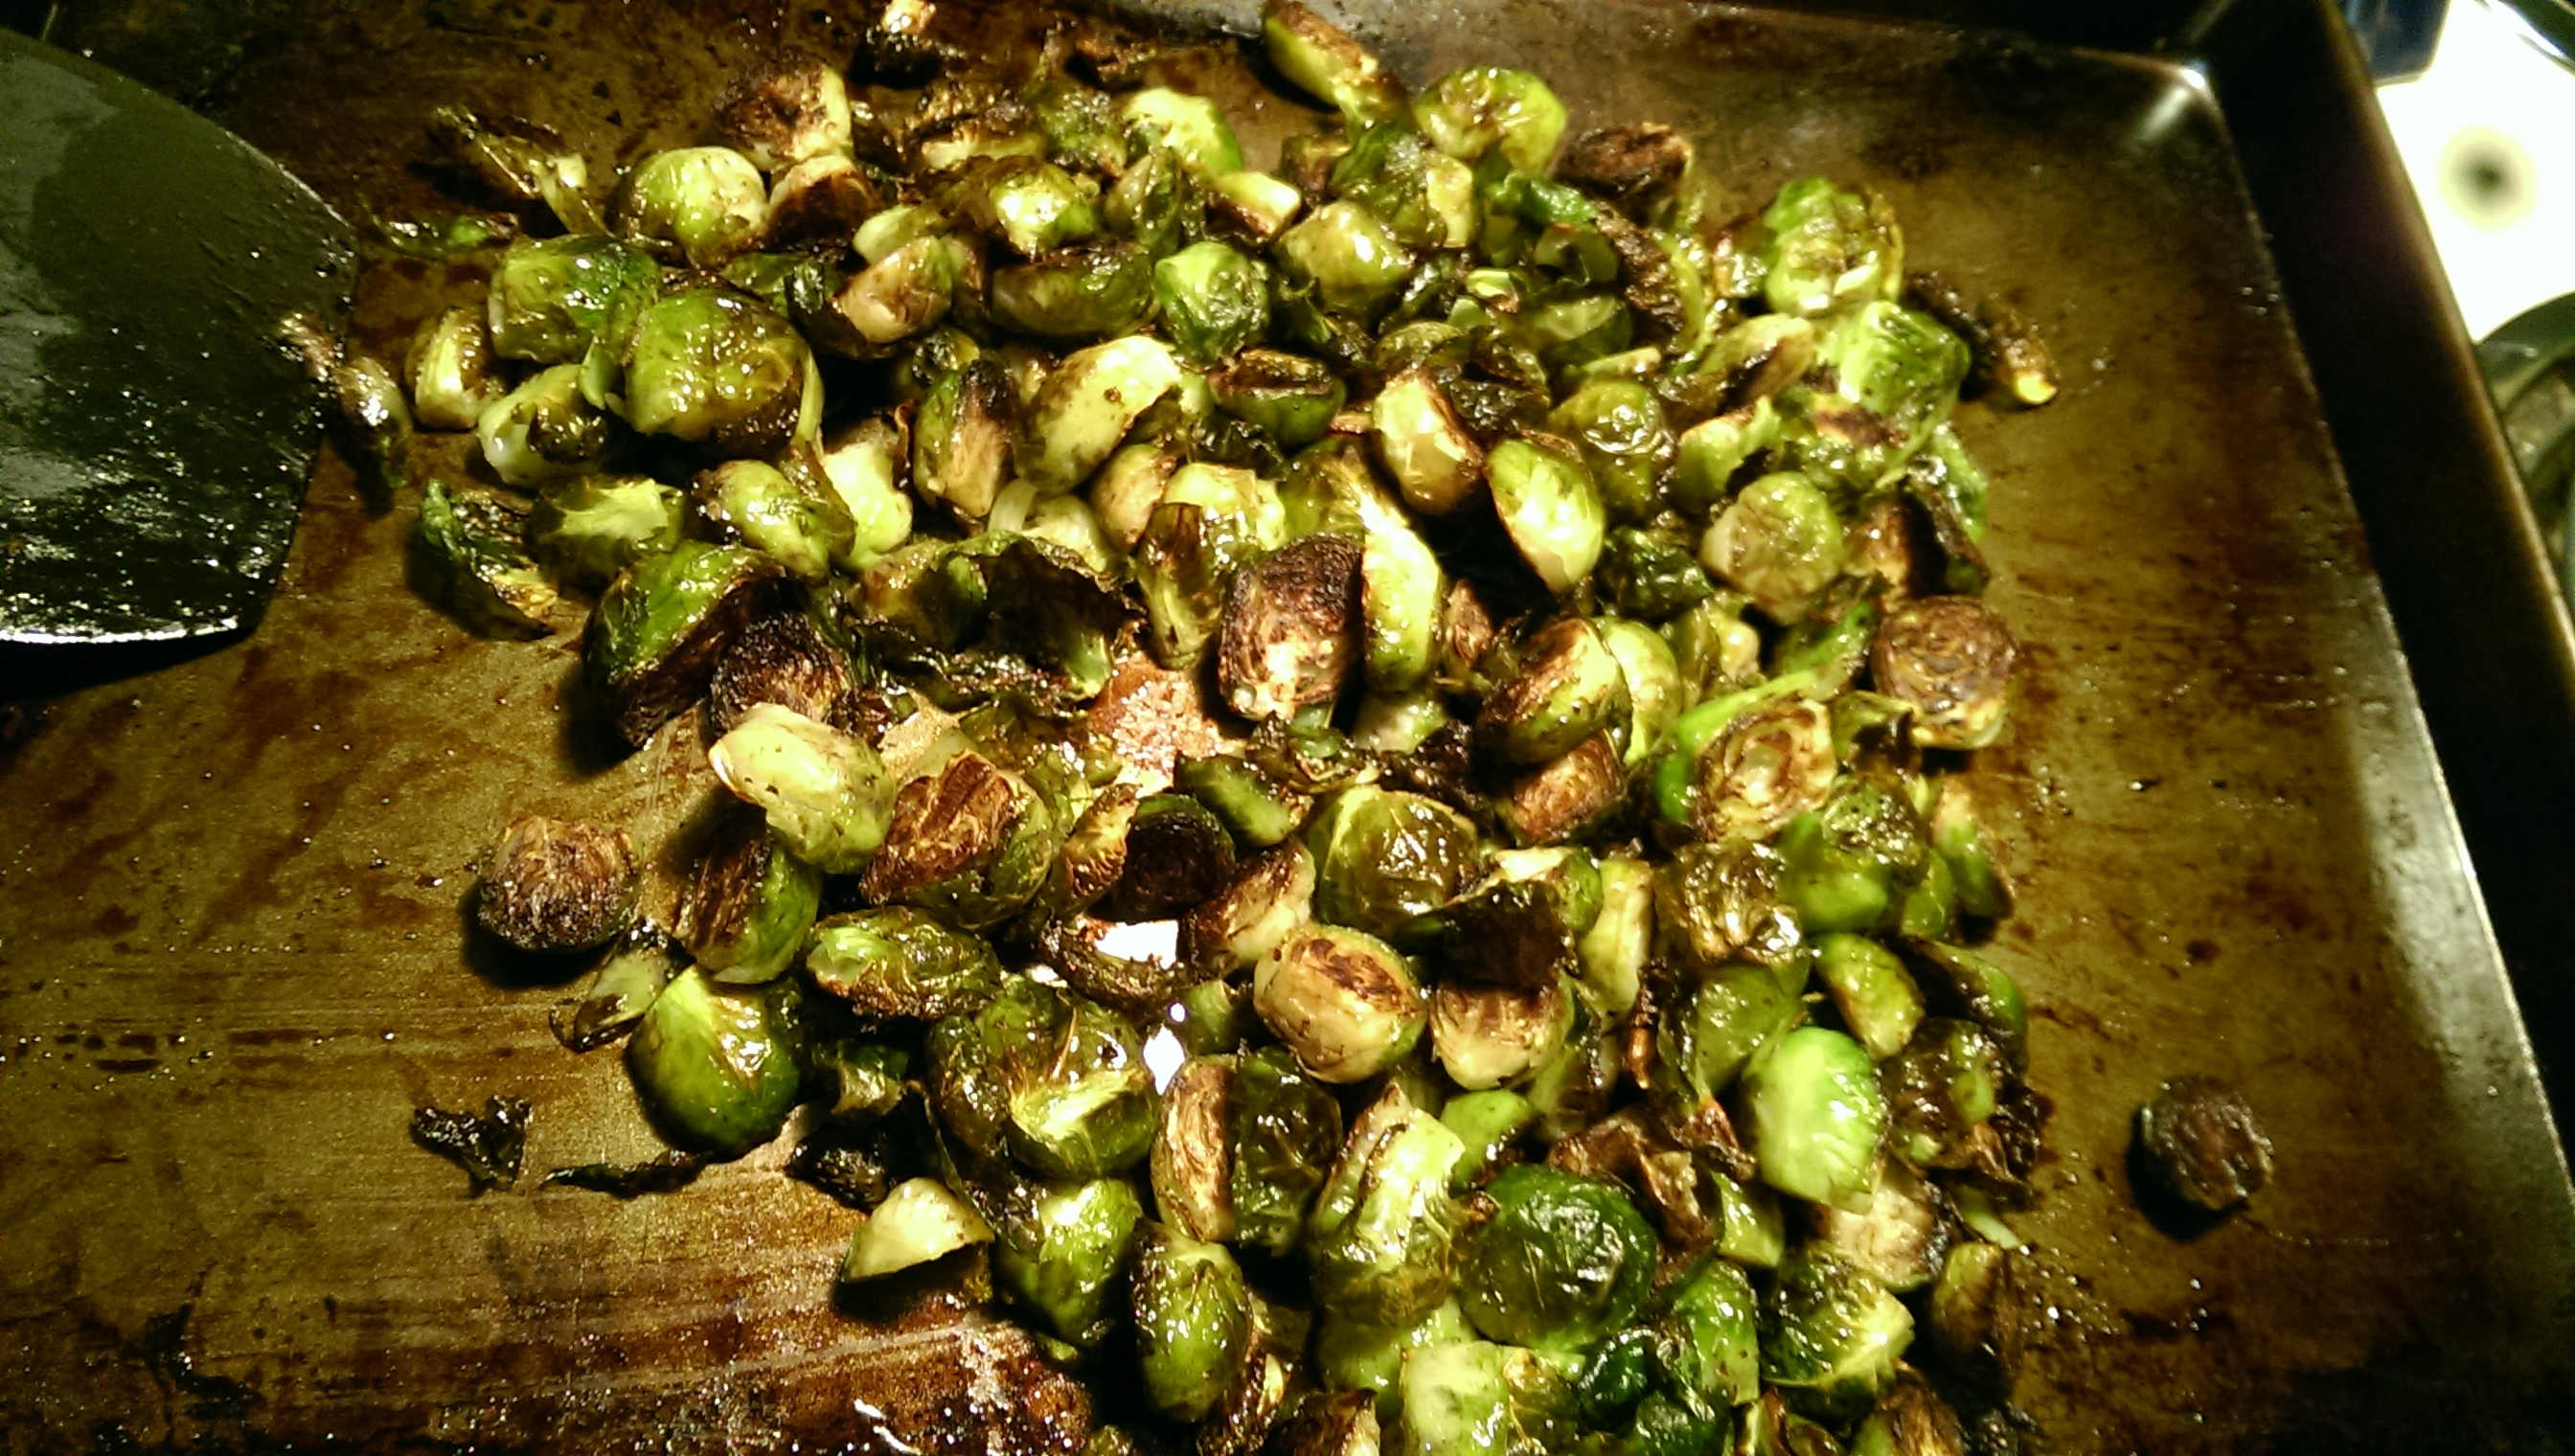
Add a few teaspoons of balsamic vinegar over them and stir with a spatula to spread it around. Watch out, though! The vinegar gets really strong on a hot pan and can burn your nose.
These are even good leftover…I like to eat my leftover sprouts right from the fridge.
Balsamic Roasted Brussels Sprouts
Just one of several ways you can roast these baby cabbages up in the oven. The balsamic vinegar adds a complex sweetness to the sprouts.
INGREDIENTS
2 lbs Brussels Sprouts
2 Tbsp extra virgin olive oil
Sea salt and fresh ground pepper
2 tsp balsamic vinegar
DIRECTIONS
Cut the bottoms off of the sprouts and halve them. Discard outer leaf layers if discolored.
Combine in bowl with EVOO, salt and pepper.
Spread out on a jelly roll pan or baking sheet, cut side down.
Roast in 375ºF oven for 20-25 minutes until somewhat browned.
Drizzle balsamic vinegar over them and stir. Place back in oven for 2-3 minutes. Enjoy!
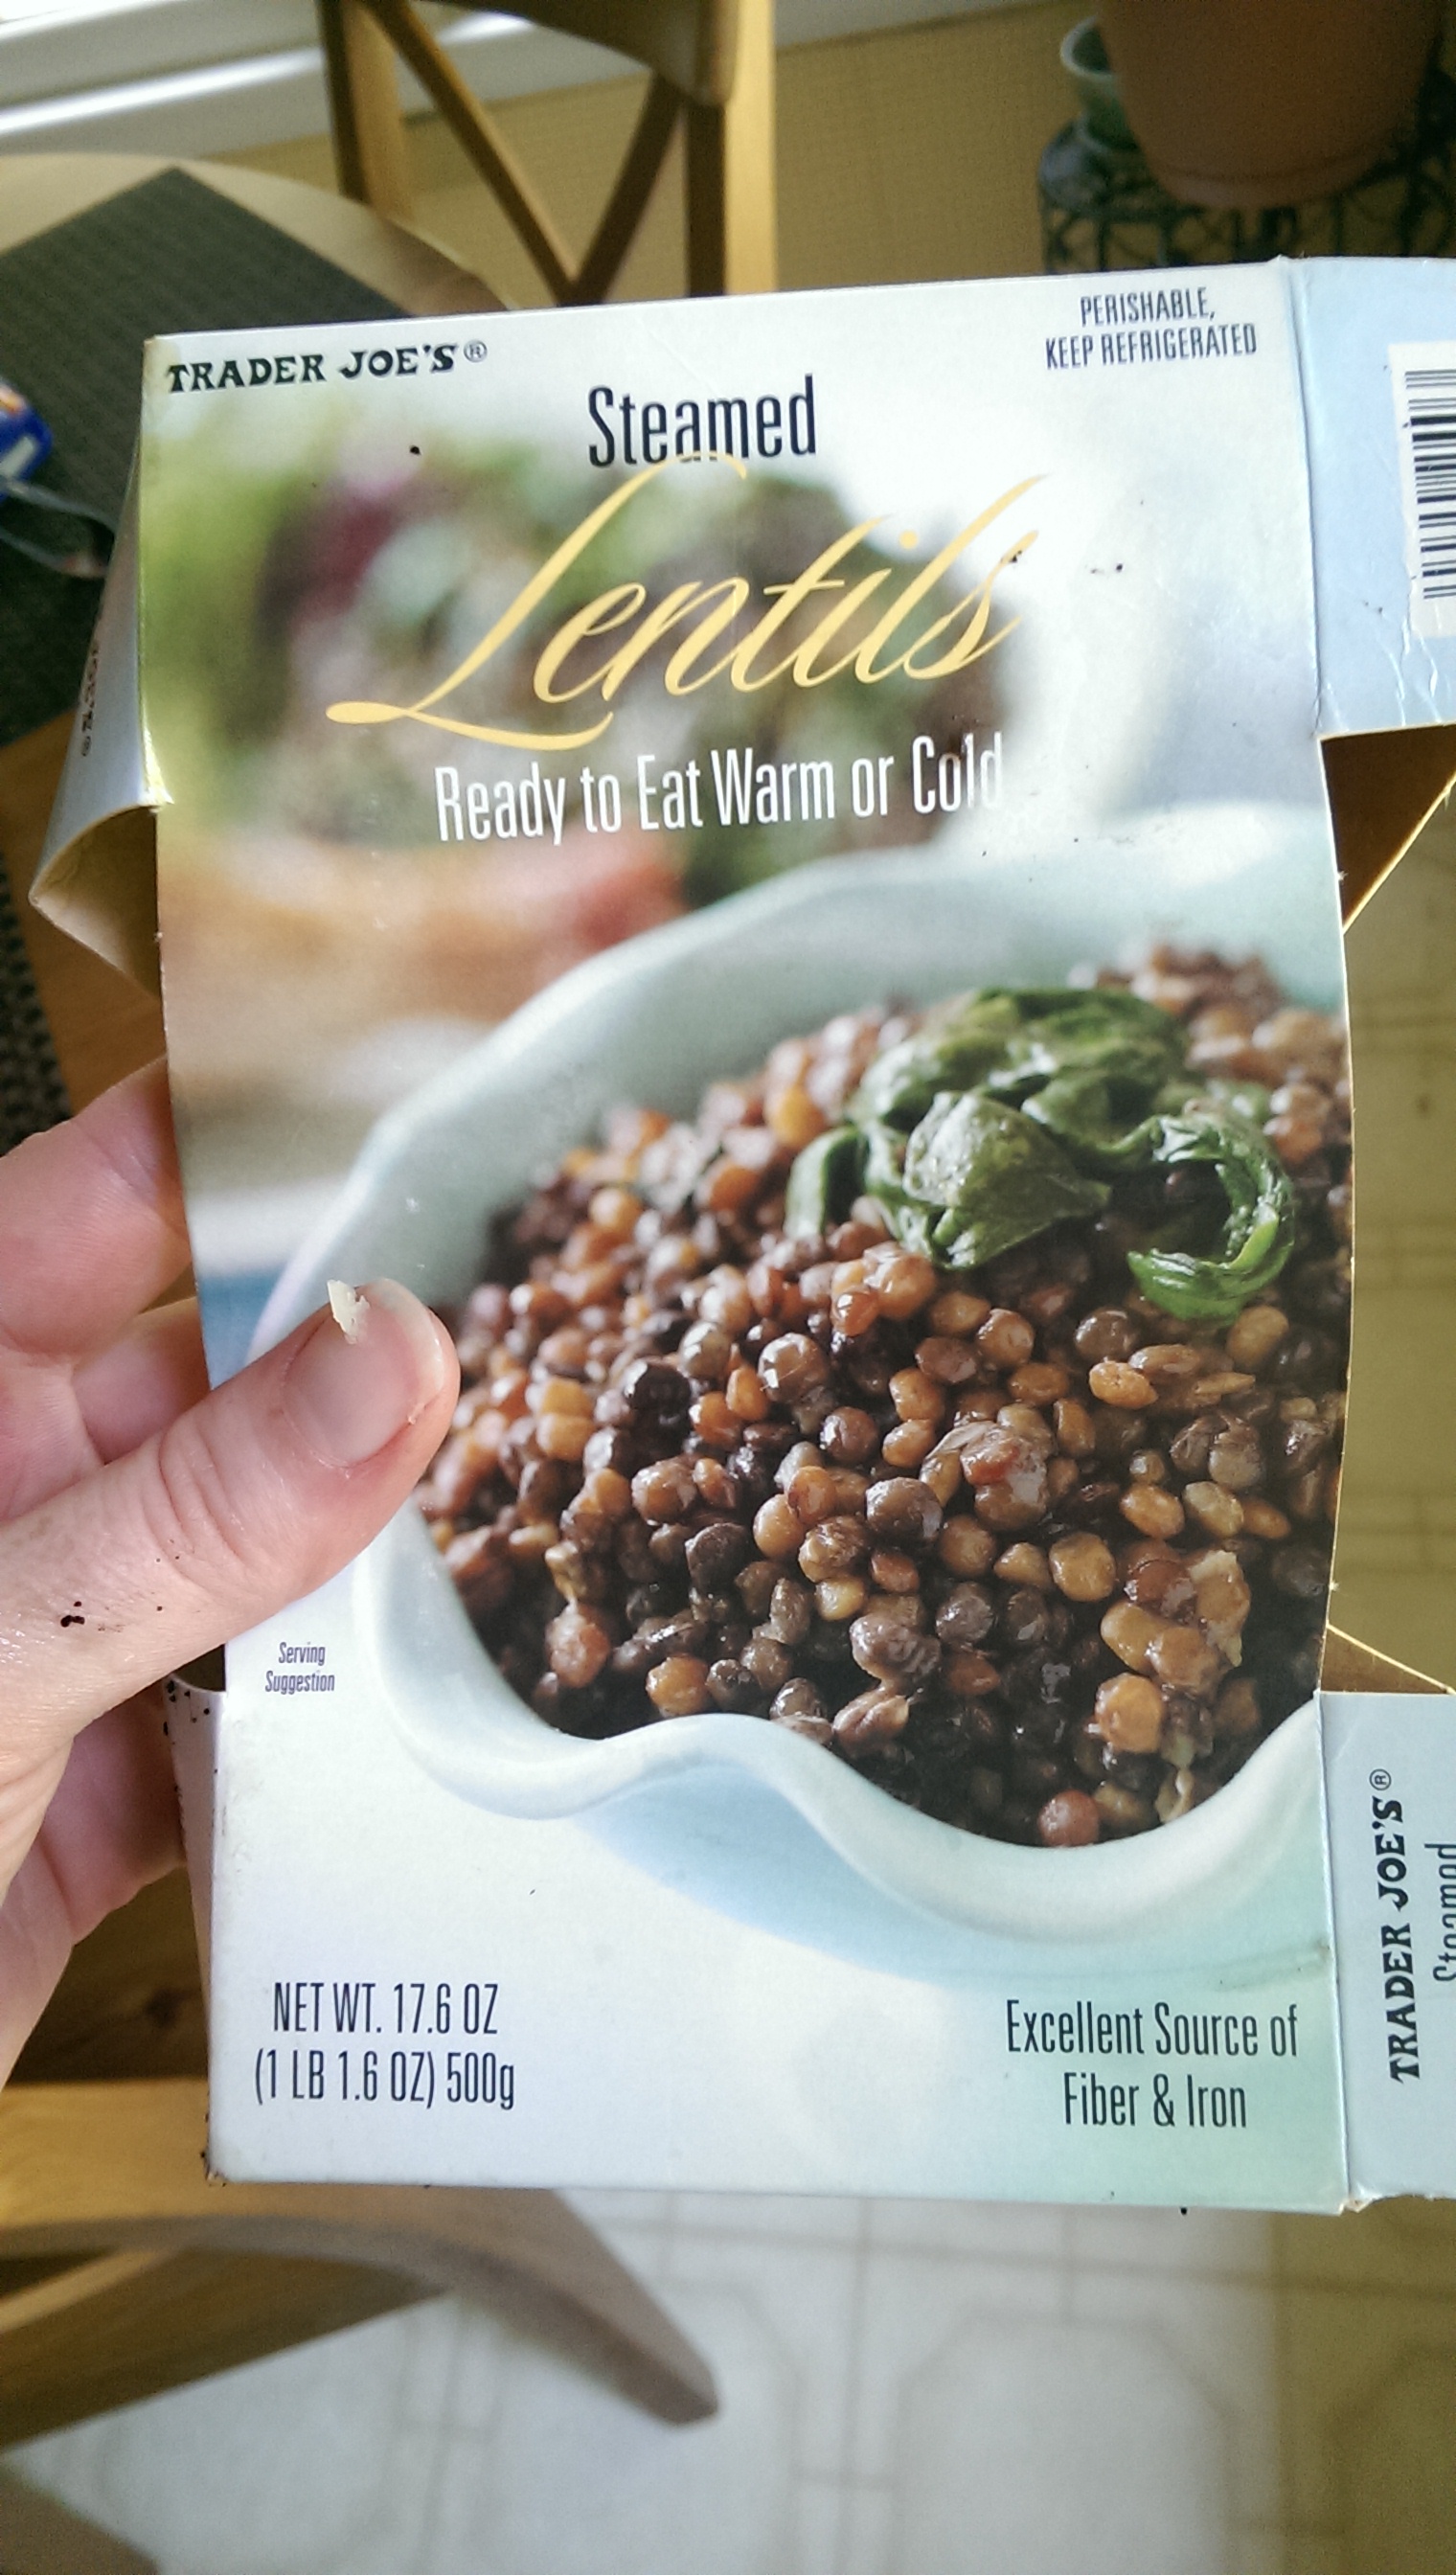
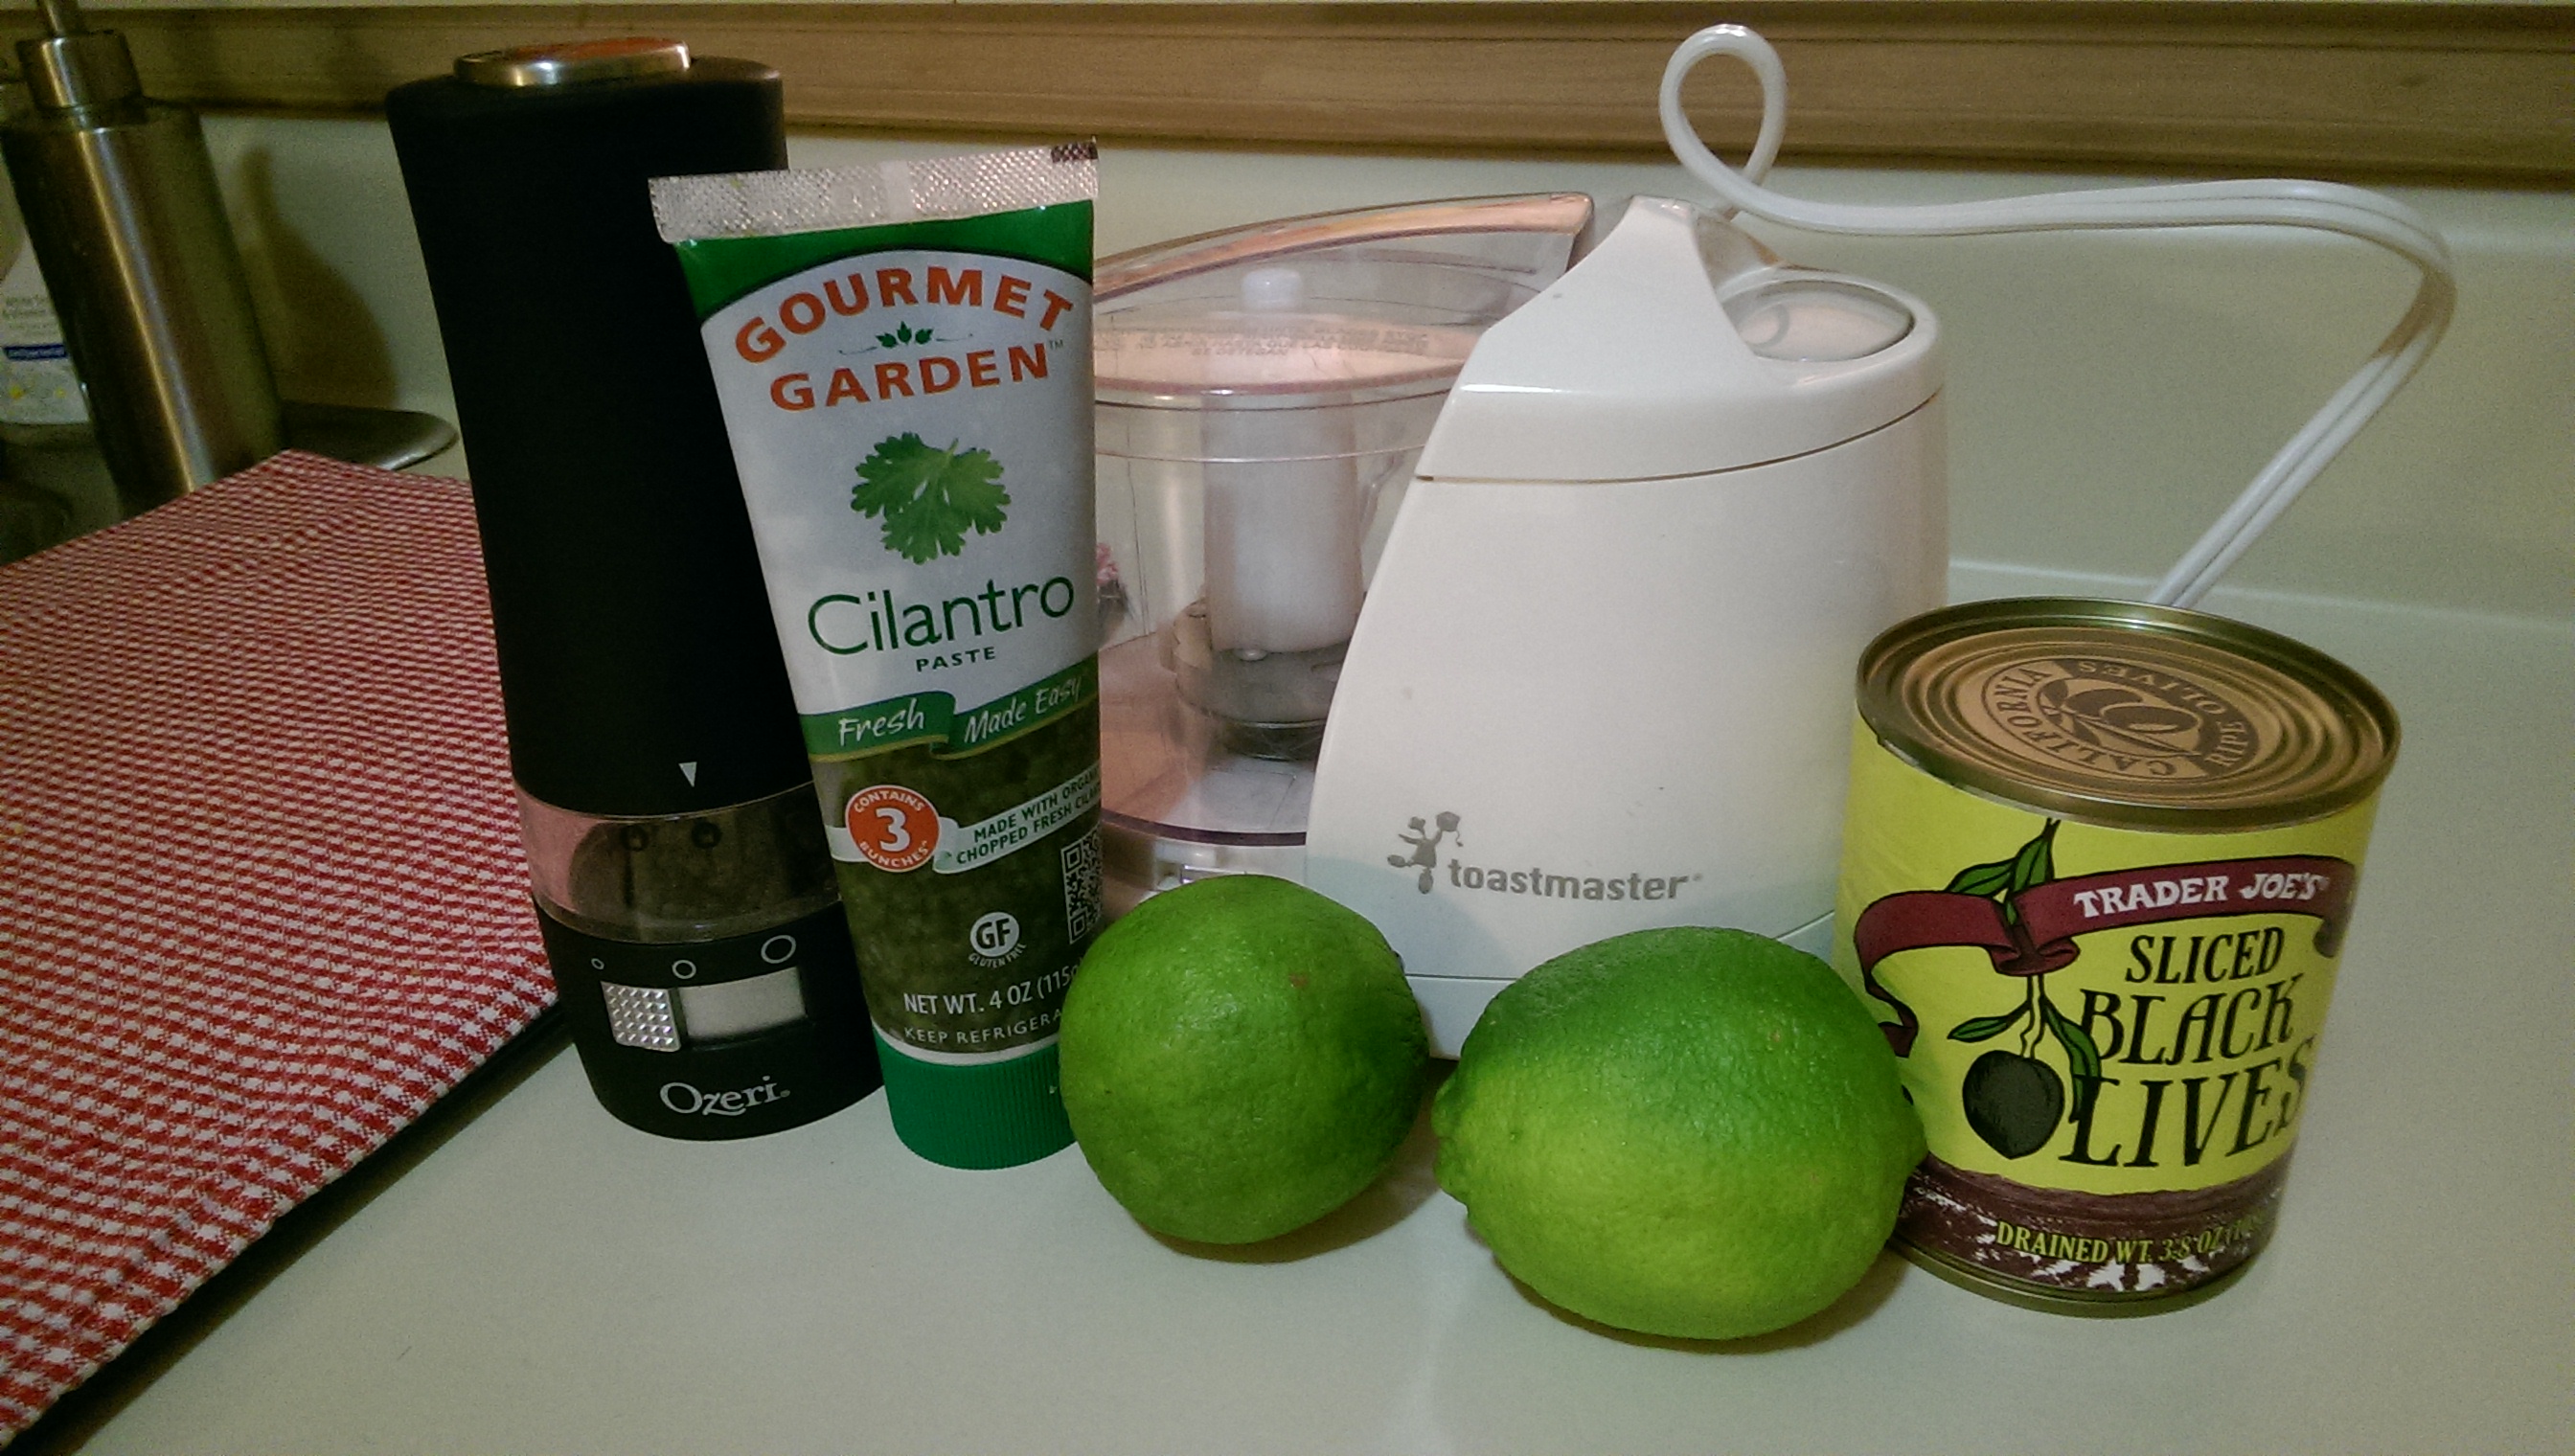
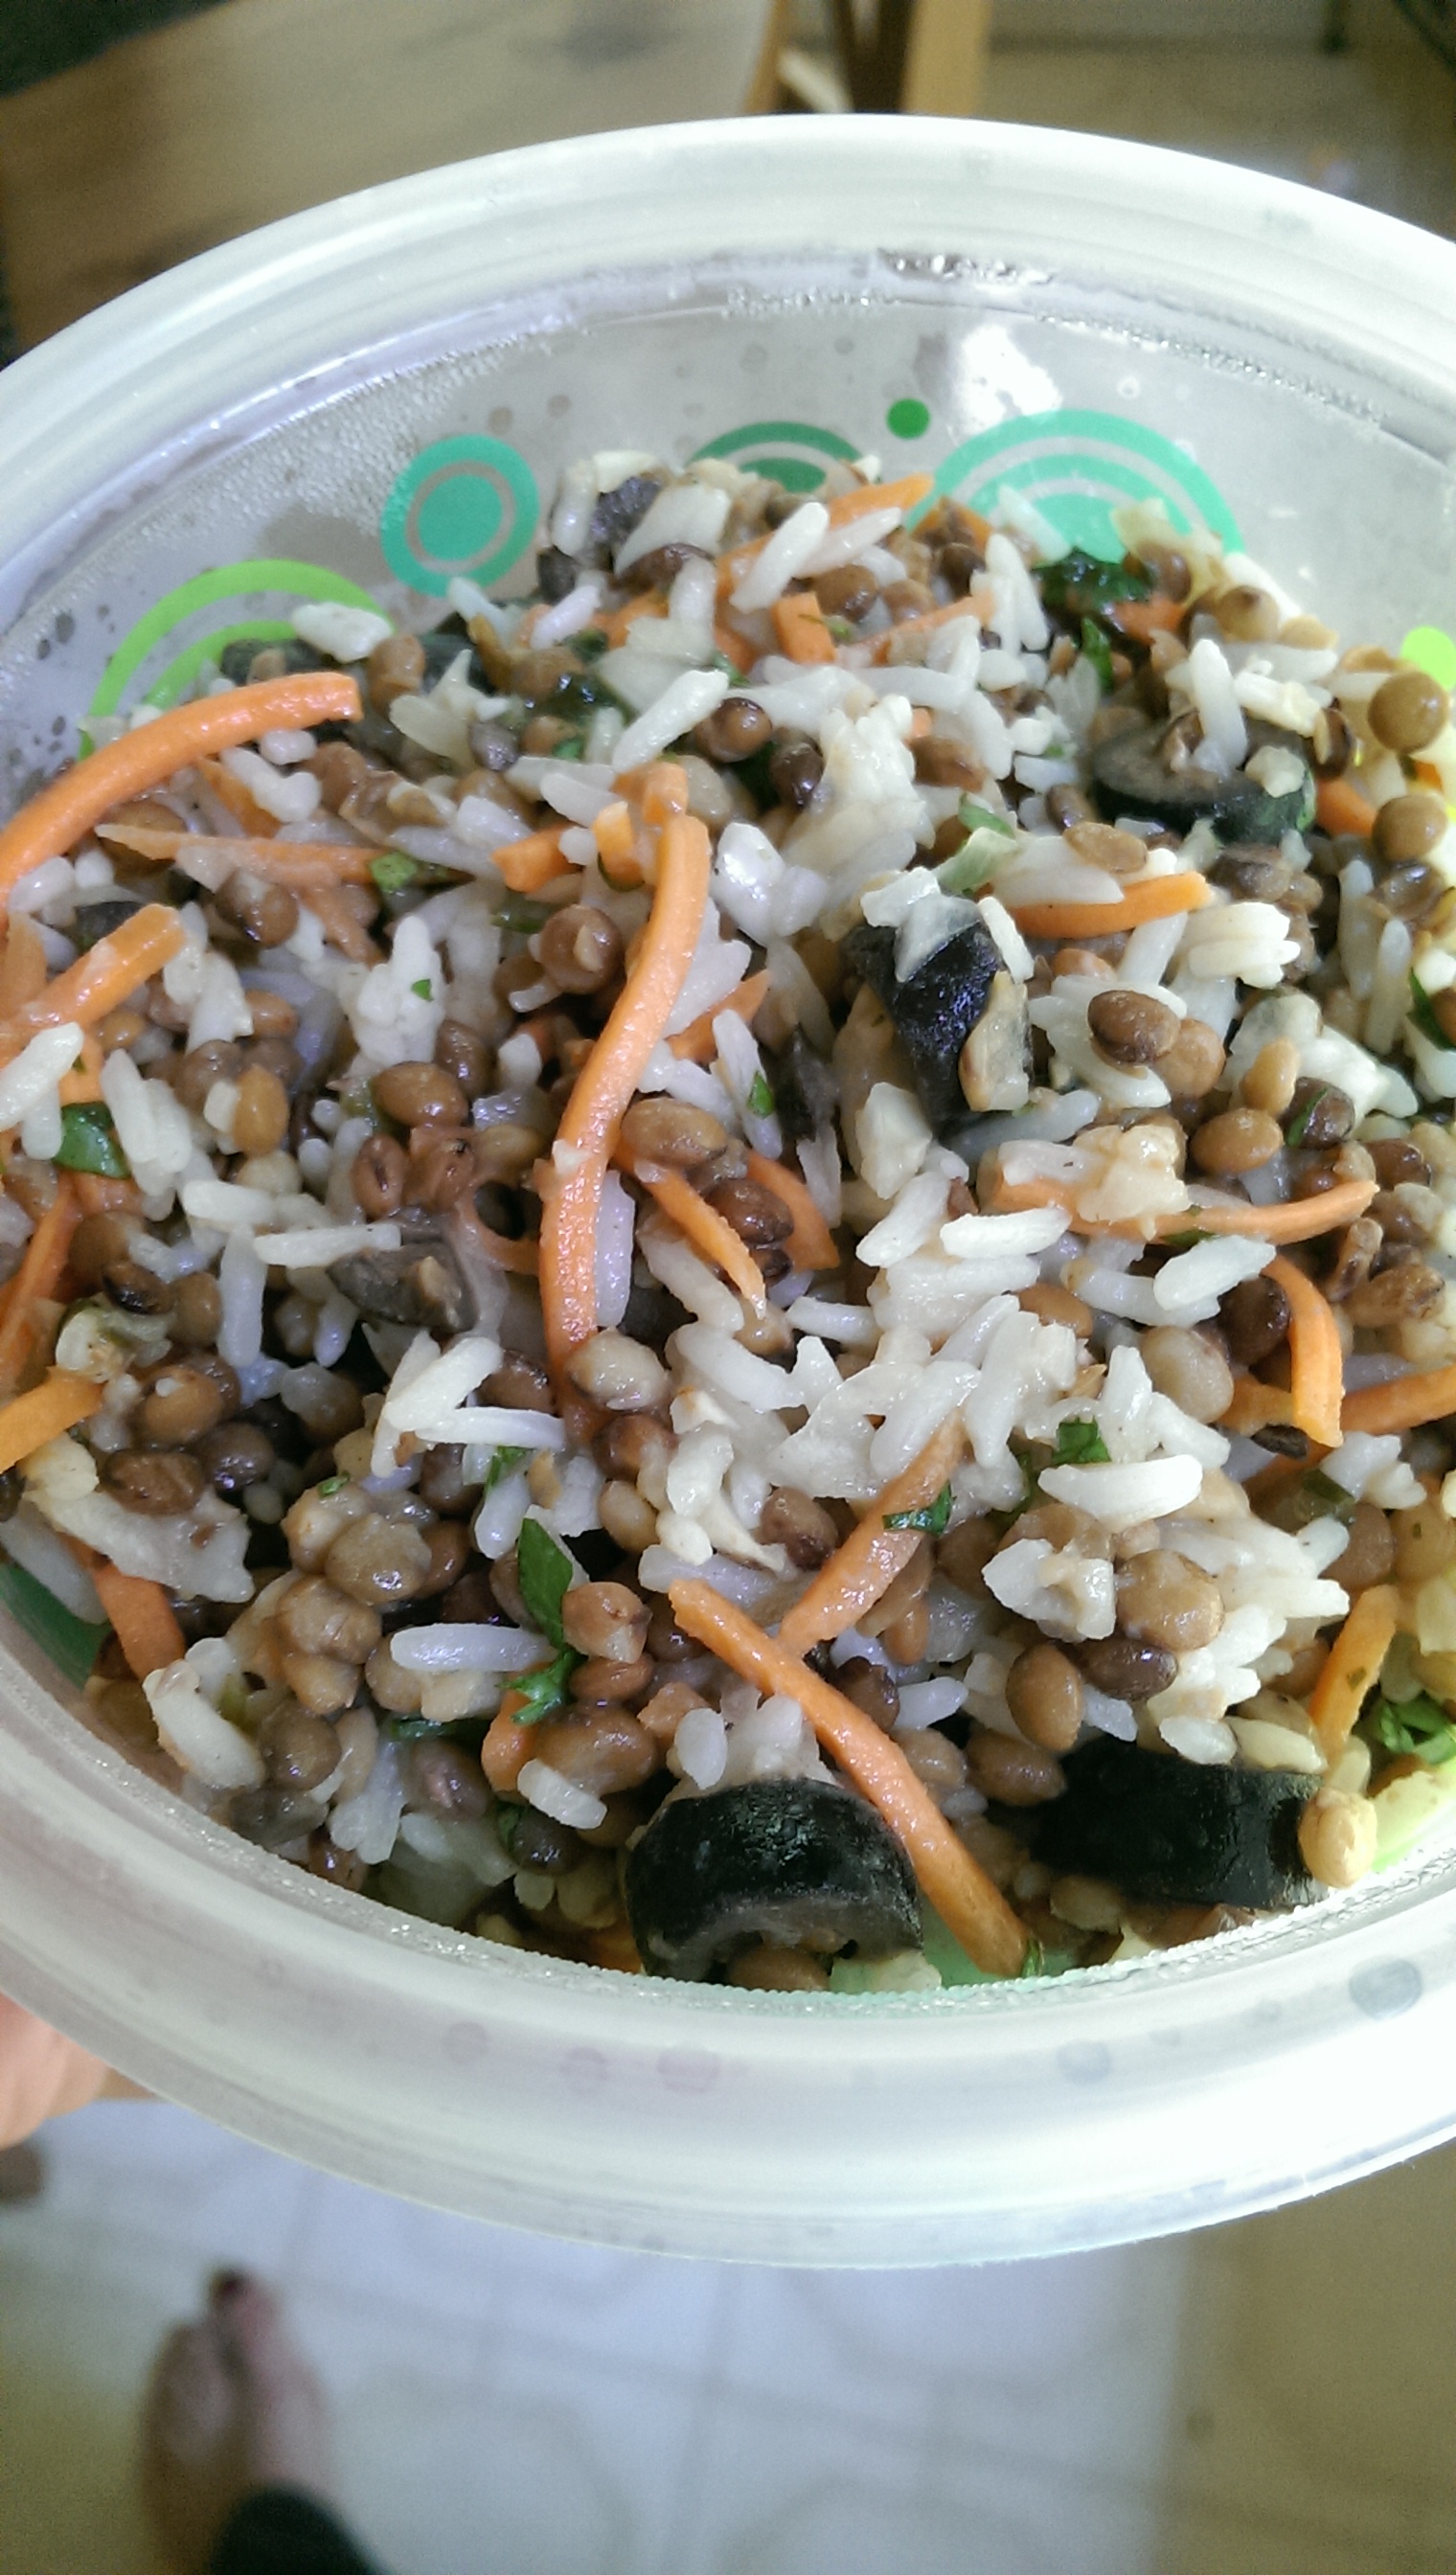
The days leading up to payday are always a challenge for me. I am the budget and after all these years, I still stink at it. I hope that I can learn someday so we can get back to digging ourselves out of debt. For now, you get to benefit from me having to get creative in the kitchen in order to provide healthy meals to fill our bellies. After rummaging through the refrigerator on Tuesday, I saw enough things in there to work with and get my mind moving. A package of vacuum-packed, precooked lentils, leftover basmati rice, black olives, and some items from the vegetable drawer. I started throwing things together in a bowl and kept adding to it. This was the result: Leave it to Trader Joe’s to help a girl out. I am an avid label reader (the crunchy side) and there are some things from there that I won’t touch, but there are lots of things you can find in Trader Joe’s that are not only healthy and cheap, but are real time savers. This is one of them…not that lentils take all that long to cook, but still. I have a three year old and I can use all the help I can get. So I took these and the leftover rice (enough to fill one of those plastic Chinese takeout soup containers, maybe 2 cups?) and popped them in the microwave to get them softened up and brought back to life. Then the creativity came and I was pulling things to the counter left and right. I threw in a large handful of bagged, organic shredded carrots, 3/4 can of sliced black olives (Trader Joe’s), 2 tsp minced garlic (from a jar), and 1 small onion finely diced in my chopper – one of my top kitchen favorites that I love so much that I have given it as gifts. The one I have linked is not the same brand, but it’s the same thing (and the one that I buy for people).
Then I added 2 Tbsp fresh chopped cilantro plus about 1-2 tsp from the squeeze tube, quite a bit of salt and fresh ground pepper, squeezed the juice from two limes and one lemon, and finished it off with a few turns around the bowl of extra virgin olive oil. And this is what I got. YUM!
Lentil Rice Salad
Easy on the budget, this quick protein-filled dish can help stretch your dollars and your time. Sorry for the vagueness in quantities, but this is how I do it 🙂 Thinking back, I wish that I had some English cucumber and/or organic bell pepper lying around, too. That would be even better. Just use your own judgement and taste buds to perfect your own!
INGREDIENTS
Approximately 1 lb of cooked lentils (I used Trader Joe’s 17.6 oz package of steamed and refrigerated lentils)
Approximately 2 cups of cooked rice (I had leftover Basmati)
Large handful of bagged, shredded carrots (approximately 1-1.5 cups)
Sliced black olives, drained (I used about 3 ounces of a 3.8 ounce from Trader Joe’s that I had left in the fridge – more would be better)
2-3 tsp minced garlic (from the jar – time saver!)
1 small onion, very finely diced
2 Tbsp freshly chopped cilantro
1-2 tsp cilantro from the tube (or 1-2 Tbsp more fresh)
Juice of 2 limes
Juice of 1 lemon
Few times around the bowl with EVOO (1-2 Tbsp)
Quite a bit of fresh ground pepper and sea salt (start with 1/4- 1/2 tsp each and taste from there)
DIRECTIONS
In medium bowl, stir together lentils and rice. Warm (in microwave) if needed. (yes, I still use a microwave – half-crunchy)
Add the rest of the ingredients, giving a few stirs now and then to combine well.
Taste and add more salt and pepper, if needed. Enjoy!
I love to eat breakfast any time of the day. And by breakfast, I mean eggs. I could eat eggs three times a day and never get bored. There are so many ways to eat them! I even have an entire Pinterest board dedicated to recipe ideas that involve eggs; Breakfast Anytime. Most of them are frittatas (my favorite things to create) and muffin things like this one, but there are some others on there that I make quite often, like this Kale and Feta Egg Bake recipe. You should check it out. But you won’t find any other kinds of breakfast recipes, like the carbtastic ones, because we don’t really eat food like that in our house. I have never been a pancake/waffle/french toast kind of person, except maybe a few times when I was pregnant. I blame my Sugar Bee for that.
Speaking of Sugar Bee, she’s a broccoli fiend. This kid goes through phases of obsessions (like all toddlers), but the broccoli one seems to be pretty consistent. The odd part to me is that her preferred way to eat it is raw with hummus, which completely thrills me as eating raw foods retains their nutrients. Steaming is the next best option, but raw broccoli maintains its high levels of vitamins A ,C, and K, and none of the other bonuses (calcium, iron, fiber, and the cancer-fighting sulforaphane) have a chance to deteriorate like they do when cooked. Of course in this recipe, the broccoli is steamed before a quick bake in the eggs, but I couldn’t help rambling on about the reasons for my broccoli love. Now on to the recipe!
Everyone complains about egg muffins sticking to the pan, but I haven’t found using liners to be a much better solution. This time, I decided to spray the liners with cooking spray (yes, I use PAM – gasp! – and Trader Joe’s makes a good coconut oil one but coconut and eggs don’t go together) to see if that would make a difference. It did help make the paper a lot easier to remove from the muffins…no little pieces left behind after removing the liner…especially in the ridges along the sides where little pieces would hide. I don’t care much for paper in my food.
After setting up the liners, preheat the oven to 375ºF and get a pot of water heating up to steam the broccoli. I use a stainless pot with a steam insert similar to this one, but it’s a lot nicer than mine. (That’s why there’s no picture. I really need a new one.) Chop up about 2 cups of broccoli into small pieces and steam for a few minutes, just until you can poke a fork through and there is a bright green mess looking at you when you lift the lid.
In a large bowl, crack in 8 eggs and whisk together. I like to add a little water to make it fluffy. Add about 1 Tablespoon dried chives. I didn’t have any fresh on hand, but if you do, always go with fresh herbs. Add salt, pepper, garlic powder, a few circles around the bowl of sriracha (or other hot sauce), and shredded cheese. I used a cheddar/Mexican blend, but any flavor will do. Add the steamed broccoli and stir to combine.
Spoon into the muffin liners so they are almost full and top with more cheese. You can never have too much cheese. Unless you can’t eat cheese. And that thought just makes me sad.
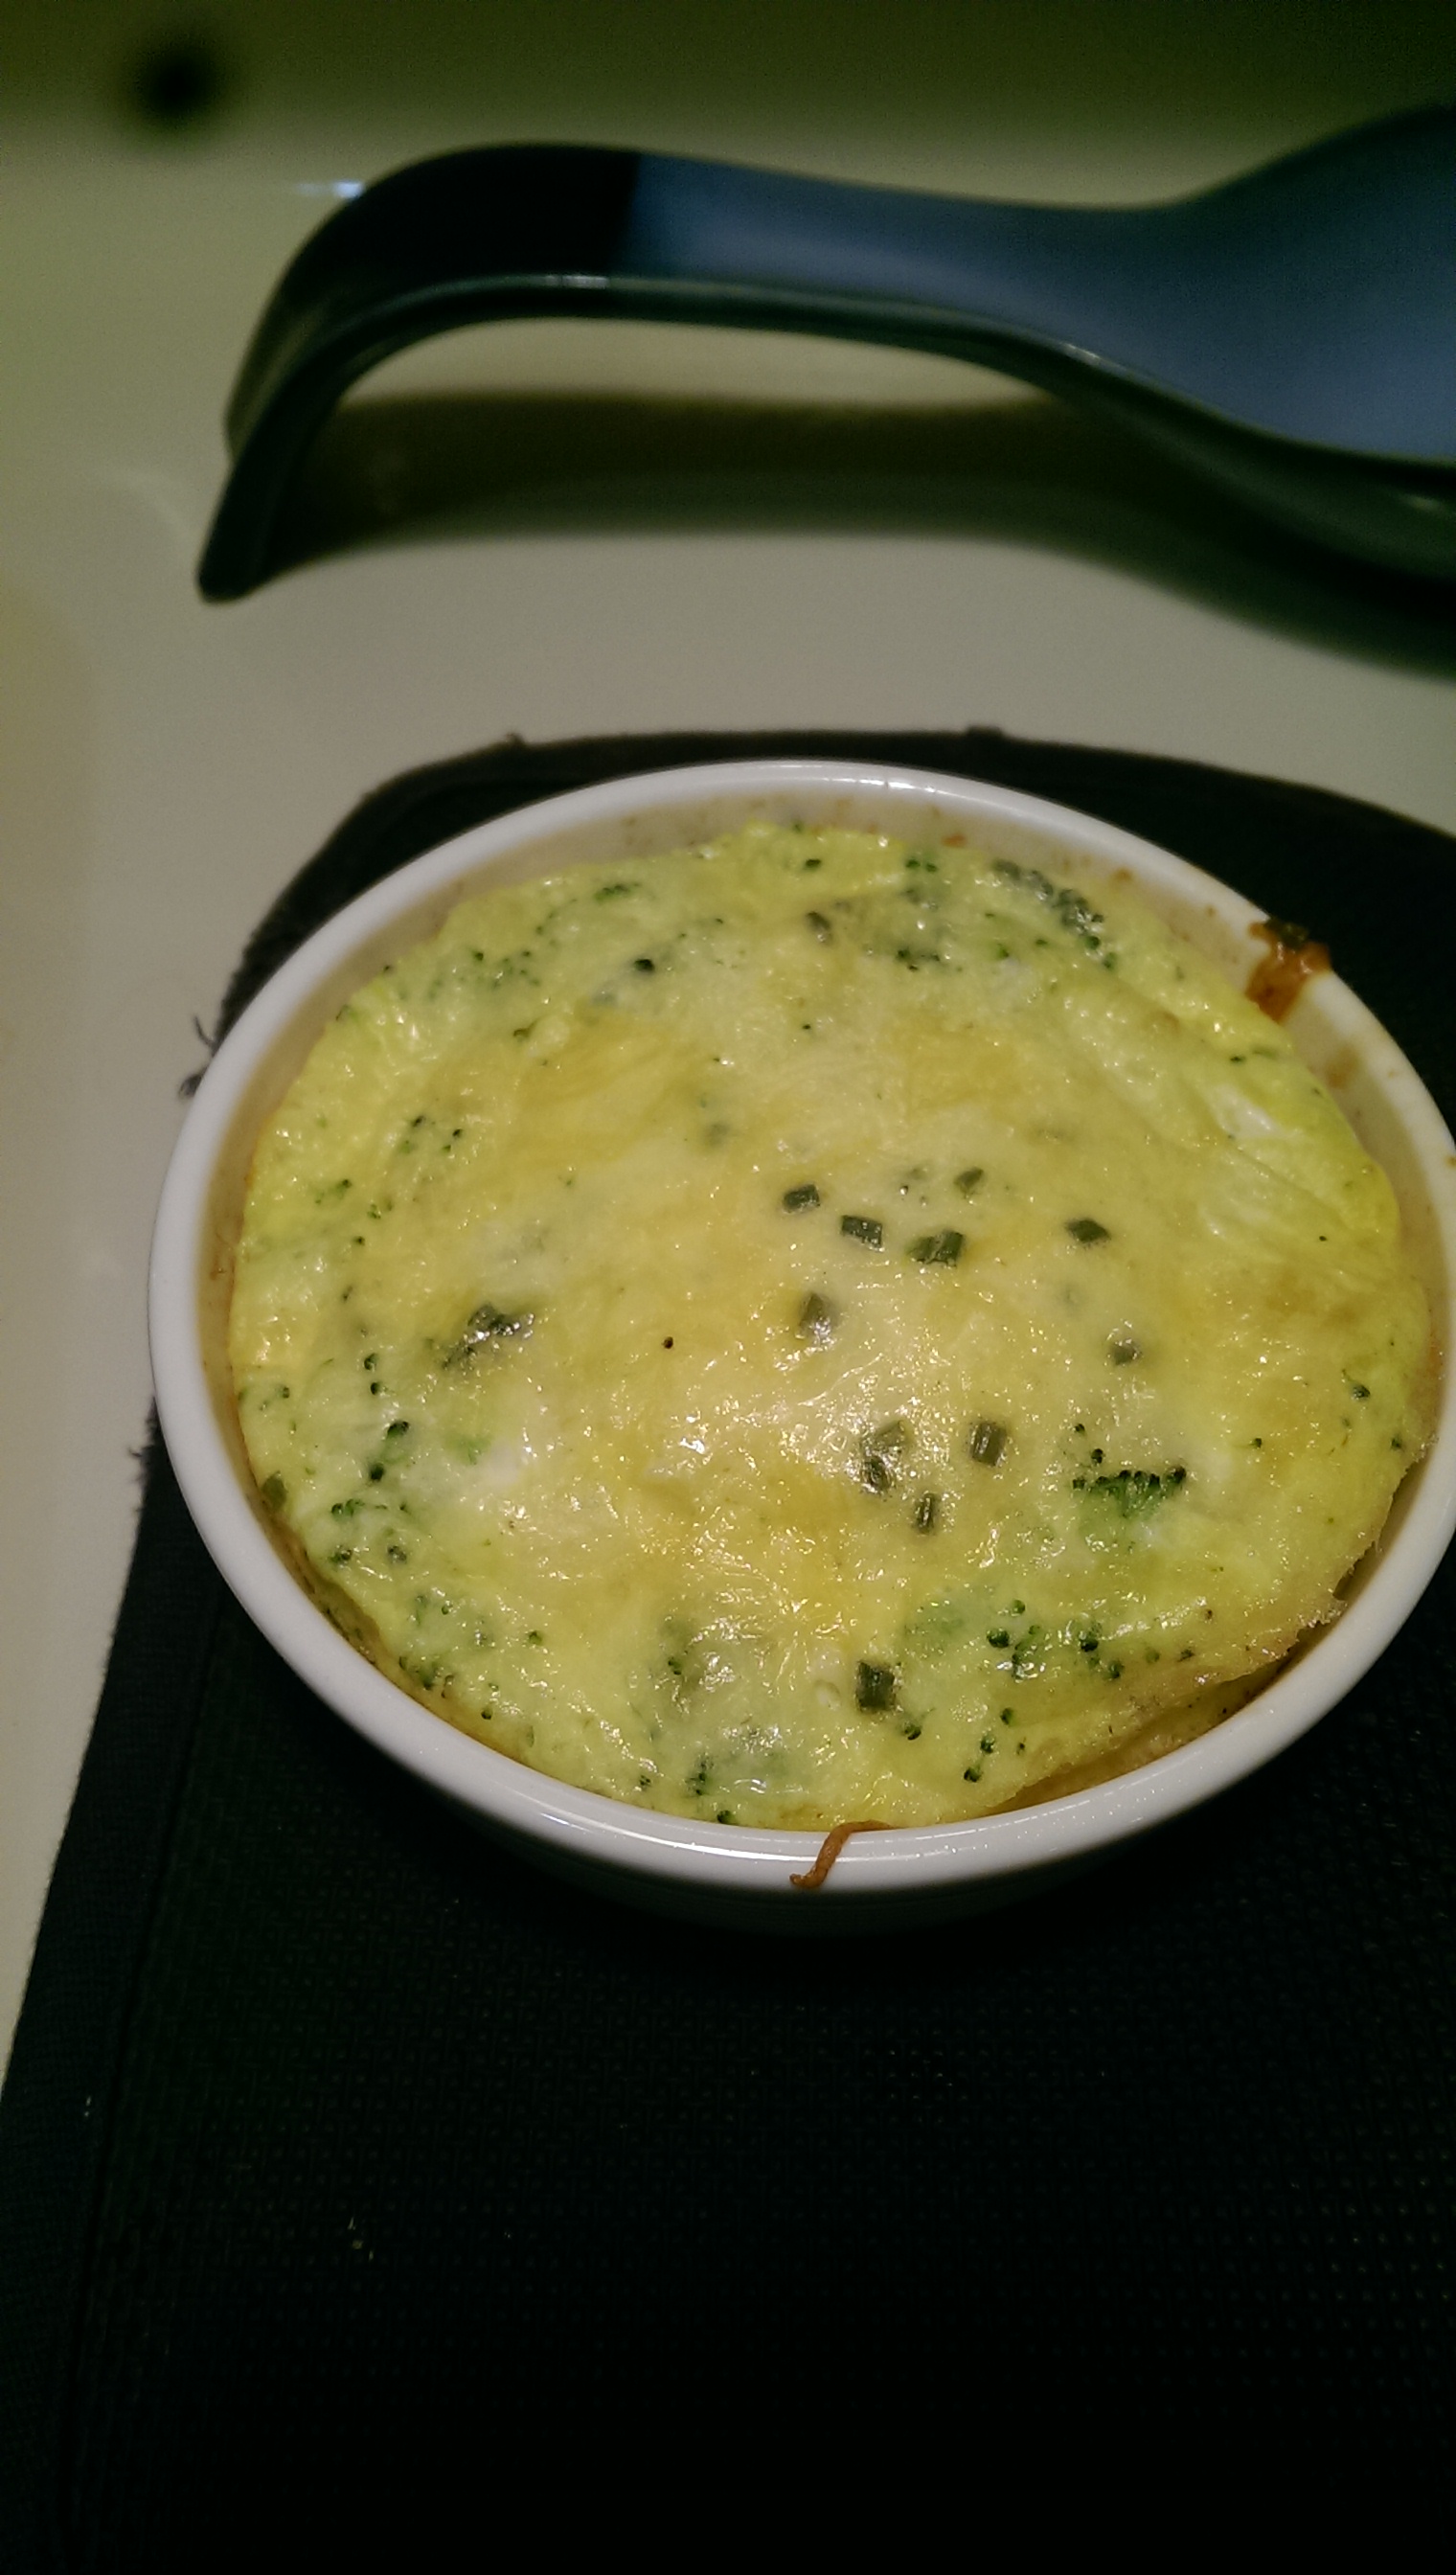
I had some left in the bowl after filling the 12 muffin liners, so I grabbed one of these little ramekins and poured the rest in. (If you don’t have a small ovenproof baker or two to use, you might want to omit an egg or some of the broccoli or cheese from the recipe.) This made a nice portion for the Russian when he got home from school that night.
Bake for 12-15 minutes. The magic number for me was 14, but my oven is so old, just check on it and use your judgement. They should fluff up and be pretty when they are done, with a slight golden sheen.
So yummy! I couldn’t stop eating them. I think I had three for dinner that night. Sugar Bee enjoyed hers, too!
Cheese Broccoli Egg Muffins
Breakfast can be any time and any place with these portable, protein-filled muffins. Broccoli is high in vitamins, fiber, protein, and cancer-fighting nutrients. This is a tasty way to get more broccoli into your diet. Superfood!
INGREDIENTS
2 cups chopped broccoli
8 eggs
Splash of water
1 Tbsp chives (dried)
1 tsp garlic powder
A few circles of sriracha, or hot sauce of your choice
Salt and pepper (to taste)
1.5 cups shredded cheese, divided
DIRECTIONS
Preheat oven to 375ºF. Add cupcake liners to 12-muffin baking tin. Spray liners with cooking spray.
Steam broccoli for 2-5 minutes, until can be pierced with a fork and are still bright green. Remove from heat.
In large bowl, whisk together eggs and water. Add chives, garlic powder, hot sauce, salt, pepper, and 1 cup of cheese. Stir to combine.
Spoon mixture into muffin liners and top with the remaining 1/2 cup cheese. Bake 12-15 minutes. Muffins will fluff up and have a few golden spots on them when done. Enjoy!
This recipe is a huge favorite with the Russian and I. After I made it once to try it out, I added it into my regular rotation of dishes. It’s fast, cheap, and easy, all very important characteristics with everything I’m juggling these days, and his eyes light up whenever I mention making it again. There is little doubt that once Sugar Bee* gets over her “it has skins” phase about everything put in front of her that she will be chowing down on this one, too. She still loves avocado (her first food) and is a total veggie-head. Don’t be fooled by the word “creamy” in the title. This dish is non-dairy, gluten-free, vegetarian, paleo-friendly, you name it and it probably fits, like nearly every recipe I will ever post.
The recipe originates from the blog of Empowered Sustenance. Her original recipe can be found here. She is an amazing resource and I have really enjoyed her posts. You should follow her blog, too!
First, I have to mention (brag) that the zucchini used for this blog was successfully grown in my own container garden. This is only my second year taking a crack at growing my own food and I’m quite impressed with myself. If I actually had time, I would research a lot about how to successfully grow each individual crop and spend a lot more time tending to the plants. I’m sure I would probably have actual garden beds, a greenhouse, and compost everything, but containers are about all I can handle at this point in my life. Just take a look at this beauty!!
Now let me focus your attention on one of the best things ever invented, next to the Kitchen Aid stand mixer. I LOVE this thing! You can spiral fruits and vegetables into noodles or chips in minutes. It’s so easy to use and clean. If you don’t have one, go buy it. Now. Amazon usually has the best price. Look, I’ve even given you a place to click and get one here. If you are a clean eater, paleo, or GFer and you still don’t have one, I’m not sure we can talk anymore. You should have had this yesterday. But if you don’t have one, you can use a julienne peeler like this one to make the noodles.
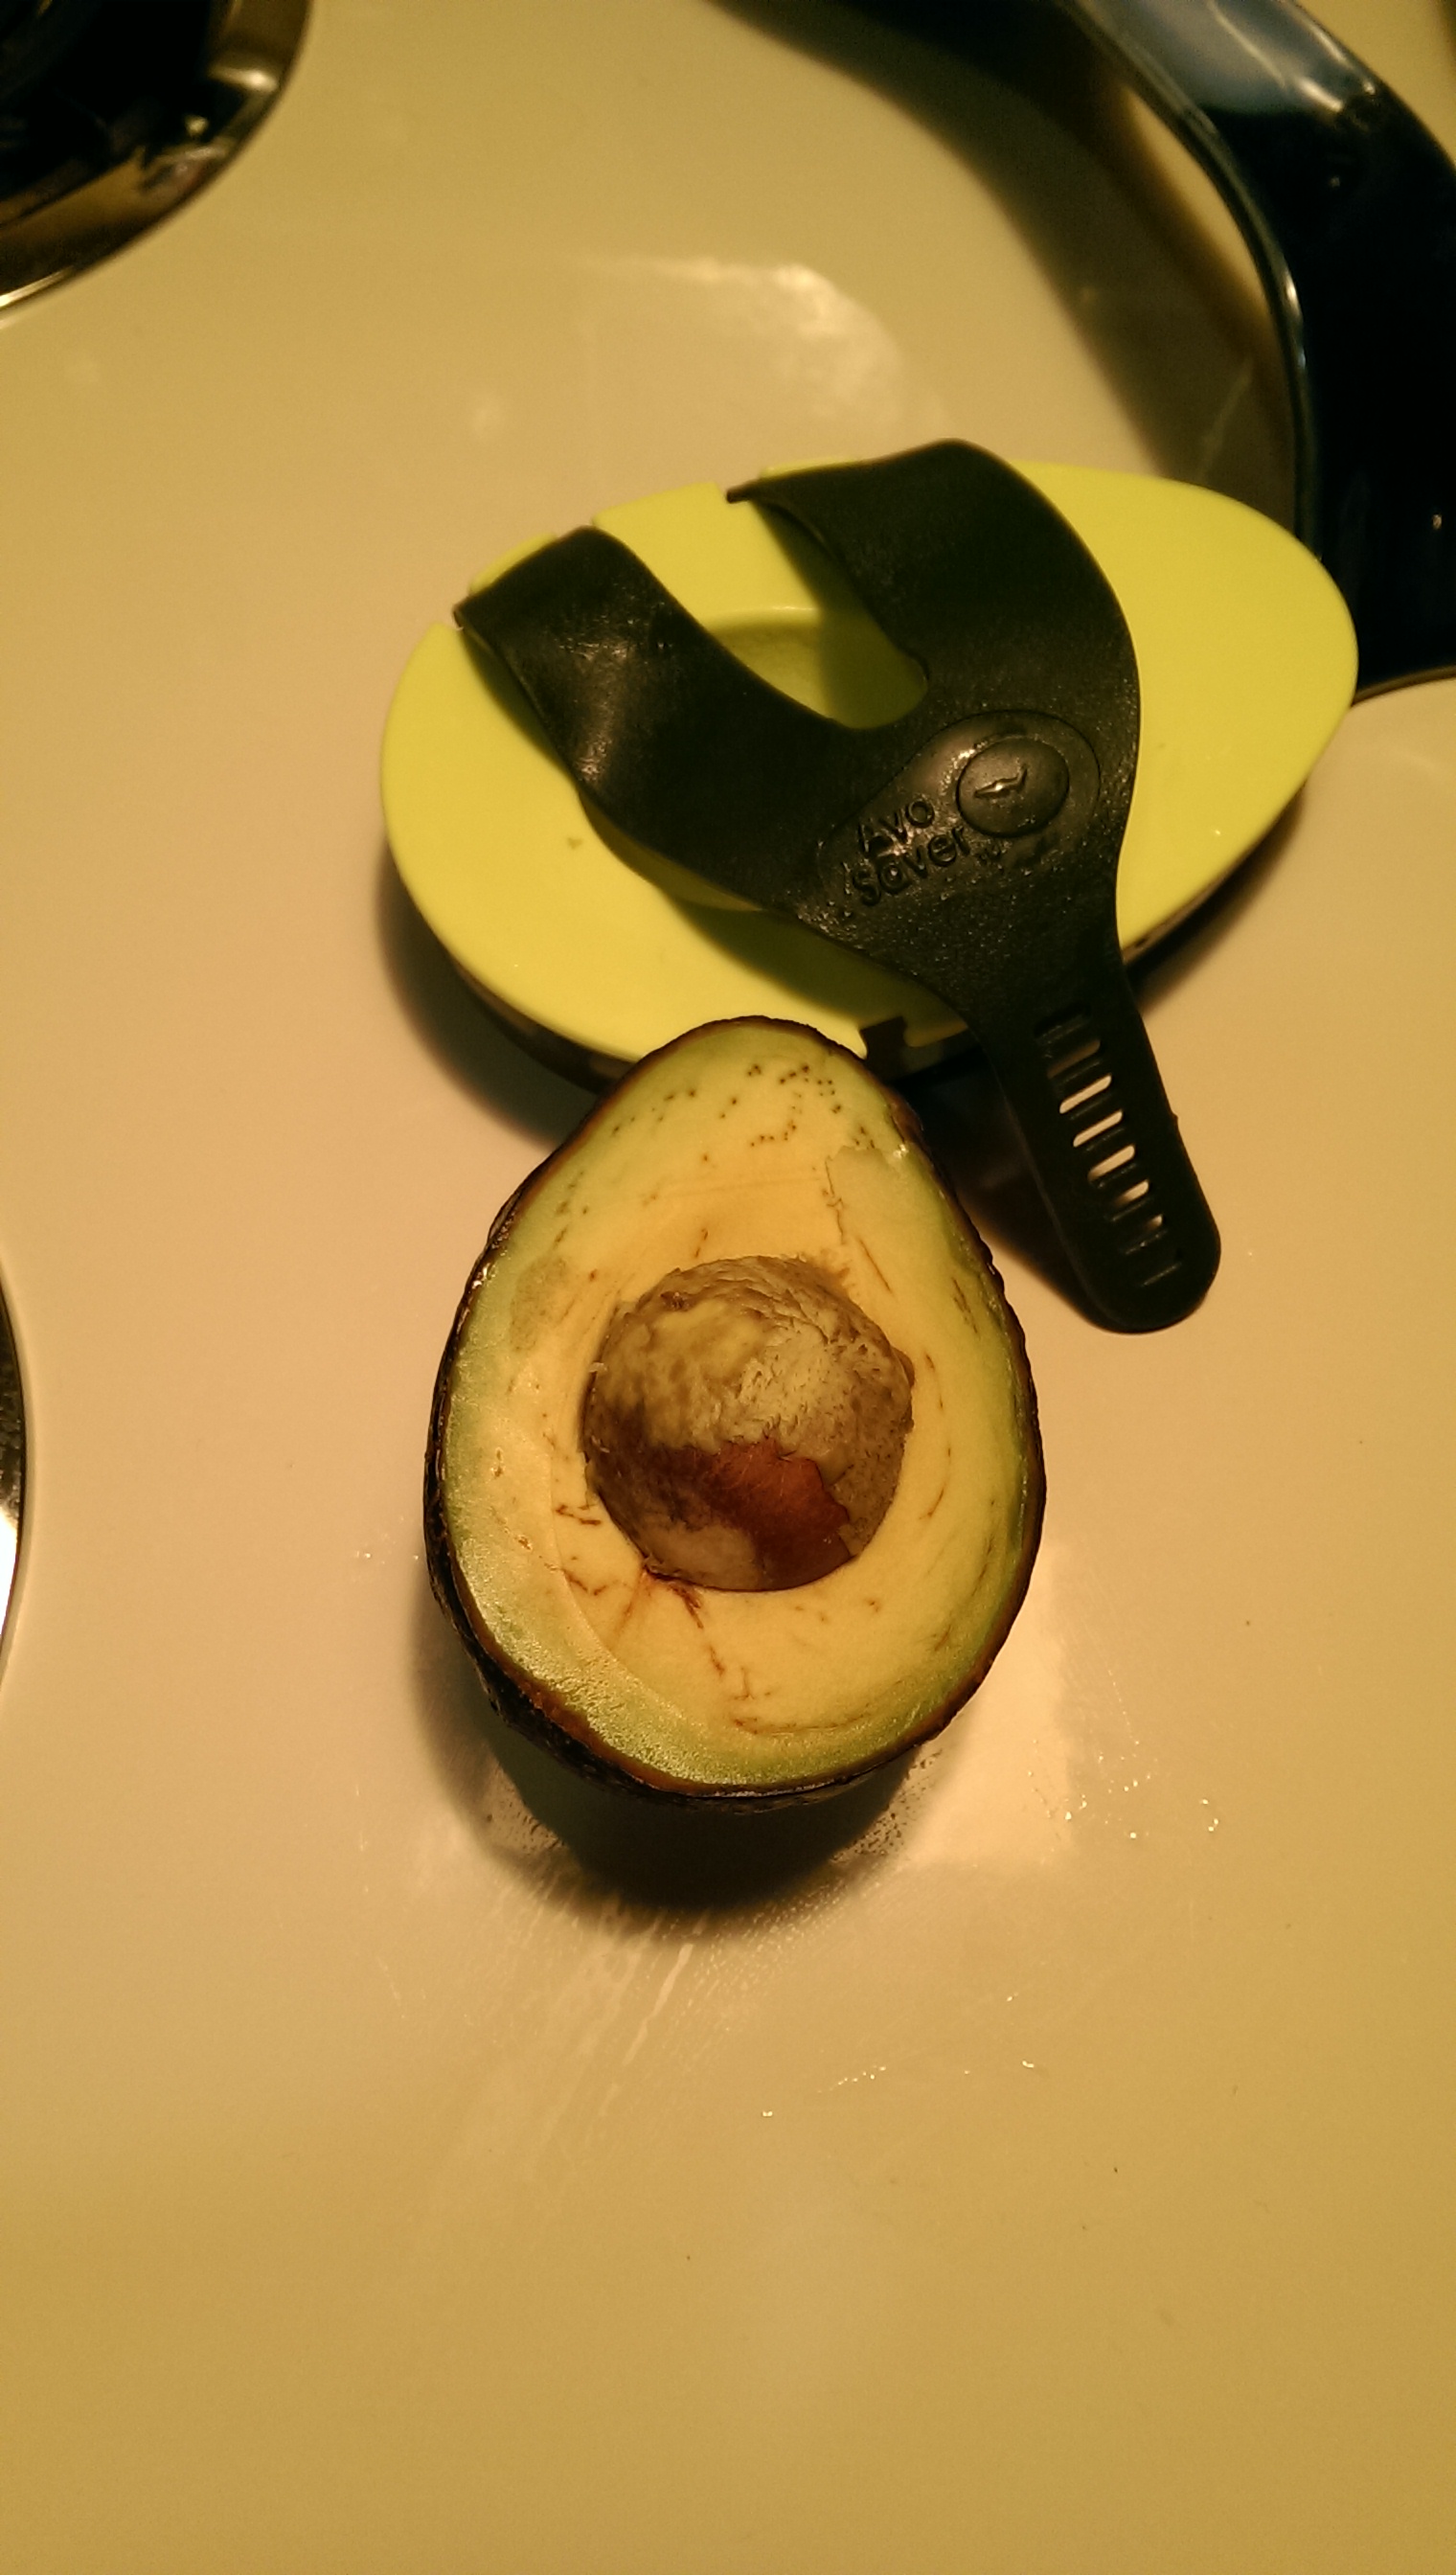
Another nifty item to have is an avocado saver. There are those rare occasions where we actually have half an avocado left in our house and this thing actually works. You do have to pull it real tight to make sure air can’t get to the flesh, and there might still be a little discoloration when you get to it, but it’s a very thin layer that scrapes off very easily.
This was after two days in the saver in the fridge. I think that’s pretty darn good! The lighting in this picture stinks, but as you will see in the picture down below in this post after it’s been scraped into the bowl, it was still nice and green. The only thing was that those little stripes appeared. TWO DAYS. Here it is on Amazon, but I bought mine in Publix. My mom found one for herself up in NY at Stop N Shop, so I’m sure you can get one anywhere. Do it.
To make the zucchini noodles, trim the ends off the zucchini, position it in the slicer, and turn the handle. Yep, this is really hard stuff here.
I like to make my noodles on the short side. When I first started making this, I would make them too long, making cooking, mixing, and even eating them a little difficult. I break them off after a few turns and drop them in the bowl. Then I turn and make some more. One of the easiest things going on in my world of cooking prep.
When you are done making the zucchini noodles, it’s time to cook them. Heat the EVOO in a saute pan over medium heat. Add the zucchini noodles, some Italian seasoning and garlic powder, and turn the noodles around in the pan to coat them in the oil and spices.
While the zucchini is cooking, get the sauce ready. Scoop the avocado into a medium-sized bowl with juice from half a lemon, a giant tablespoon of mayo (you could use yogurt, if tolerable), salt, and fresh ground pepper to taste.
Mash the ingredients together with a fork until it looks like a creamy guacamole.
When the zucchini has finished cooking, it should still have a nice green color and be soft, but not mushy. Remove it from the heat and let it stand a minute or two. Don’t let it cool too long as the warmth from the zucchini helps the creamy avocado sauce to coat the noodles.
After it has cooled for a few minutes, add it to the bowl of creamy sauce and stir to combine. I try to drain some of the oil off of the noodles before placing them in the bowl or the sauce can get too runny. Serve immediately and enjoy!
* Sugar Bee is what I call my three-year-old daughter. I actually call her My Sweet Sugar Bee, but this shortened version will work fine for my blog.
Creamy Zucchini Noodles
These quantities make two servings if made as a side dish, one if you eat it all by yourself as a meal…which you might want to do after the first time you make it. This is easily doubled and since I have found that it does last until the next day, I usually make a double batch. I have also sauteed fresh garlic in the oil before adding the zucchini for extra flavor (then omitting the garlic powder). We love garlic! Happy cooking!
INGREDIENTS
1-2 tsp extra virgin olive oil (or the oil/fat of your choice)
Heat oil in saute pan over medium heat. Add the zucchini, Italian seasoning, and garlic powder, tossing to coat. Saute for 3-5 minutes until noodles have softened, but not mushy and are still bright green.
While noodles are cooking, mash avocado with the remaining ingredients in a bowl with a fork until it has the consistency of a creamy guacamole.
When zucchini is finished cooking, remove from heat and let cool for 1-3 minutes. Add to the bowl with the avocado mixture, allowing some of the oil to drain off. Stir to coat noodles and serve. Enjoy!
Yay! A recipe post! I’m glad you’re back. Food always brings people back.
The Russian* and I are obsessed with eggplant. Seriously obsessed. My daughter, now almost three, has eaten eggplant since she could eat food that only needed to be mashed a little before swallowing. Her favorite recipe is what I call “Eggplant Ragu” and I will surely post that one as soon as I make it again so I can write it down. When they are 10 for $10 at Kroger, we are eating eggplant in a variety of ways. I like to slice and grill it, marinate with other veggies for a variety of dishes (one of several ratatouille recipes, eggplant parm, eggplant lasagna, eggplant salads…all future postings), and of course, baba ghanoush. If I could figure out how to freeze eggplants, we would be set! Hmmm….might have to start researching and experimenting.
They way I like to cook is kind of like how I get my news. I read a few different sources and make my own decisions on how to move forward. My recipes are usually a little from this recipe, a little from another, and some other piece or two from yet a different one, all mixed together with my own knowledge of cooking and what tastes good and works together. After reading several different recipes, I decided that I had enough information to make my own. I must say the first batch was pretty damn fantastic. After half a dozen or so batches, they seem to only get better.
One “mistake” I apparently made was cutting the eggplant before roasting it. Sometimes I read a little too fast and miss an important item. Kind of like when I’m supposed to read directions or instructions for putting something together. Well, after my maiden batch, I was pretty sure that this is the best way to do it and that everyone else made the mistake by keeping the eggplant whole.
First, slice the eggplant in half lengthwise.
Then oil up the cut side with some EVOO.
Place it cut side down on a nonstick baking sheet.
Bake it for about 25 minutes or so, depending upon how big it is (or they are if you are making a double batch). You want the eggplants to have some give when you push on the skins…usually anywhere between 20-30 minutes. They should look nice and golden and be pretty smushy. Perfect for going into the food processor.
Now you will want to let them cool off before scooping out the insides, unless you’re impatient (I don’t know anyone like that). In that case, you will need a towel or something to protect your hand. However, I suggest giving them at least a few minutes. That will give you time to set everything else up.
Get out your food processor. I have a small one and large one, but it’s almost easier to make it in two batches than drag the huge one out. And clean it.
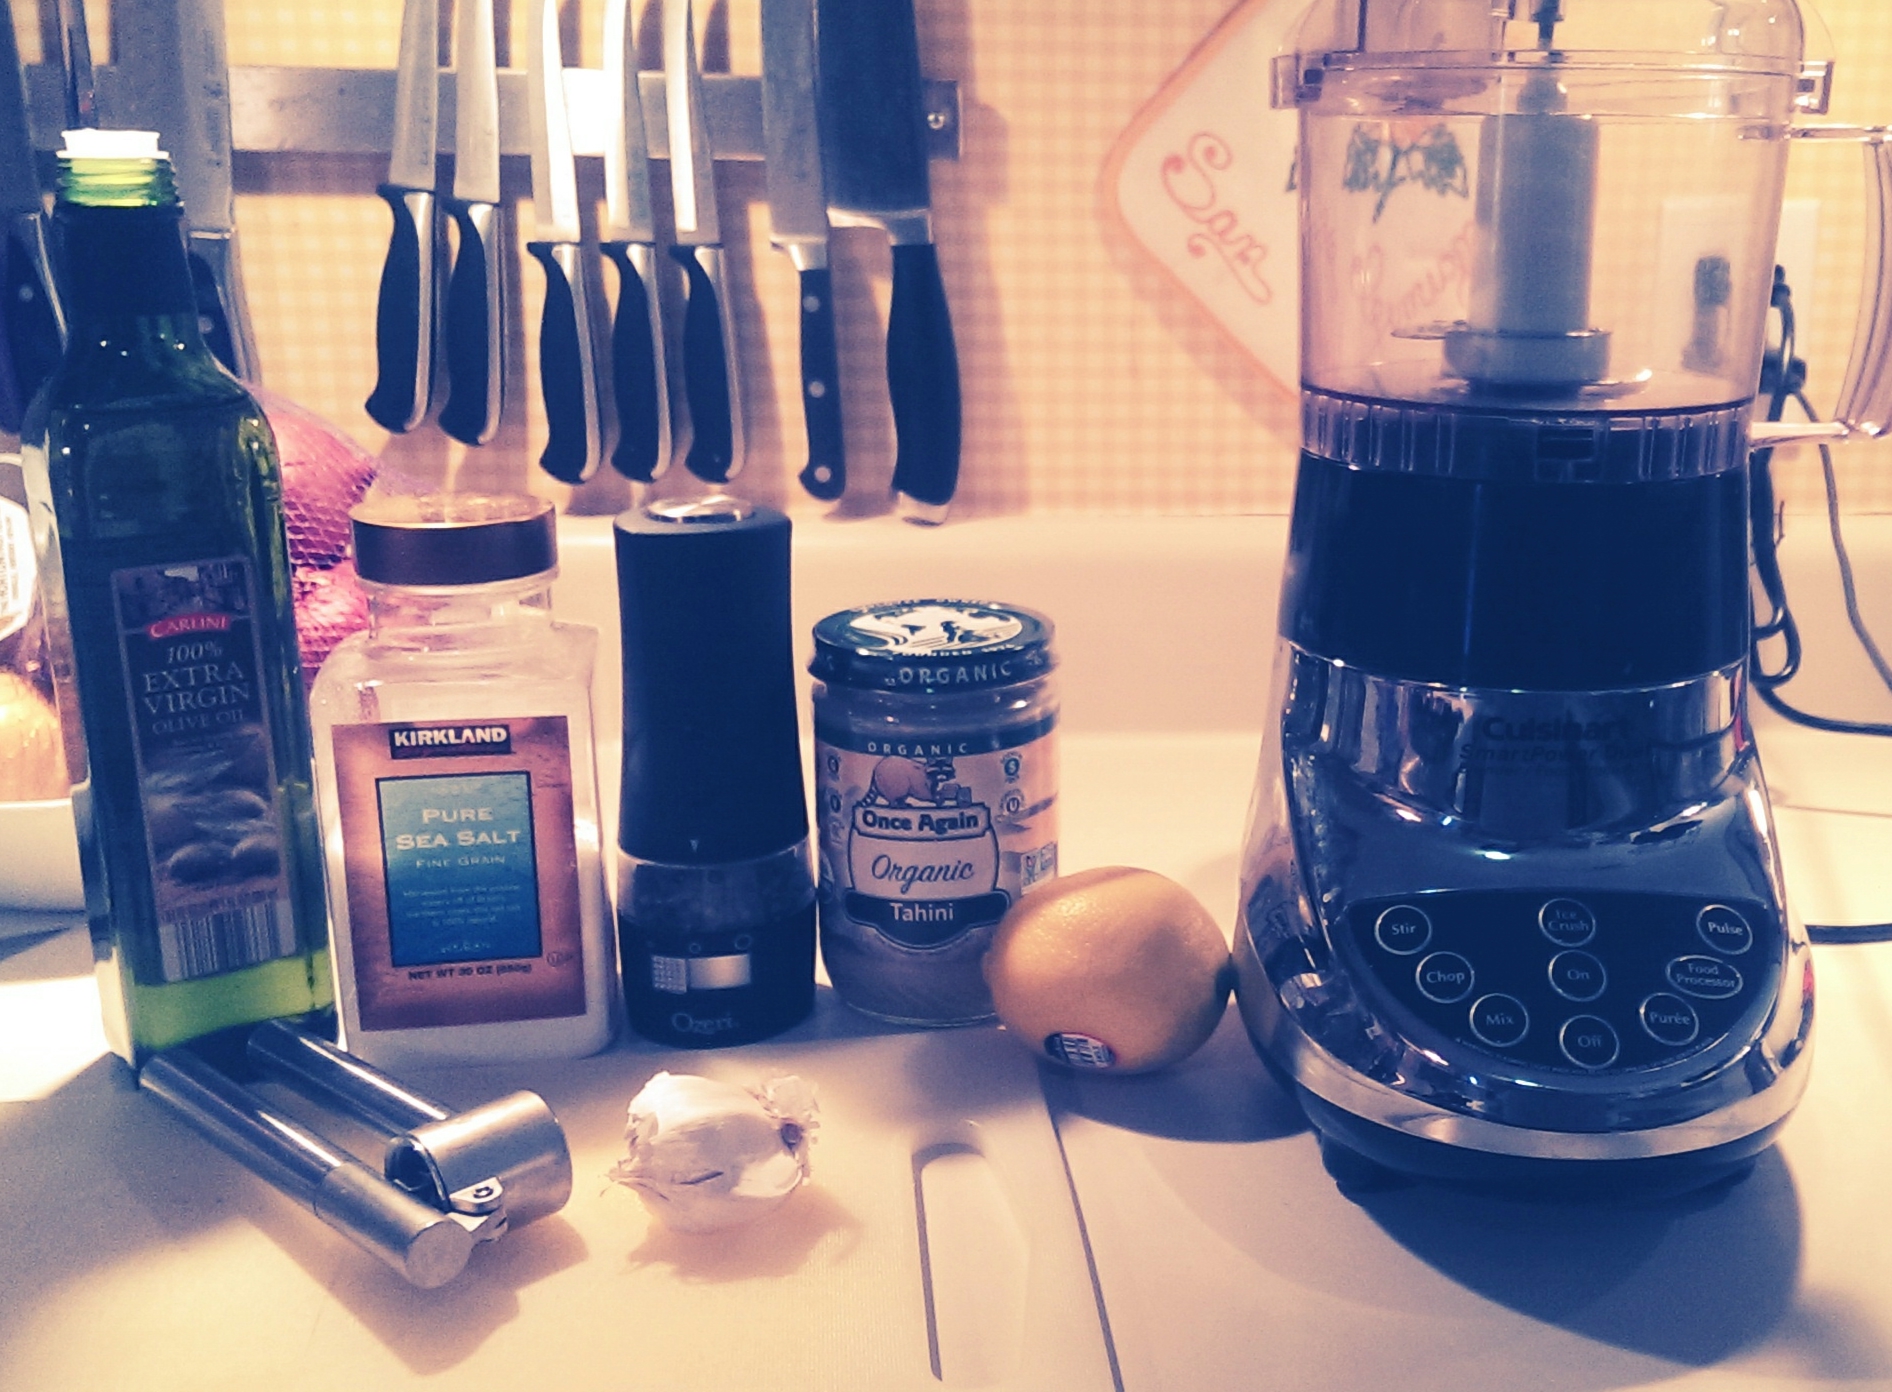
You will also need EVOO, that’s extra-virgin olive oil for those of you that have never watched any of Rachael Ray‘s shows. Sadly, much to the disappointment of all of my chef friends, she’s the one that actually got me cooking and helped me to realize how much I love to cook. In addition to the olive oil, grab a lemon, a few cloves of garlic, tahini (I like this one and you can get it in most stores), pepper (preferably fresh ground), and Kosher or sea salt. Yep, that’s all that’s in it. Gluten-free, vegan, vegetarian, paleo, whatever your eating preferences or restrictions are, you can eat this! Unless you’re just picky and are afraid to try delicious things to put in your belly.
Now for the fun part.
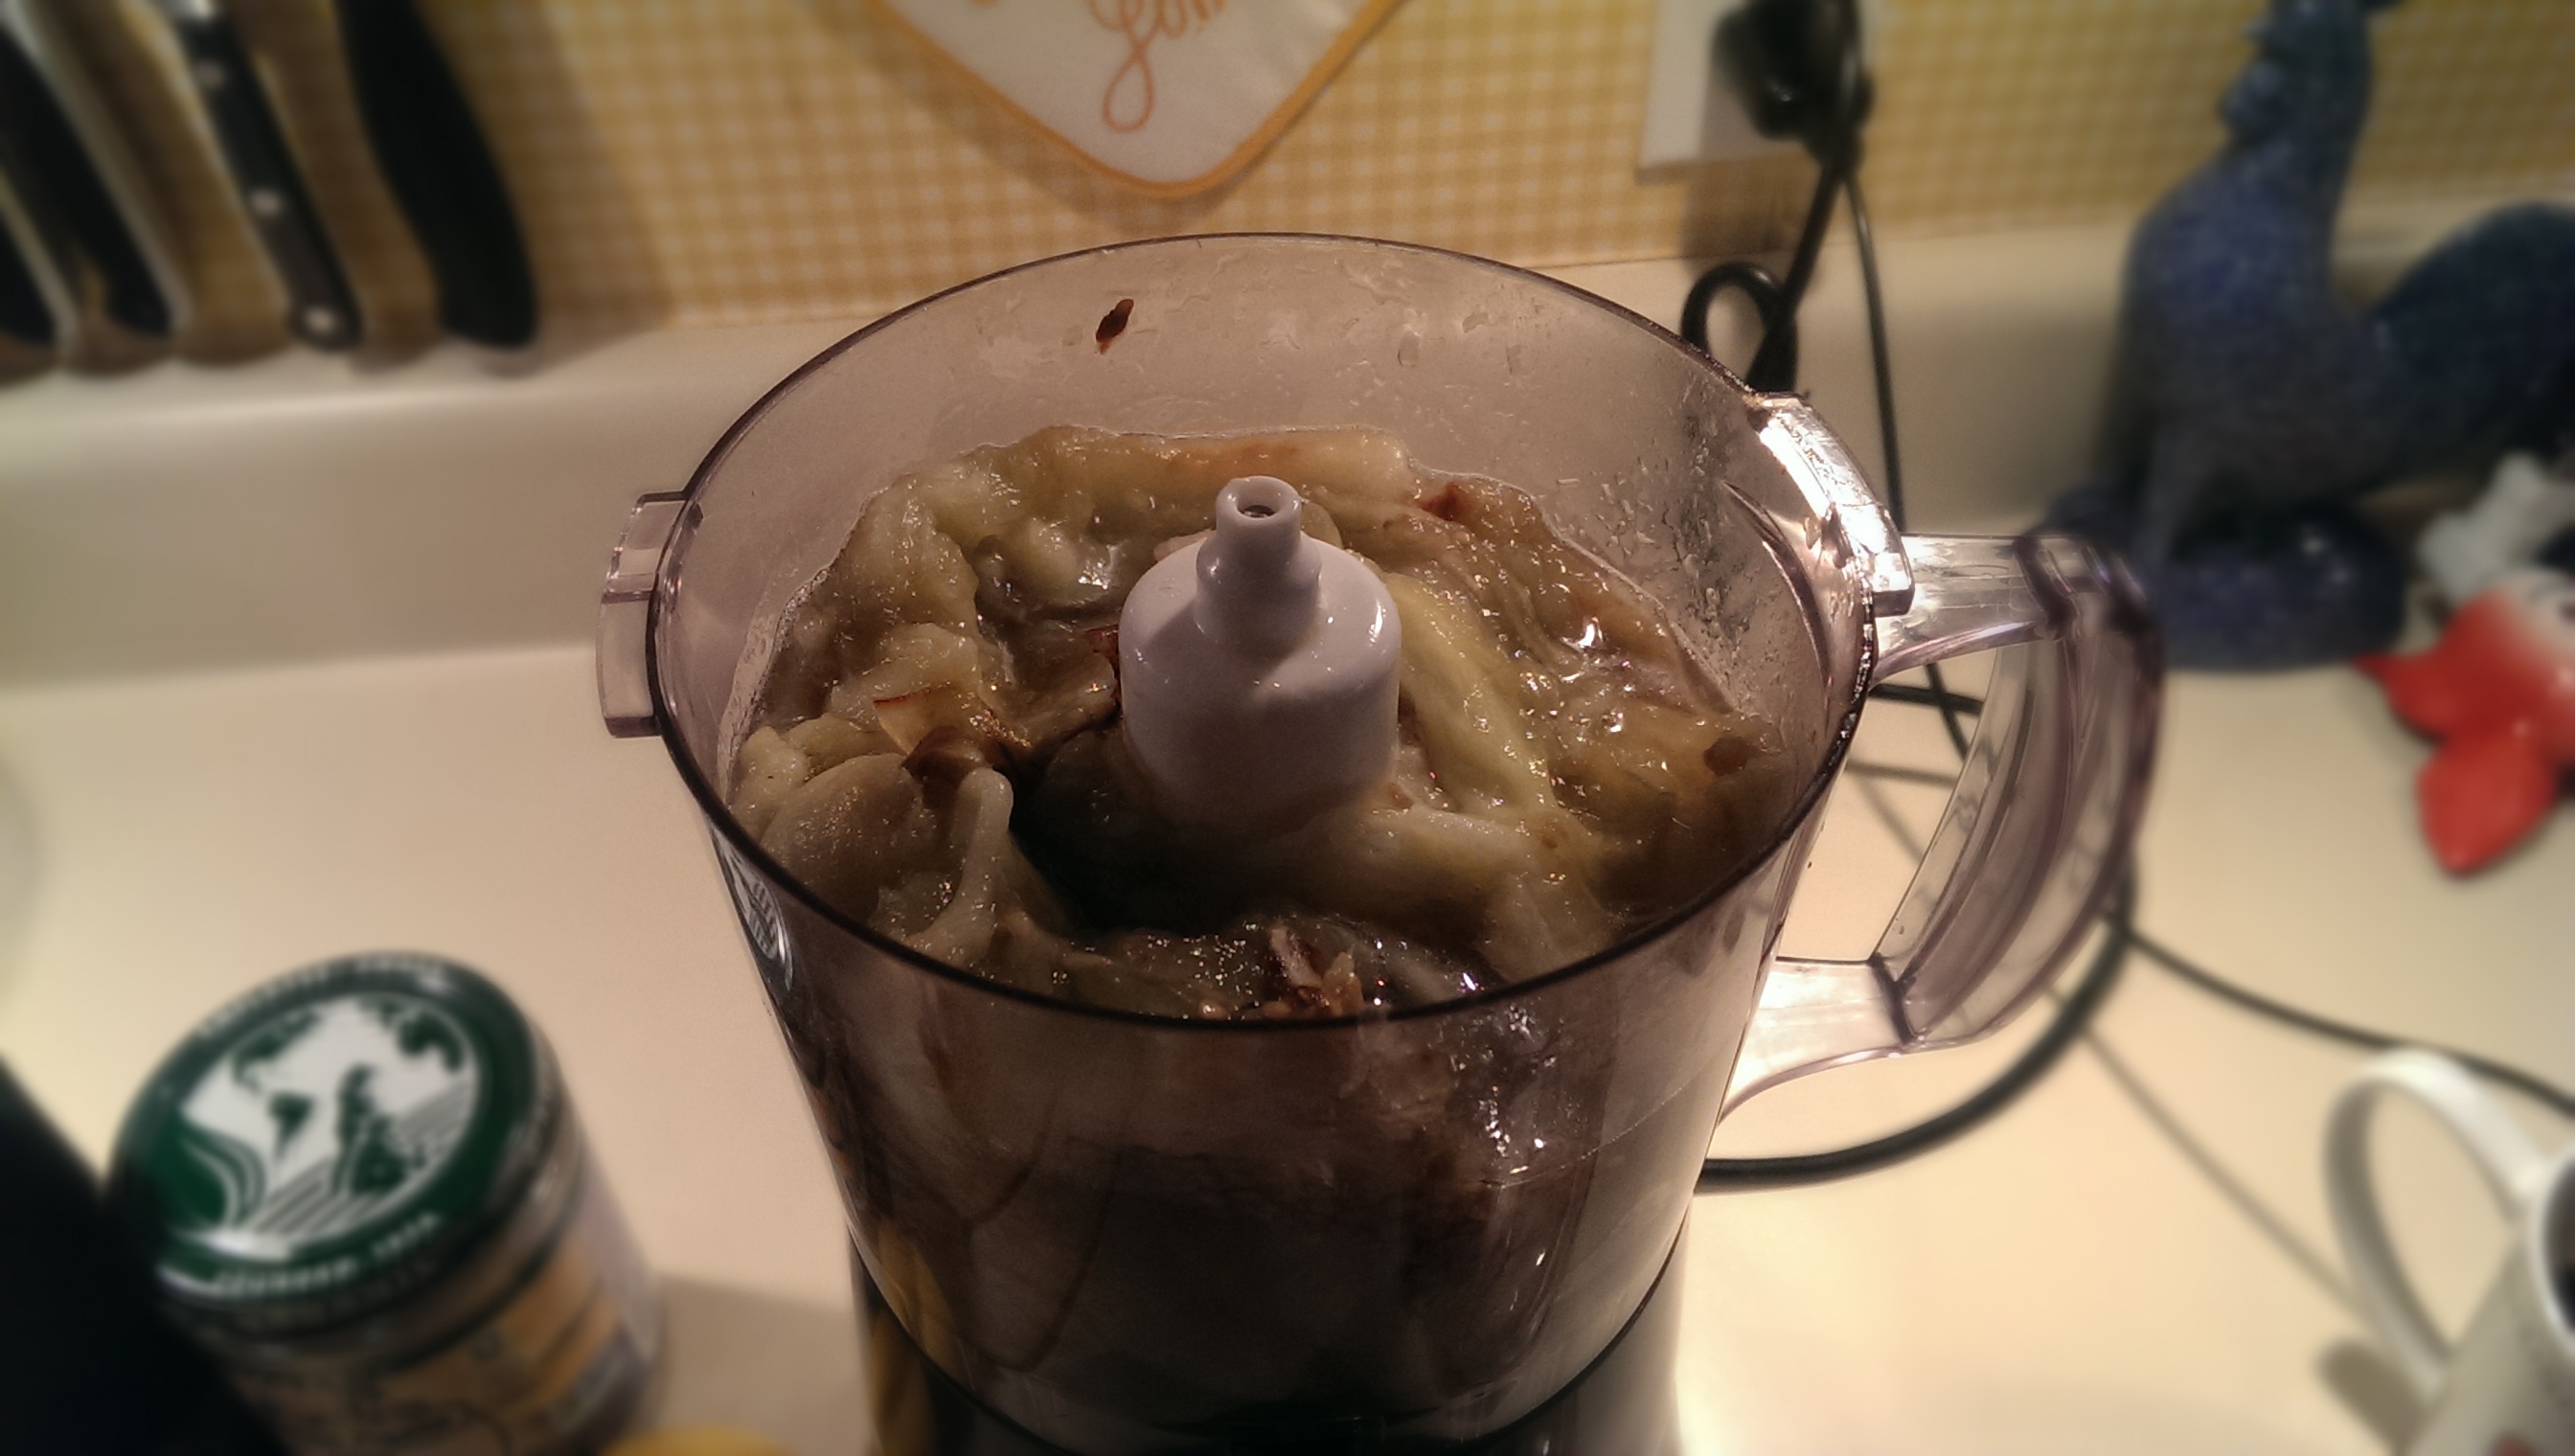
Hopefully the eggplant(s) are cooled off now. Scoop out the insides into the food processor with a spoon. Now, I’m not really one for measuring anything. I go with how I feel, so sometimes my measurements are estimates. Taste as you go, stick your finger in and taste, and then adjust accordingly. Salt is the biggest thing I have a hard time with and I often under salt my food. It’s better than putting too much in.
For a single eggplant batch, I usually add two cloves of garlic run through the press (even though it’s going to get blended, it helps to distribute better), a heaping tablespoon of tahini, 1/2 of a fresh squeezed lemon, 1-2 tablespoons of EVOO, 1/2-1 teaspoon of sea salt, and a few circles of the pepper grinder around the heap of ingredients waiting to be blended.
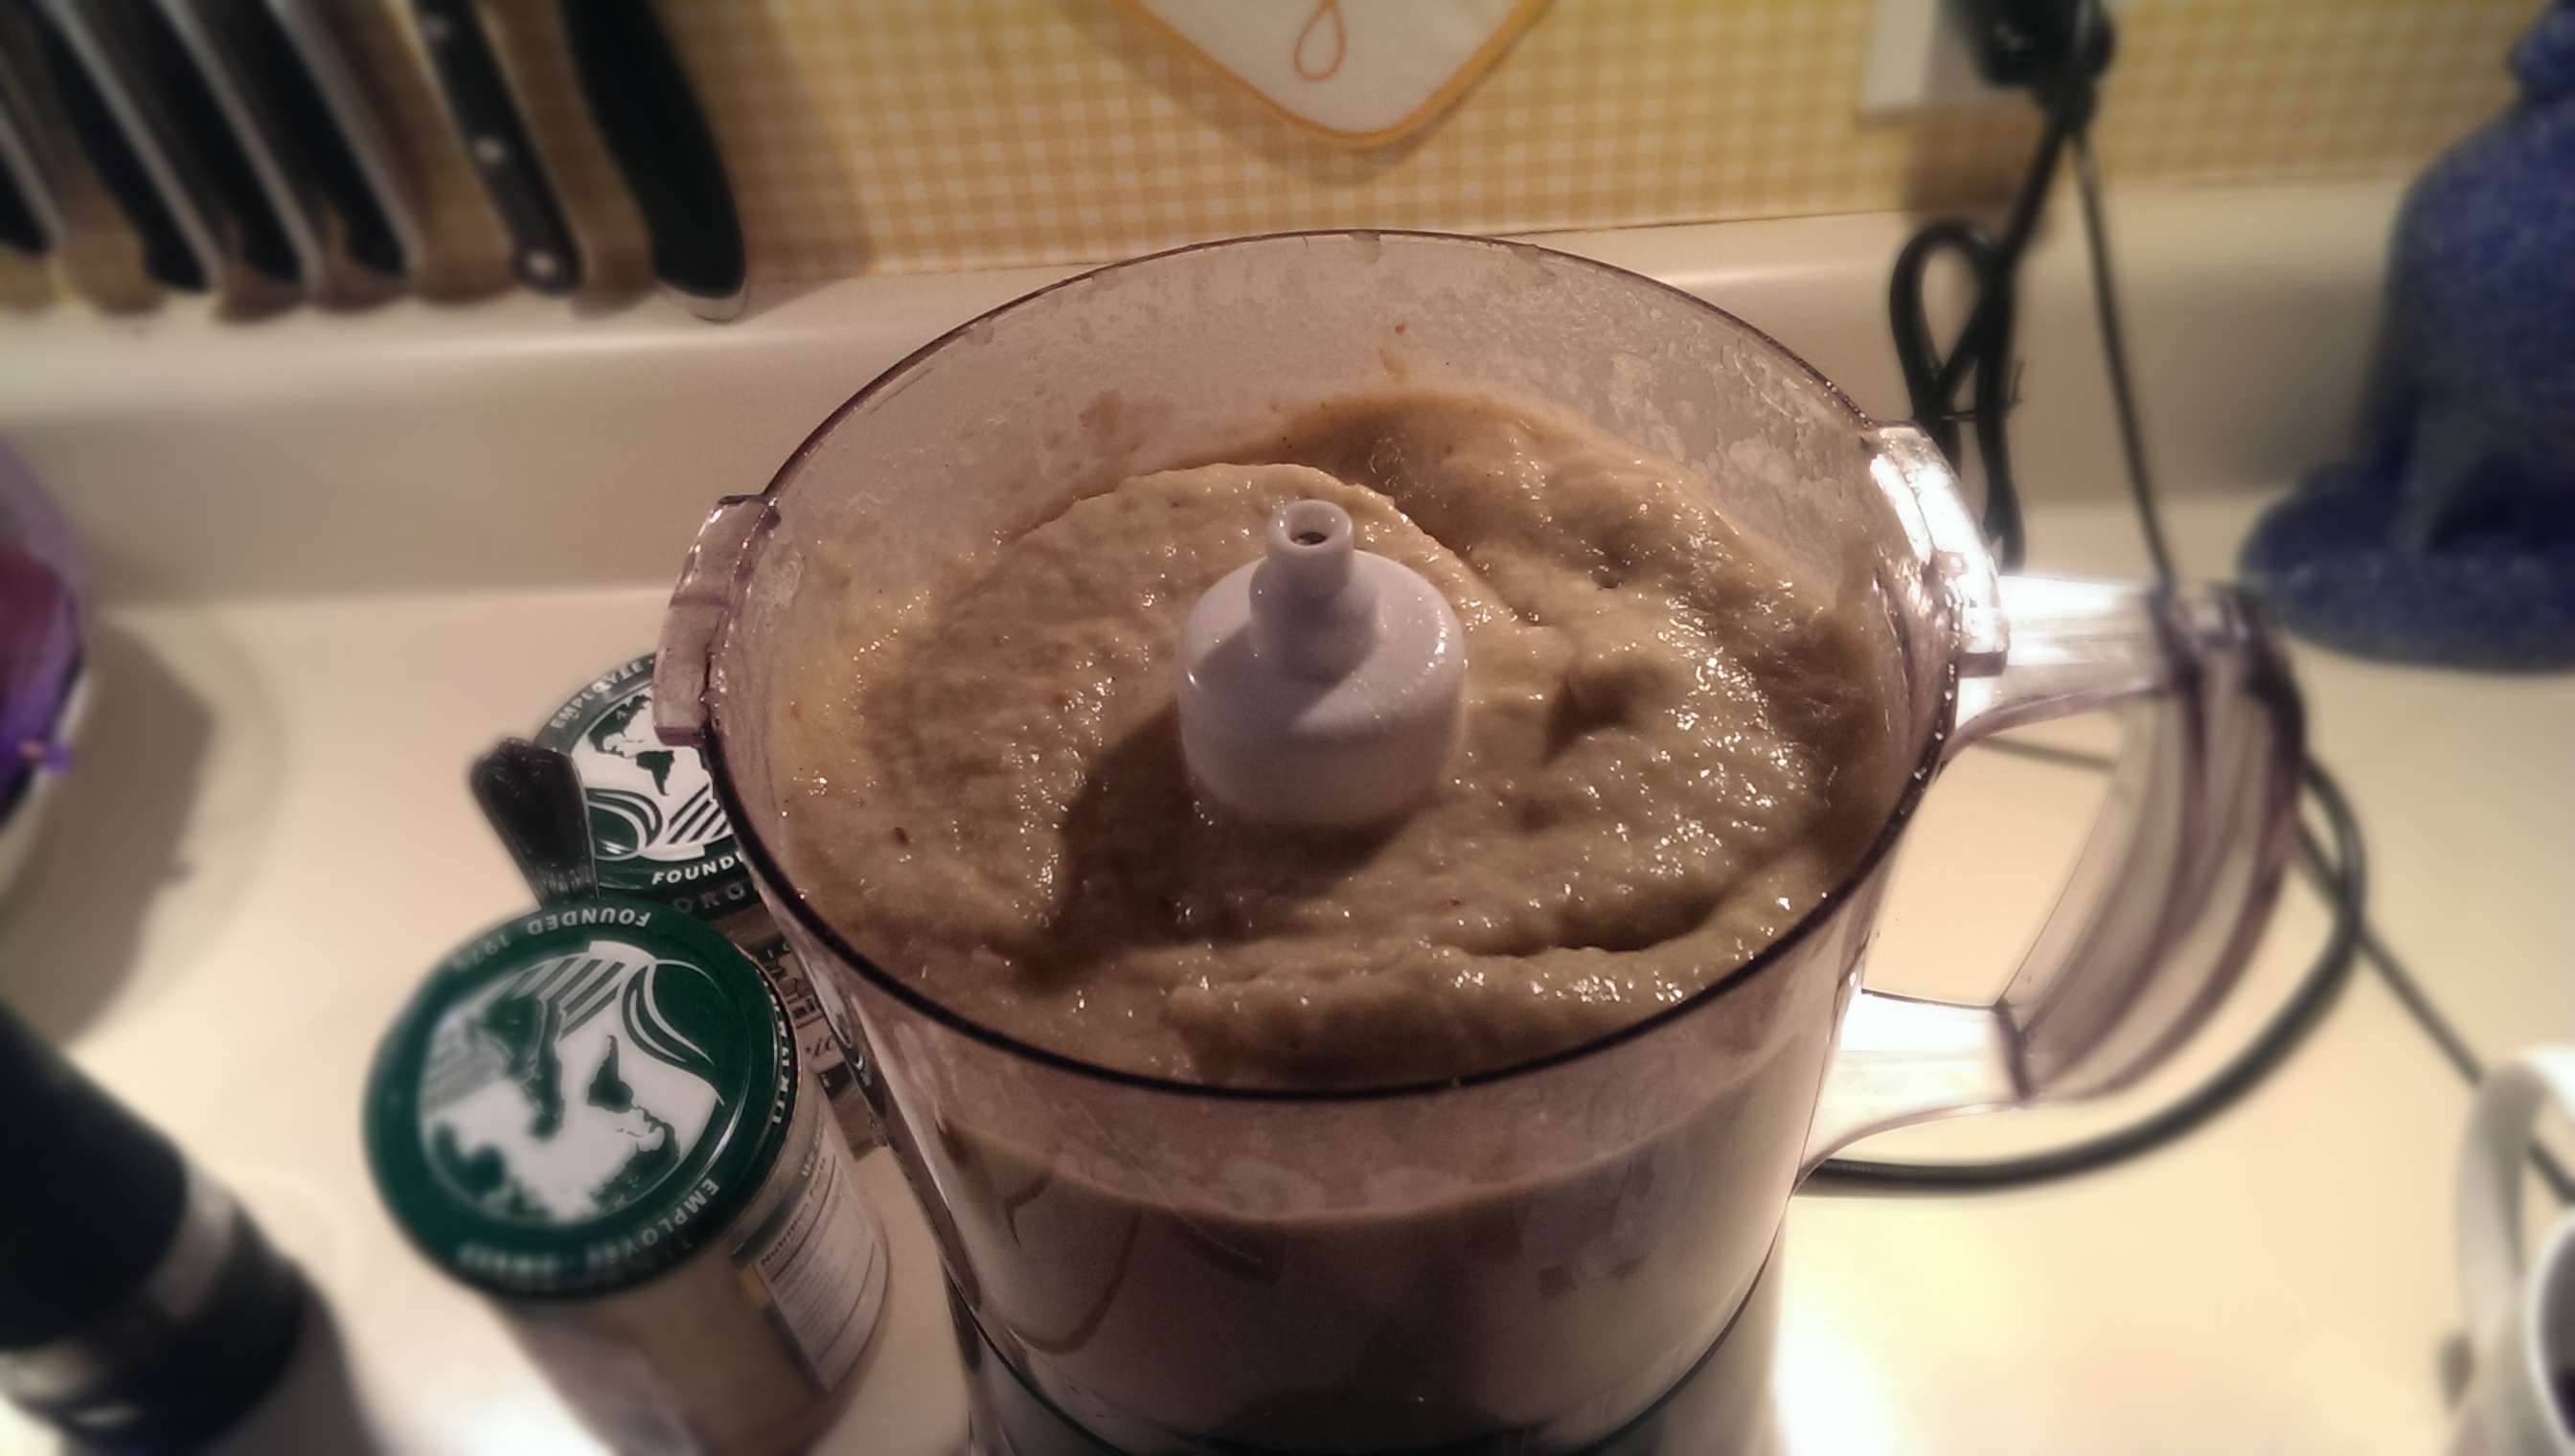
You don’t want to process it too much or it will get really runny. I like it to be thick enough to pick up a bunch on the end of a baby carrot, not having to scoop it up with a spoon because it slides off.
Hopefully you will get something that looks as beautiful as this when you are finished and have plated it…or put it in a plastic or glass container that can be sealed up. Store it in the refrigerator and enjoy for several days to come!
Remember, there are no preservatives, so enjoy it sooner rather than later. Clean and fresh food is best!
* This is the endearing term for my Moscow-born husband that will be regularly used when discussing anything to do with him in my posts.
The Half-Crunchy Mama’s Baba Ghanoush
These quantities are for a single batch. I usually double everything, so multiplying ingredients does not affect the taste as happens sometimes with recipes. For two or twenty, Baba away!
INGREDIENTS:
1 Eggplant (FYI, to pick a proper eggplant, it should feel heavy for its size and give a little when you squeeze it)
2 Cloves of garlic, minced or pressed
1 Tbsp tahini
1/2 Fresh-squeezed lemon
1 Tbsp extra-virgin olive oil, plus some for oiling the eggplant before roasting
1/2-1 tsp kosher or sea salt, to taste (I have used both at different times, so this one is your choice)
Several turns of fresh ground pepper, to taste
DIRECTIONS:
1. Preheat oven to 400°F.
2. Slice the eggplant in half lengthwise. Coat cut side with olive oil. Place cut-side down onto baking sheet and bake in oven for about 25 minutes. Total time could be anywhere between 20 and 30 minutes, depending upon size. The eggplant is ready to be removed when there is lots of give when pressing on the skin with your finger. Allow to cool.
3. Once cooled, scoop insides of eggplant into food processor bowl. Add the remaining ingredients and blend until combined and the preferred consistency has been reached. (Be careful not to over-process or it will be like soup.)
4. Store in airtight container for up to a week in the refrigerator. Enjoy!