The Half-Crunchy Mama

Trying to live a natural life with balance


2 Comments

Zasta with Tomatoes and Goat Cheese

Zasta with tomatoes and goat cheese | The Half-Crunchy Mama

My garden has been very productive this year. I’m quite proud of myself as each year I have learned something new that has led to this year’s success. I’m picking 1-3 dozen cherry tomatoes every day. I’ve had eggplants, zucchini, lots of jalapenos, and plenty of crookneck squash. This has led to some very delicious meals! And mostly free 🙂

Zasta with tomatoes and goat cheese | The Half-Crunchy Mama

This was two weeks ago…it’s even fuller now!

While I’m still waiting for cucumbers and bell peppers to emerge, I’m enjoying the literal fruits of my labor. Most of the time, I’m throwing a bunch of fresh veggies into my breakfast, but not the other night. Two large zucchini, a ton of cherry tomatoes, and a stalk of basil, all from the garden, were sitting on the counter calling to me. So I listened. And ate them up.

Zasta with tomatoes and goat cheese | The Half-Crunchy Mama

As a cheesemonger, nothing makes a meal better than adding cheese. In this case, it was goat cheese. I love the depth of flavor that goat cheese adds to dishes. The Russian and I ate the entire thing between the two of us. So fast, and of course my other two favorite dinner adjectives, cheap and easy, make this one a keeper and one worthy enough of blogging. After all, it’s been over 6 months since my last post! Obviously, life has gotten busy and with summer almost over here in Georgia, I’m ready to have time to start dedicating to this space. Can’t wait! Although it’s bittersweet…the increase of available time to dedicate comes with the fact that Sugar Bee is off to kindergarten in 2 1/2 short weeks. Time flies.

Before I get to the recipe details, short as they are, I need to give proper credit to the term “zasta” that I’m using. The daughter of friends of mine had the same thinking as me and didn’t care for the term “zoodles” so she came up with “zasta.” I love it and will forever refer to zucchini noodles as zasta. I hope you enjoy this meal as much as we did!


Zasta with tomatoes and goat cheese

Super fast and easy with very little cost, especially if you have a rockin’ garden this year, this vegetarian meal will be a keeper!
INGREDIENTS
  • 1-2 Tbsp extra-virgin olive oil
  • 1 shallot, finely diced
  • 2 cloves of garlic, minced
  • 2 dozen or more cherry tomatoes, halved
  • 1 roasted red pepper, diced small (jarred okay)
  • 2 zucchini, spiralized into noodles
  • 4 oz crumbled goat cheese
  • salt and pepper, to taste
  • Fresh basil, 1-2 Tbsp chopped
DIRECTIONS
  1. Heat EVOO in large skillet over medium heat. Add shallots and saute for 2-3 minutes. Add garlic and cook an additional minute or two until fragrant.
  2. Add tomatoes and cook 3 minutes or until skins start to wrinkle. Add red pepper and simmer 2 more minutes.
  3. Add zucchini, salt, pepper, and a bit more EVOO, tossing to coat evenly. Don’t cook too long or all the water will release from the zucchini. You want a little bit of juicy, saucy goodness, but not soup! (See last picture below. We loved the sauce!)
  4. Add almost all of the goat cheese (reserve 1-2 Tbsp for topping when serving) and stir to toss completely and melt the cheese.
  5. Divide between two plates and top with basil and remaining goat cheese. Serve immediately. Enjoy!
Zasta with tomatoes and goat cheese | The Half-Crunchy Mama

Sweet, saucy deliciousness


Leave a comment

Maple Spiced Pecans

This recipe has been such a hit, that I have decided to only make double batches from now on. If I bring them out while guests are over, I will end up with an empty container. But I love feeding those I love, especially when it’s something that is healthy and nutritious. The Russian and Sugar Bee alone could eat the whole batch, so I can’t fault my friends for loving these nuts.

This is so super easy; one bowl and a foil-lined pan means minimal cleanup. That makes me happy. These would be awesome in the fall and around the holidays because of the flavors, but my BFF’s mom had sent her several bags of pecans harvested from their grove (Gerry’s Pecan Grove) and she shared a few bags with me this spring. So I went to work messing with a recipe from the chia seed book I’ve mentioned in previous recipes (Lemon Chia Balls and Cinnamon and Spice Sweet Potato Chips). Now I’m buying pecans all the time from Aldi just so I can keep up with our habit. I will be emailing the grove for more soon and see if I can get set up with a regular shipment. I’m thinking these would make nice Christmas presents this year. 🙂

Maple Spiced Pecans | The Half-Crunchy MamaIn a large bowl, whisk together maple syrup, cinnamon, nutmeg, cloves, and sea salt. Then stir in pecans, chia seeds, and chopped cranberries until everything is well coated. Maple Spiced Pecans | The Half-Crunchy Mama Transfer to a baking sheet lined with foil and spread out in a single layer. Bake for 15 minutes, stirring every 5 minutes.Maple Spiced Pecans | The Half-Crunchy MamaOnce they are done in the oven, transfer them to waxed paper and let cool completely (if you can).Maple Spiced Pecans | The Half-Crunchy MamaStore in an airtight container…if they are not all eaten that day.


Maple Spiced Pecans

The health benefits from the pecans, cranberries, and chia seeds make this snack a great choice. Its sweet crunch is addicting and I have yet to find someone who doesn’t fall in love. This can easily be split in half if you are making this snack for one….then you would use 1/4 cup plus 2 Tablespoons of maple syrup.

INGREDIENTS
  • 3/4 cup pure maple syrup
  • 1+ teaspoon ground cinnamon
  • A few shakes of ground nutmeg
  • A good shake of ground clove
  • 1/4 teaspoon kosher sea salt
  • 4 cups pecan halves (raw are best)
  • 1 cup dried cranberries, chopped
  • 1/2 cup chia seeds
DIRECTIONS
  1. Preheat oven to 325°F.
  2. In large bowl, whisk together the maple syrup with the spices and salt. Stir in the pecans, cranberries, and chia seeds, tossing until well coated.
  3. Lay the mixture out in a single layer on a foil-lined baking sheet. Bake for 15 minutes, stirring every 5 minutes.
  4. Transfer the mixture to a large piece of waxed paper and allow to cool completely.
  5. Store in an airtight container in a cool place and enjoy while they last!


Leave a comment

Garlic and Herb “Spaghetti”

Garlic and Herb "Spaghetti" | The Half-Crunchy MamaIf you still have not tried spaghetti squash, whether it’s because you are intimidated by the thought of cooking a food that is new to you or you think it’s too healthy or have an aversion to food that is good for you, stop right now and go get one at the store. It is so easy to cook up spaghetti squash and use it in place of pasta for any dish. I first started using it for my Eggplant Ragout several years ago. As it turns out, it’s a good thing that I love using it in my meals because it has been a blessing with Sugar Bee and her wheat issues. Squash is an even better alternative than any gluten-free pasta that I could give her. When she was one, she would double-fist feed herself with my ragout over “spaghetti” and was the talk of her school. I have even made a quiche using spaghetti squash as a crust. It’s just awesome. And so easy.

Slice the squash in half, being very careful as I’m always certain that this time will be the time I lose a finger doing it, and scoop the seeds and rough, stringy parts out. Coat the insides with extra-virgin olive oil and place cut-side down onto a baking sheet. Bake in a preheated oven at 450ºF for about 30 minutes. It is done when the skin gives as you press down on it. I like mine to be a little more roasted like in this picture, but be careful not to cook it too long or it will be more like spaghetti mush instead of spaghetti strands.Garlic and Herb "Spaghetti" | The Half-Crunchy MamaWhile that’s in the oven, prep your onion and herbs. Chop one small onion into fairly small dice. I used the herbs that I had on hand, but feel free to experiment with other flavors and what you have in the house or garden. I chopped one tablespoon of fresh thyme, and two tablespoons each of fresh parsley and basil. I also included five cloves of minced garlic, but I would probably push it to at least six because as I’ve said before, we LOVE garlic here.Garlic and Herb "Spaghetti" | The Half-Crunchy MamaWhen the spaghetti squash is finished and cooled enough to handle, strip out the strands with a fork. It should look something like this. Garlic and Herb "Spaghetti" | The Half-Crunchy MamaMelt about two tablespoons of Kerrygold butter over medium heat. Add the onions and cook for about 5 minutes, until softened. Add the garlic and stir, cooking about a minute. Throw in the “spaghetti” and fresh herbs, and add some sea salt and fresh ground pepper, stirring well to combine. I added some freshly grated Parmesan cheese since I’m allowed a bit of hard cheese now and then. Butter and Herb "Spaghetti" | The Half-Crunchy MamaI served this as my side dish with a delicious salmon burger from Costco. Wild-caught salmon and very few other ingredients (some oil and spices), without any wheat to hold them together. It was such an easy meal to throw together. And nutritious!Garlic and Herb "Spaghetti" | The Half-Crunchy Mama(The Russian doesn’t mind his food touching, so this one was his)


 Garlic and Herb “Spaghetti”

Spaghetti squash is a great alternative to pasta for any recipe and can also be a side dish or meal on its own. Depending on what it’s served with, I usually get 3-4 servings out of a medium squash. This is a flavorful way to serve it up and you can add almost anything you want to this basic recipe.

INGREDIENTS
  • 1 medium-large spaghetti squash
  • 1-2 Tbsp extra-virgin olive oil, however much is needed to coat the inside of the cut squash
  • 2 Tbsp Kerrygold butter, ghee, or oil of your choice
  • 1 small onion, diced small
  • 4-6 cloves of garlic, minced (to your preference)
  • 1 Tbsp fresh thyme, chopped
  • 2 Tbsp fresh basil, chopped
  • 2 Tbsp fresh parsley, chopped
  • Sea salt and fresh ground pepper
DIRECTIONS
  1. Preheat oven to 375ºF
  2. Cut the spaghetti squash in half lengthwise. Scoop out and discard the seeds and stringy threads.
  3. Coat the insides and cut edges of the squash with EVOO. Place the halves cut side down on a baking sheet and bake for about 30 minutes. Squash is done when skin gives from a poke with your finger. Turn over squash halves and set aside to cool until able to handle.
  4. Melt butter in skillet over medium heat. Add onions and cook 5 minutes until soft.
  5. Meanwhile, pull spaghetti strands from squash with a fork, pulling the fork through the flesh lengthwise from one end to the other. (Use a potholder to hold the squash if still too warm to handle.)
  6. Add garlic and stir, cooking until fragrant, about a minute.
  7. Toss squash and the fresh herbs in the pan with the onions and garlic, mixing well to combine.
  8. Add salt and pepper to taste. Enjoy!


Leave a comment

Southwest Black Bean Soup

Southwest Black Bean Soup | The Half-Crunchy Mama

It’s that time of year when all I want is warm soup. Even if it’s not that cold in Georgia, it’s still winter. And the temperature swing from midday to midnight can easily be 30 degrees. I’m really trying to lower our food budget, so soups are also budget-friendly and you end up with several meals worth when it’s done. Sugar Bee, my three year old, loves beans, especially black beans, so she’ll pretty much eat any soup now that has beans. I have even been known to add some beans to my chicken soup for her eating enjoyment. Here is another winner for her.

This one is also a time-saver. I usually make bean soups in the crock pot since I try to cook my own beans as much as possible. Not only is it a lot cheaper to soak and cook dried beans yourself (and you get to control the amount of salt), it also helps make them a less musical fruit if they are freshly cooked. Freshly soaking the beans loosens the skins, and releases the gas causing agent (oligosaccherides). When you dump that gassy water from the overnight soak and cook them with fresh, clean water, you end up with less gas. (Here’s a great post about how to cook and soak your own beans.) That aside, because I used canned beans for this recipe, I can see being able to throw this together for a last-minute dinner on a weeknight. Cheap, fast, and easy…just how I like my meals.


 Southwest Black Bean Soup

Cheap, fast, and easy. That’s how I like my meals. Soups are a great way to get more out of your food budget. Bean soups are even more thrifty. This recipe uses canned beans, but you can easily swap the cans for a pound of presoaked beans, throw everything in the slow cooker, and set it for 8 hours on low. Either way, this is a perfect meal for a winter’s night.

INGREDIENTS
  • 2 Tbsp oil (I used expeller-pressed coconut oil)
  • 2 onions, diced
  • 6 cloves of garlic, minced
  • 1 generous Tablespoon chili powder
  • 1 generous Tablespoon cumin
  • Four 15 oz cans black beans
  • 32 oz broth (I used vegetable broth)
  • 2 large roasted red peppers, chopped
  • 2 Tablespoons tomato paste
  • 2 bay leaves
  • Fresh ground black pepper, to taste
  • Juice of one lime
  • Fresh cilantro, chopped
DIRECTIONS
  1. Heat oil in large stock pot over medium heat. Add onions and cook for 5-7 minutes, until softened, but not browned. Add garlic and cook until fragrant, about a minute.
  2. Add cumin, chili powder, and beans, stirring to coat everything in spices.
  3. Add broth, peppers, tomato paste, bay leaves, and pepper, and bring to a boil.
  4. Reduce heat, cover, and simmer for 25 minutes. Add fresh lime juice and stir.
  5. Spoon into bowls and garnish with fresh cilantro.

Southwest Black Bean Soup | The Half-Crunchy Mama

(Optional: Add spoon of sour cream like The Russian did)


2 Comments

Lemon Chia Balls

Lemon Chia Balls | The Half-Crunchy MamaI have already shared one of the recipes that I regularly make from from this book, the Cinnamon and Spice Sweet Potato Chips, but this one is even more popular. I rambled on a bit in that post about the health benefits for chia seeds and why they have become such a thing these days. I don’t like to repeat myself, so please go check that post out for some great information about this great little superfood.

As with all the recipes that I use from other people, there are a few tweaks here and there. The author calls for raw nuts, but that’s just not usually in my budget. I will tell you that regular ones from Trader Joe’s, Costco, or wherever will work fine. Ideally, you want the raw, so if that’s in your budget, go for it!

A great deal that I have been able to get at Costco is on pitted dates. A ginormous three-pound container ended up being about half the cost after doing the math, depending on where you shop. If you see this at your local Costco, pick it up! They were gone last time I went, but I was able to get a huge bag of Kirkland pitted dates for a steal, too. If you are cooking and baking with dates a lot, this is the way to go. Not all dates are equal, and I have only bought and used these or Medjool, so I would steer away from regular “pitted dates” from the store.Lemon Chia Balls | The Half-Crunchy Mama

Why dates? Dates add the sweetness to baked (or no-bake goods in this case) without added sugar. The simple sugars from fruits are less likely to exacerbate your inflammation, acne, etc, and as dates are also high in fiber, they are digested slower than typical sugars to make it easier on your blood sugar. Medjool and other quality dates are also a good source of copper, potassium, magnesium, and manganese that many people are not getting in their diet anymore. Add the benefits of the dates with the protein and healthy fats from the nuts and chia seeds, and this is a satisfying snack for when you want something sweet.

This recipe is so quick, the only annoying part is making the balls. They are so sticky {get your mind out of the gutter} that it makes it a real pain, but they are SO worth it in the end. I promise. Just put everything into a heavy-duty food processor (I specify that because I’m fairly certain that this is what broke my smaller one 😦 ) and once it looks like this, it’s time to make the balls.

Lemon Chia Balls | The Half-Crunchy Mama

Take a heaping tablespoon of the mixture to make each ball. It’s more like smooshing together instead of rolling into balls, and I usually have to rinse my hands a few times during this stage to unstick my hands. As you make each one, roll them in finely shredded coconut to coat them entirely. Don’t use regular shredded coconut as it doesn’t stick well to the balls. I know this from experience. They were still delicious, but they are so much better with a finer shred of dried coconut.
Lemon Chia Balls | The Half-Crunchy Mama

And just look how pretty they are! Everyone loves them, even Sugar Bee, and no one can have just one! They are also trainer approved as I brought two to the gym one day. Try this and see for yourself!

Lemon Chia Balls | The Half-Crunchy Mama


Lemon Chia Balls

Combining the benefits of fiber- and mineral-rich dates with protein and healthy fats from the nuts and chia seeds, you will get a satisfying snack that is perfect for when you want something sweet. This one is loved by everyone and yields about 20 balls.

INGREDIENTS

  • 1.5 cups pitted dates
  • 1 cup almonds (raw, if possible)
  • 1/2 cup cashews (raw, if possible)
  • 2 Tbsp chia seeds
  • 1-3 Tbsp fresh squeezed lemon juice (I have found more is better, especially if the nuts are not raw)
  • 1-2 tsp lemon zest
  • 3+ Tbsp of finely shredded dried coconut

DIRECTIONS

  1. Combine all ingredients except for coconut in a food processor. Pulse into a coarse and slightly sticky mixture. If too dry, add a bit more lemon juice and process again. If too watery, add a few more nuts and process. (It should stick together when you press it between your fingers.)
  2. Roll about a tablespoon at a time into a ball.
  3. Coat it in coconut.
  4. Store in an airtight container. Enjoy!


2 Comments

What’s the best thing you can do for your liver?

EAT LIVER, of course! If you are like me and have a sluggish liver that ends up causing all sorts of issues from hormonal imbalances to very stubborn belly fat, it might be time for you to give this organ meat a try. The initial response from most people is, “YUCK,” but I have realized that such a response is usually because they have never actually tried it.2014-12-21 18.52.52

I am fully aware that I am way more adventurous than a lot of people when it comes to trying new foods. In fact, I pretty much live for it. Traveling to new places means I get to experience new foods and dishes that I have never been exposed to. Kind of like my obsession with drinking at least one local beer for any city/state that I’m visiting, even though I can hardly tolerate the wheat in beer anymore {sigh}. If you want me to try something that I might not “want” to eat if i know what it is first, just don’t tell me. I prefer to try it first and then decide how I feel about it. Sweetbreads are one of my favorite things to order at a classy restaurant…also an organ that acts up on me occasionally. I’m so glad that my father encouraged me to order it for the first time a few years ago and that he didn’t tell me what it was until after my second bite when I proclaimed how delicious it was. Once I knew that I loved them, it didn’t matter at all.

Diets today are a hot mess, especially in this country. We lack so many things in our fast-food, over-processed, carbohydrate-laden lives. Similar to my opinion about the instant gratification we obsess over with medications, it seems like we are always looking for a quick meal. Quick can equal healthy, but most often it results in a meal that serves our bodies up very little actual nutrition. Everyone would benefit from more greens in their life, and I don’t mean lettuce. Real leafy greens, like kale, chard, and spinach. Many people are mineral deficient and have no idea, resulting in a myriad of stresses in their body that manifest in ways that conventional medicine often lets go undiagnosed. We are also vitamin deficient, and not in a way that taking some store-bought, garbage vitamin is going to fix (although there are now some of great products in places like The Vitamin Shoppe). Not only do we need to supplement our bodies with whole food supplements, we need to eat FOOD.

Before the Western diet turned into what it is today, people never wasted any part of the animal. Organs, bones and marrow, and of course every single piece of meat itself were used to stretch the budget. The Depression-era folks still used everything despite the shift in how Americans ate. Gram would make chicken livers (I admit at first I thought, “How gross!”…until I tried them) and her soups were made with broth from bones. These days everyone talks about bone broth and its healing properties and health benefits. This seems “new” to us, but I’m sure previous generations would laugh at this. There were no cans and boxes of broth back then, everyone made broth. And there were not all these GI problems, allergies, psychological disorders, etc., that we are now seeing connected to gut health. Bone broth repairs the gut. This is just one small reason why I can’t help but believe that it is our dietary changes that have caused so much dis-ease to surface and run rampantly throughout our population. Perhaps it’s not that these diseases never existed, but maybe that we have brought them all to the surface with our poor diet and lifestyle. They existed, but were rare. Now they are the norm.

Throughout my journey, my liver issues would rise to the top, and my liver still appears with regularity when having a nutrition check at my naturopath’s office. It’s a powerhouse organ that regulates so much of our bodies, playing a major role in metabolism and having a number of functions in the body, including glycogen storage, storing vitamins (especially B12 and A) and minerals (including iron and zinc), decomposition of red blood cells, hormone production, detoxification, and breaking down insulin, hemoglobin and other hormones. If your liver is sluggish, your body can’t function properly. Without a healthy liver, a person cannot survive. No one can live without one, unlike some other glands that people get surgically removed. Maybe it’s time to pay attention to it.

Some of the supplements that I have taken in the past to help support, clean, or heal my liver have been pretty pricey as they also often include desiccated liver pieces. If I’m having a bad flare of one thing or another, I might need more than one bottle over the course of a few weeks. I was looking to cut some of the cost of my supplement intake, so I discussed with Doc about what foods I could make sure that I’m regularly eating (or avoiding) in order to help my body out even more naturally than I already was. It was amazing how much adding liver into my diet became such a game changer. Not only was my supplement list getting smaller from visit to visit, everything was improving. I hadn’t seen my body respond like this since I first did the Liver Enhancement Diet. WIN!

As it turns out, The Russian is very good at cooking liver. He has made me dishes with both beef and chicken liver, but chicken liver is a lot easier to find and it’s also cheaper. He has made two dishes that taste just like Gram’s and I was in heaven. He has experimented with a few other ways, but his new favorite is making pate. This is the one I’m going to share first. It’s the easiest way to get some in your body since you can spread it on bread or crackers, dip raw veggies in it, or do whatever you want, and it’s so creamy. It is so much cheaper to make your own than to buy the premade stuff in the store and this has no preservatives or additives. It’s always best to try and make your own food so that you can control exactly what is in it. Here’s The Russian’s pate for you to try out. You can use either beef or chicken livers, but this particular post is about the chicken. And it’s delicious!

(He made this double batch for me last night as I have not been feeling as good the last few weeks as I had been for the past few months. We hadn’t been eating liver, so here’s hoping I feel back to my old self by the end of the day! For more reading about liver, google it and also check out these two links: Liver: nature’s most potent superfood and Health Benefits of Eating Organ Meats)

Heat about 2-3 Tablespoons of EVOO (or whatever oil/lard/ghee) in a large skillet over medium-high heat. Add two medium onions, halved and sliced, along with about a cup of shredded carrots. Cook for 7-9 minutes, stirring very frequently. You want them to soften and caramelize, but not get super brown or burn.

2014-12-21 19.21.33While the onions are cooking (or before if you’re like me and prep everything first), trim up the livers. According to The Russian, beef livers require a little more cleanup, but what’s important with the organ meat is to remove the ducts that connect the tissue. (Yes, it’s even gross for me to type that. There is a reason that The Russian is the only one that cooks the livers in our house!) You also will want to cut up any larger pieces so that they are around the same size for even cooking. That is a good habit to get into in case you want to try out any future liver recipes that I will post. Those recipes are not as forgiving with overcooking these delicate pieces of meat. (Note that you should be buying organic chicken liver whenever possible and always grass-fed beef liver.)

2014-12-21 19.08.36

Once the onions and carrots are finished, add the livers and cook until outsides are no longer shiny. Think about when you are cooking meat and you are browning the outside or making ground beef no longer pink. Same concept, just look for no more shiny parts.2014-12-21 19.25.40

 Next, add the spices and a cup of water. The spices consist of crushed bay leaves, coarse ground pepper, and some kosher salt. Stir and bring the mixture to a boil. Then reduce heat to low, cover, and simmer for 20 minutes. Once the 20 minutes is up, remove the lid and cook an additional 5 minutes over medium heat to let some of the liquid evaporate and allow the sauce to thicken.

2014-12-21 20.01.51

Remove from heat and let it cool to room temperature. Once cooled, pour the mixture into a food processor. Add about 3 Tablespoons of sliced, room temperature butter/ghee (we use Kerrygold) and blend until smooth.2014-12-21 21.13.39

Store in an airtight container in the refrigerator, but eat it within a week. Remember, there are no preservatives!


Chicken Liver Pate

You can use this recipe with any kind of animal liver; beef, goose, or chicken. We purchase chicken most often as it is easier to find and more economical. You can easily cut this in half or double it. The yield from this recipe is about three cups of pate. Make your liver happy!

INGREDIENTS

  • 2-3 Tbsp extra virgin olive oil (or oil of choice)
  • 2 medium onions, halved and sliced
  • 1 cup of shredded carrots or 1 – 2 carrots, peeled and sliced
  • 2 lbs of organic chicken livers (2-16 oz containers), ducts removed and large pieces divided
  • 1 tsp crushed bay leaves (or one bay leaf)
  • 1/4 – 1/2 tsp coarse ground fresh pepper (to taste)
  • 1/2 – 1 tsp kosher salt (to taste)
  • 1 cup water
  • 3 Tbsp Kerrygold butter (or ghee)

DIRECTIONS

  1. Heat oil in a large skillet over medium-high heat. Add onions and carrots and saute until soft and slightly caramelized, but not browned, about 7-10 minutes.
  2. Add livers to vegetables and cook until no longer red and shiny.
  3. Add the bay leaves, salt, pepper, and water, stirring to combine. Bring to a boil.
  4. Reduce heat to low, cover, and simmer for 20 minutes.
  5. Remove lid and raise heat up to medium, cooking for an additional 5 minutes until some of the liquid evaporates and the remaining liquid thickens.
  6. Remove from heat and let cool to room temperature.
  7. Once cooled, place mixture in food processor. Add butter and blend until smooth.
  8. Place in airtight container and keep refrigerated for up to a week. Enjoy!


Leave a comment

A Twist on Gram’s Tuna Salad

A twist on Gram's Tuna Salad | The Half-Crunchy Mama

Me and Gram in her kitchen – circa 2003

Gram was a Depression-era kid. She knew how to make the best and most delicious things out of anything and wasted nothing. Her soups, egg sammies, applesauce, chicken paprikash (BEST. EVER.), and her tuna salad are the first ones to come to mind. As I mentioned in the post for my Smoked Salmon and Goat Cheese Frittata, I often feel like she’s with me in the kitchen. As the anniversary of her passing is coming up (has it really been 5 years?!), I thought this would be a good time to share my Gram-inspired tuna salad recipe. She always made the best tuna salad and I was privy to a few of her “secret” ingredients. Through the years I have made some of my own twists to the recipe, but I always think of her when I’m making a batch. The Russian loves when I make it, often asking for it, so I usually make 2-3 cans at a time. It still doesn’t last and I’m lucky to see half of it. But that is what makes me happy…content bellies full of my food.

A word about the tuna I use. I no longer splurge on the white albacore filet kind. What I have learned is that you should look for the cheap stuff that is made from baby tuna. They have had less exposure to the environment, so the theory is that they will have less toxic things in them, like mercury(1),(2). So I get the huge pack of cans from Costco of regular old Chicken of the Sea chunk light in water. Or whatever is on sale at the supermarket. It’s best to pick up tuna in water in order to retain most of the naturally occurring omega-3s in the fish. When it’s packed in oil, the omegas can leach out into the oil (oil to oil) and you end up pouring this down the drain, but when packed in water, the omega oils stay with the fish – oil and water don’t mix.

On to the recipe. I vary this off and on based on my mood, but this is a good base recipe. Leave out anything you don’t like and add in things that you think would make it better. I love to play around with canned tuna and salmon, switching things up now and then to play around. Here are the basics: tuna, celery, onion, mayo, Dijon, horseradish, parsley, garlic powder, salt and pepper. Gram used to add pickle juice (one of the “secrets”) and I do the same if I have some in the fridge. The veggies are the key. Gram always used fresh vegetables in everything and what a difference they make to the flavor. In a pinch, I have added celery flakes and dried onion pieces from the spice cabinet along with some pickle relish, but fresh is always best.

A twist on Gram's Tuna Salad | The Half-Crunchy Mama

Celery is one of those things that I only buy organic. Because of this, it doesn’t always last as long and it sometimes looks a little uglier than the rest at the store. If there are some ugly spots, I just shave the celery with a peeler and then it’s perfect and ready to use.

A twist on Gram's Tuna Salad | The Half-Crunchy Mama

 Take the cans, drain them, and put them in a large bowl to flake with a fork.

A twist on Gram's Tuna Salad | The Half-Crunchy Mama

I LOVE my mini chopper that I have shared with you in the past. This cuts down chopping time and makes the celery and onions come out so finely diced that they blend perfectly with the tuna. Chop up 2-3 stalks of chopped celery (don’t forget the leaves as they add lots of extra flavor!) and a good half of a onion. Add them to the tuna and combine. I like to combine a few things at a time because I feel that it mixes better.

A twist on Gram's Tuna Salad | The Half-Crunchy Mama

Then add a few tablespoons of chopped parsley. Stir again.

A twist on Gram's Tuna Salad | The Half-Crunchy Mama

For three cans, I add about 2-3 teaspoons of horseradish, 2-3 teaspoons of Dijon mustard, and several tablespoons of mayo…maybe 4? I’m sorry, but in case you haven’t learned by now, I am not much of a slave to measurements while I’m cooking. This is why I don’t care much for baking. It’s too rigid and I can’t be free to play. And this picture was the first round of condiment additions…I pretty much doubled what you see here after tasting. Then came the garlic powder, salt and pepper, also done to taste. I would guess a good 1+ teaspoon of each. Taste and find what works for you.

A twist on Gram's Tuna Salad | The Half-Crunchy Mama

So many ways to eat tuna salad. You can put it on a salad of greens, in a wrap, on bread with tomato and cheese and then broiled…mmm…I love tuna melts. Or try one of the following options. I ended up putting a slice of cheese on this oversized tuna cracker because cheese is my downfall.

A twist on Gram's Tuna Salad | The Half-Crunchy Mama

Served on one of Gram’s plates. I inherited the set 🙂

The next day, I hollowed out this amazing tomato form the market, filled it with the tuna salad, put a slice of cheddar on top, and baked it in my toaster oven, finishing it off with a quick broil at the end to brown the cheese a little. Yum!

A twist on Gram's Tuna Salad | The Half-Crunchy Mama

Another serving option


 A Twist on Gram’s Tuna Salad

Following in the footsteps of my Gram, I whip up some pretty darn good tuna salads. Here is one of my many versions that I wanted to share. So many variations and different ways to eat tuna. This recipe is for three cans, but you can easily cut the quantities if you are only making one or two cans. I hope you like it!

INGREDIENTS

  • Three cans of chunk light tuna in water, drained and flaked
  • 2-3 stalks of finely chopped celery, including leaves
  • Generous half of a sweet onion, finely chopped
  • 2 Tbsp chopped fresh parsley
  • 2-3 tsp of horseradish
  • 2-3 tsp of Dijon mustard
  • 4-5 Tbsp of mayonnaise
  • 1+ teaspoon garlic powder
  • Salt and fresh ground pepper to taste

DIRECTIONS

  1. In a large bowl, combine flaked tuna with celery and onion. Then add chopped parsley and stir to combine.
  2. Add the horseradish, Dijon, and mayo, stirring well until evenly distributed.
  3. Add garlic, salt, and pepper, tasting to find what works for you.
  4. Make a melt, a green salad, a wrap, or whatever comes to mind. Enjoy!


Leave a comment

Creamy Veggie Tagliatelle (yes, it’s gluten free!)

How I came up with this recipe is twofold. It was partially due to what I was craving and knew I had in the house, and the rest was inspired by a recipe used for the photo on this box of pasta. I had found myself scoping out the egg pastas as I was craving some egg noodles, hoping to find some gluten-free ones so that Sugar Bee would be able to eat whatever I ended up making. All of the ones at the particular store I was at contained wheat. This was my very first time trying this brand (whether egg or plain pasta) and the success from this meal was the reason I ended up using this brand for my Eggplant Ragout one night. My thoughts that I shared in that post about choosing the spaghetti are identical to when I first picked this box up. In fact, I’m pretty sure that this was my first experience with Jovial pasta, but egg pasta IS different from regular (as regular as GF can be), so I think those thoughts are still valid here. I took one look at the box and between the “100% organic” and “Product of Italy” on the label, I was sold. Italians know what they are doing with pasta, glutened or not.

Creamy Veggie Tagliatelle - The Half-Crunchy Mama

Upon further inspection of the recipe on the box, I realized I had most of the ingredients at home and I could make a dish like this with minimal investment during this trip to the store. I was getting close to payday, so of course I was short on funds and looking to maximize my spending. This was so cheap, fast, and easy…just how I like my weeknight meals to be.

I took a large zucchini and julienned it, giving me about 3 cups of shredded zucchini. Then I sliced a sweet onion into pieces that mimicked the shreds. That was the extent of my prep work.

I melted 3 tablespoons of Kerrygold butter in a pan over medium heat. I threw in the onion and about 2 teaspoons of minced garlic from a jar, and sauteed for about 2 minutes. I threw in the zucchini shreds and about a cup and a half of  matchstick organic carrots from a bag (no prep!), tossing everything in the butter to coat. After adding some sea salt and fresh ground pepper, I let this all cook for about three minutes until the veggies started to soften a little, but kept their bright colors. I removed the veggie mixture from the pan with a slotted spoon, leaving behind any leftover butter drippings.

Creamy Veggie Tagliatelle - The Half-Crunchy Mama

 I cooked the pasta according to the directions on the box and then returned the saute pan to the stove over low heat. I added 3/4 cup of regular whipping cream and a cup and a half of grated Parmesan-Pecorino cheese, stirring until the cheese had melted. I then returned the veggies to the pan, tossing to coat them well in the creamy cheese sauce.

After cooking and draining the pasta, I returned the noodles to the pot and poured the creamy veggie sauce over them, combining well to plate a perfect summer pasta dish.

Creamy Veggie Tagliatelle - The Half-Crunchy Mama

 The absolute best part? This dish reheated PERFECTLY, unlike a typical Alfredo or cream sauce that you would make for a pasta dish. Bonus!

Creamy Veggie Tagliatelle - The Half-Crunchy Mama


Creamy Veggie Tagliatelle

A jazzed-up version of a recipe on a box of pasta, with extra cheese, added garlic, and lighter cream. I would think you could serve this over spaghetti squash, too, in case you are living completely grain free.

INGREDIENTS
  • 3 Tbsp butter or ghee
  • 1 onion, quartered and thinly sliced
  • 2 tsp minced garlic (I used jarred)
  • 1 large zucchini, julienned (about 3 cups)
  • 1.5 cups matchstick carrots (bagged is perfect)
  • 3/4 cup whipping cream (heavy cream not necessary)
  • 1.5 cups grated Parmesan-Pecorino cheese
  • Sea salt and fresh ground pepper
DIRECTIONS
  1. Melt the butter in a saute pan over medium heat. Add the onions and garlic, cooking for 2 minutes.
  2. Add the zucchini, carrots, salt, and pepper, and toss well to combine and coat in butter. Cook for 3 minutes. Remove from pan with a slotted spoon and set aside.
  3. Cook the GF tagliatelle according to package directions. When finished, drain and return to pot.
  4. While the pasta is cooking, return the saute pan to stove over low heat. Add the cream and grated cheese. Heat until the cheese is melted. Return the veggie mixture to the pan and toss to coat in the sauce, heating until warmed through.
  5. Pour creamy veggie sauce over the cooked pasta and stir to combine well. Serve and enjoy! (Even leftover!)


3 Comments

Eggplant Ragout

Get excited!! It’s a true original from The Half-Crunchy Mama. I apologize to my readers (especially my Facebook fans that knew about this for a few weeks) for taking so long with this post. Back-to-back weddings, a few weeks with Sugar Bee out of summer camp, and my job workload has left me with about a dozen drafted posts that aren’t close to publication time. But hey, I’m finally getting this one out to you! Better late than never and I think you will find it was worth the wait.

I have varied my eggplant ragout so many times through the years. For this particular batch, I worked with what I had in the house. You can switch up the spices, add some red wine, use sauce from a jar, improvise! That’s what I’m always doing in the kitchen. About 95% of the time that I make this dish, it gets served over oven-roasted spaghetti squash. I couldn’t find one in Kroger and was in no mood to go to another store that evening, so I went with a gluten-free pasta. I kind of prefer it on the squash, but it will be just as delicious served over any pasta you choose (but I would go for the squash). There are a lot of things that you can do to make this your own. Hopefully, it will still look similar to this in the pan when it’s finished and ready to fill your belly.

Eggplant Ragout - The Half-Crunchy Mama

The most exciting part of making my ragout this time around was that it was made with two freshly grown eggplants picked right from my very own container garden.  #humblebrag One large one would probably be enough. Feel free to adjust the quantity of both the beef and the eggplant based on the ratio that you want to have in your sauce.

Peel, slice, and dice the eggplant.

Eggplant Ragout - The Half-Crunchy Mama

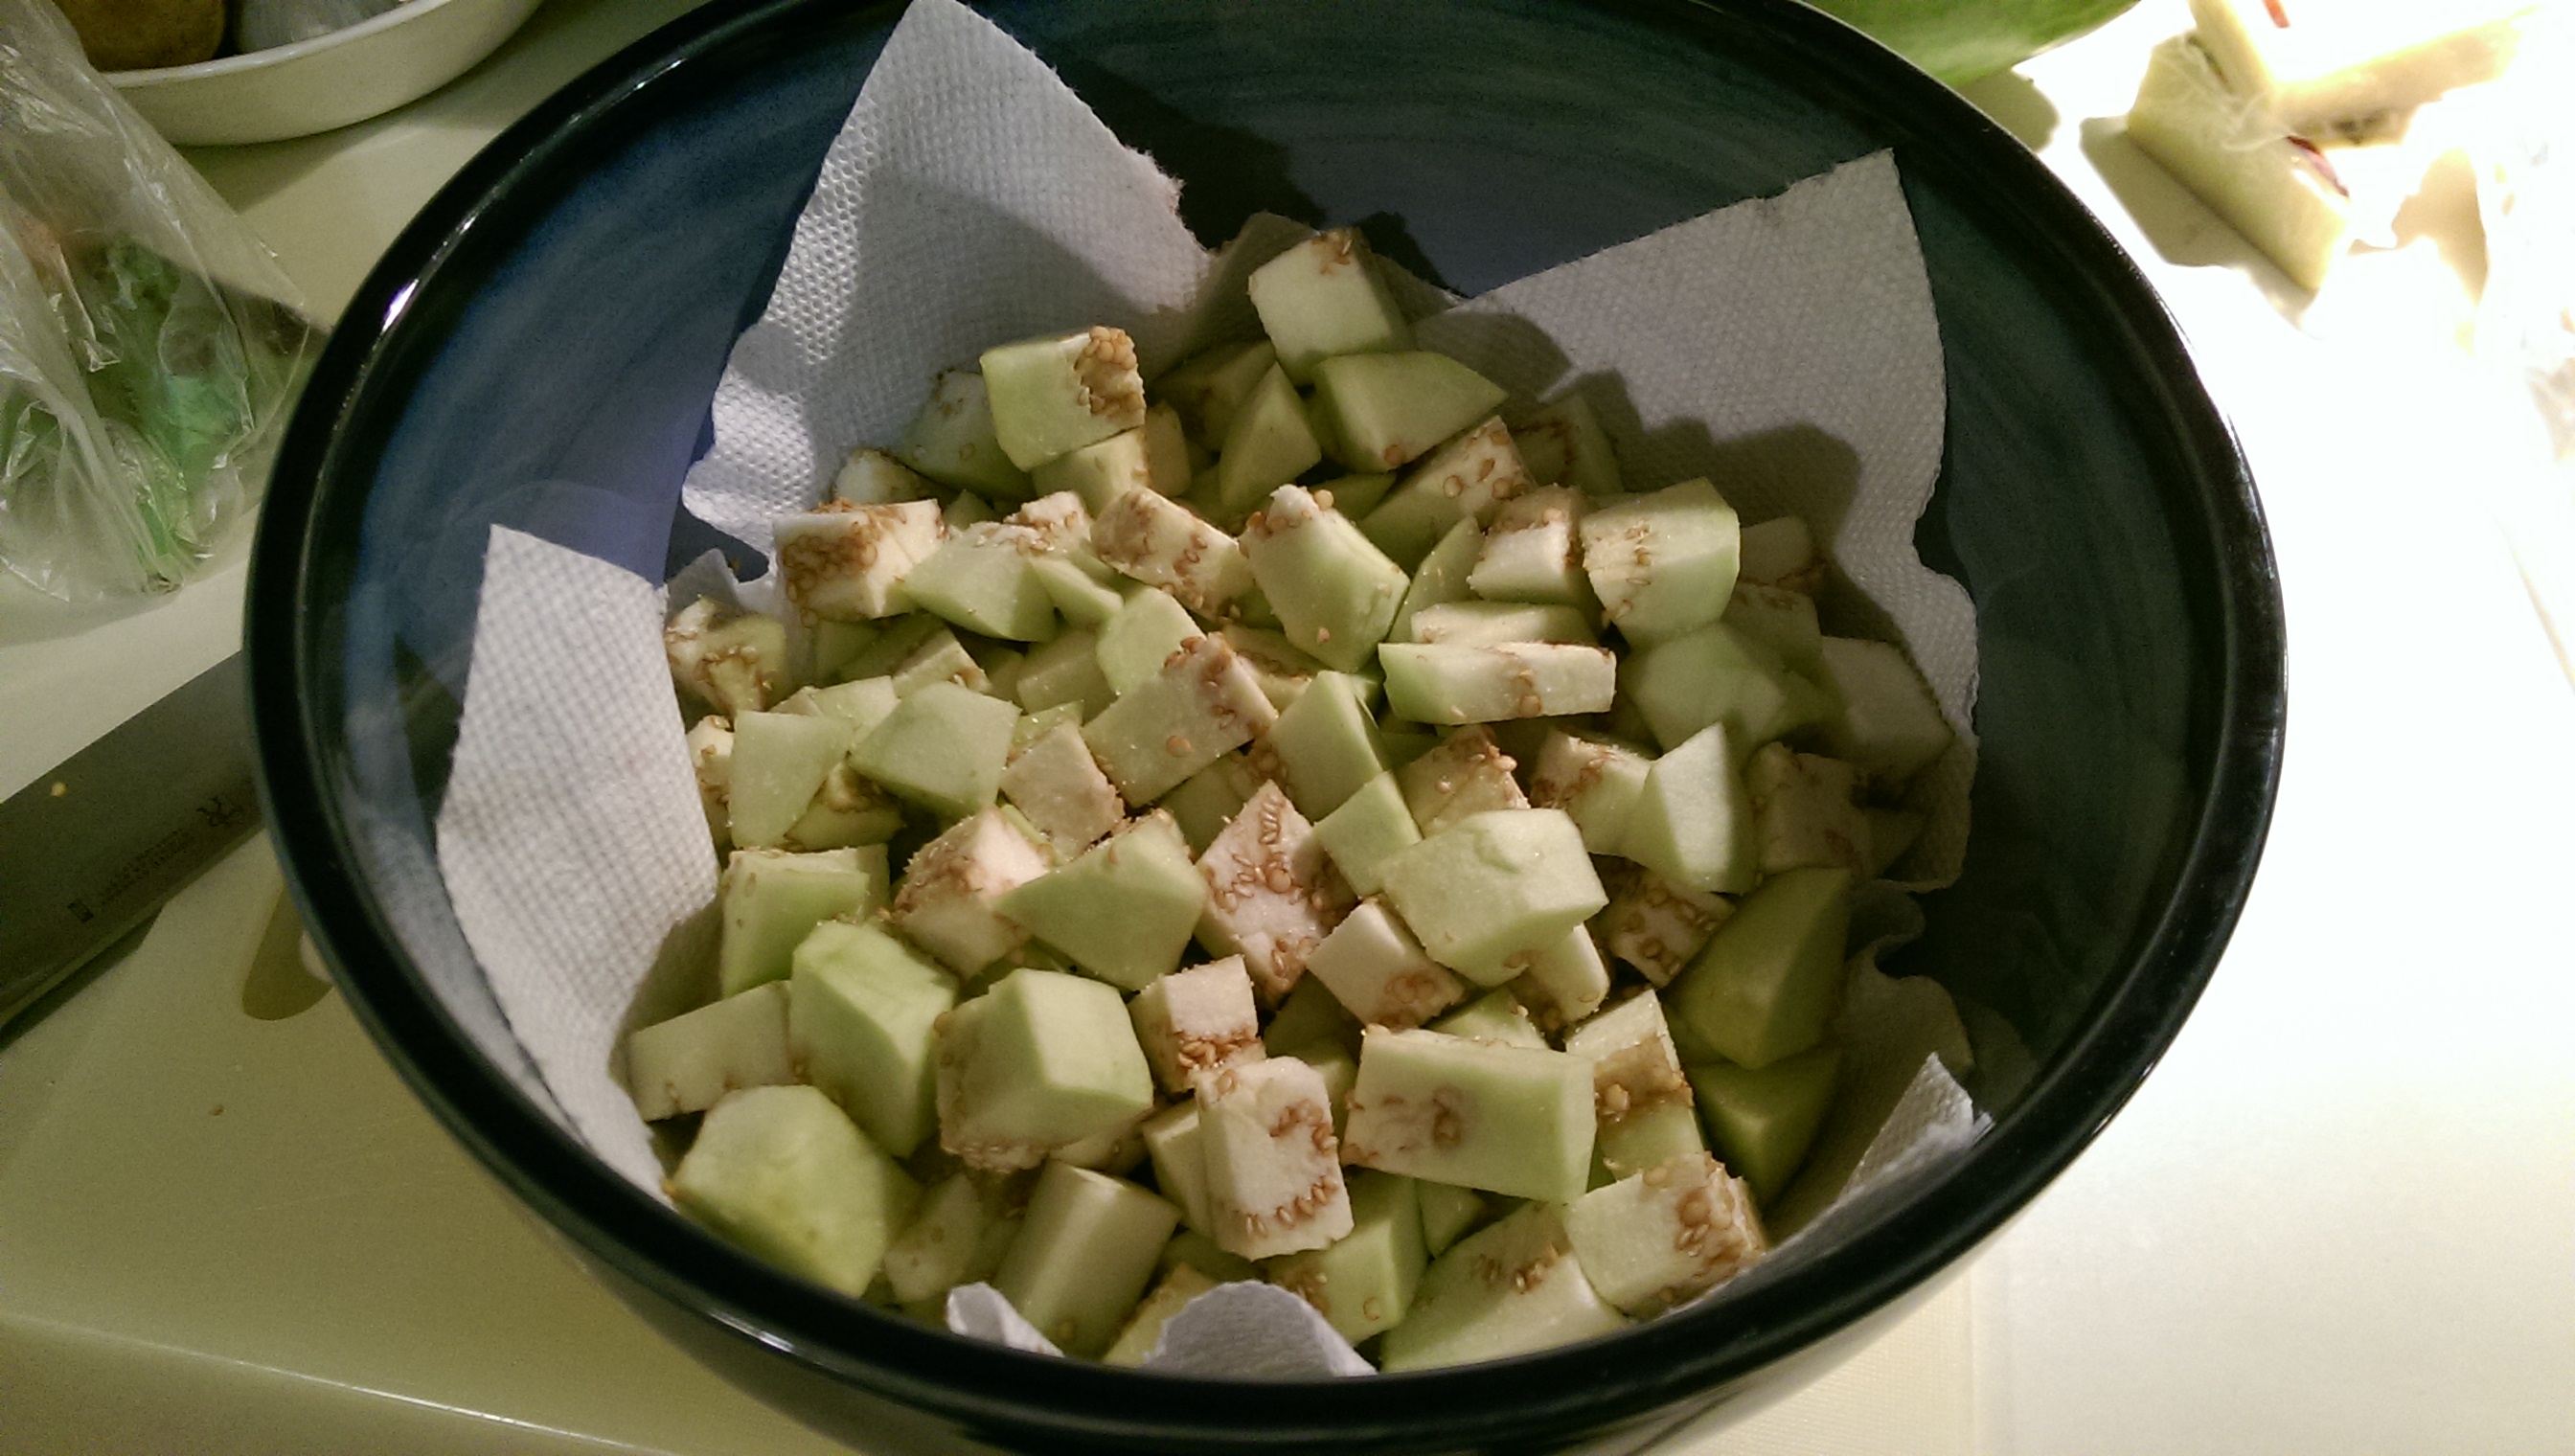
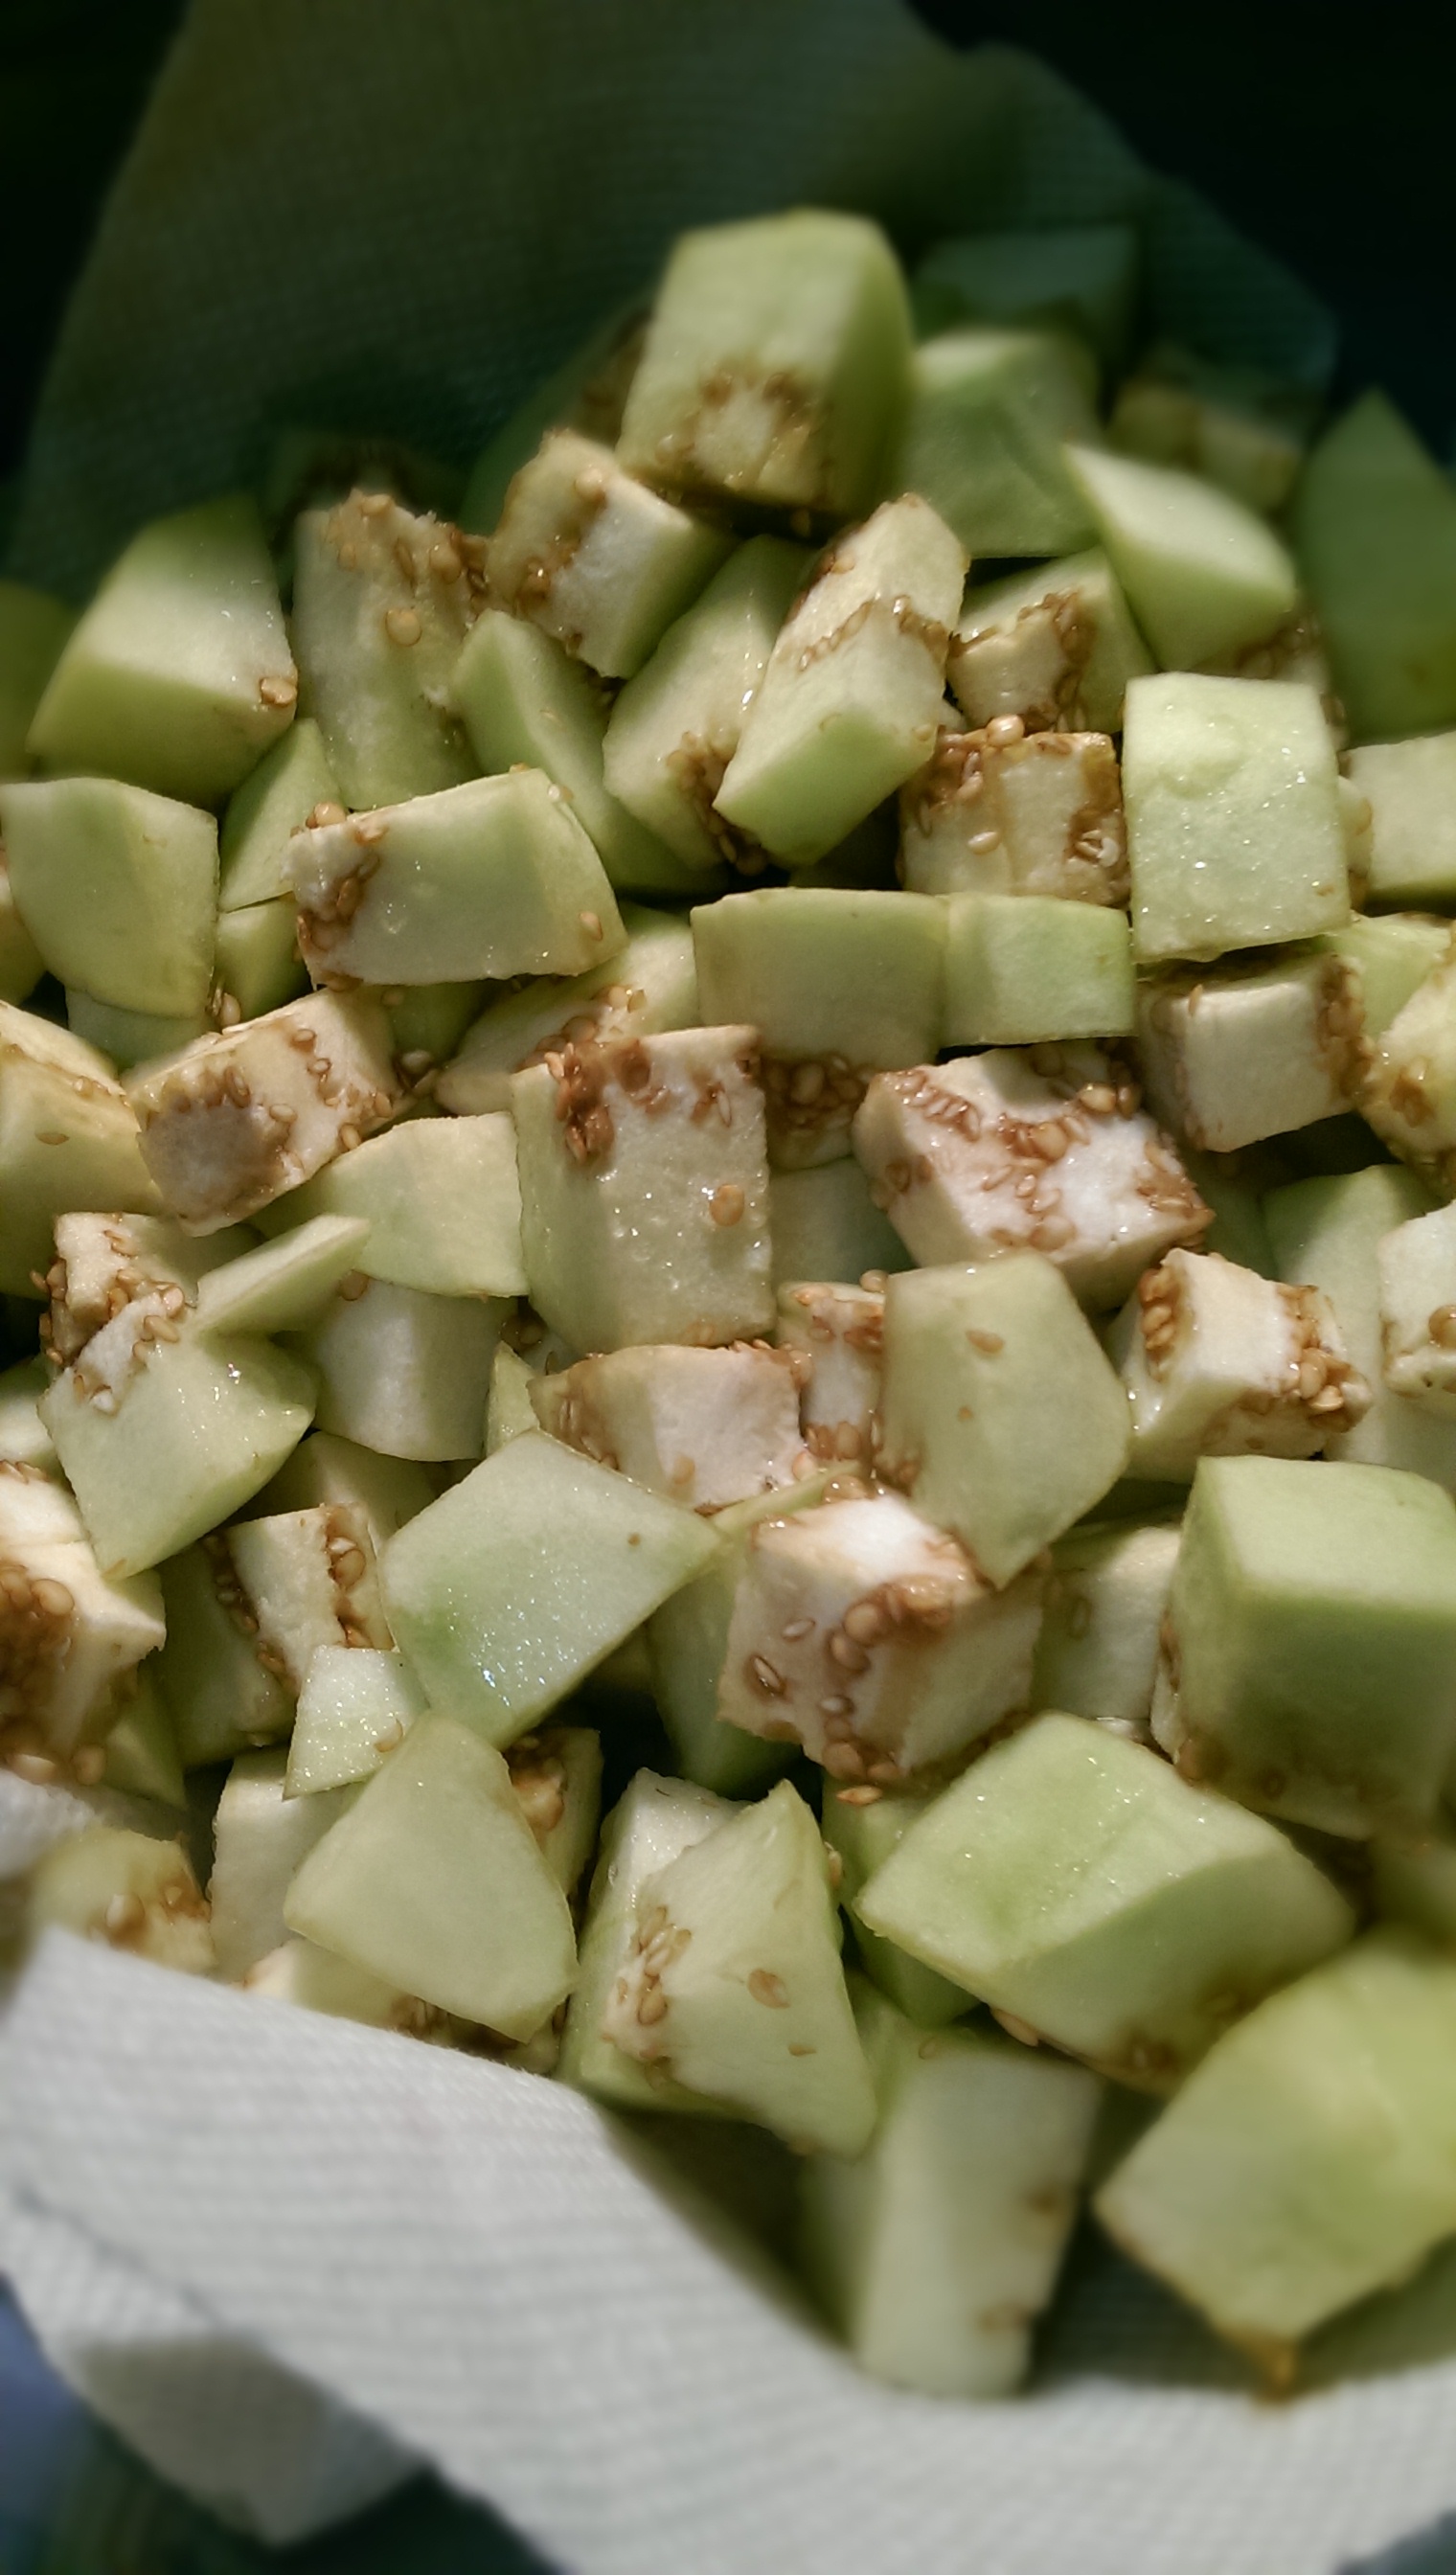
Dice it even smaller than this. I left them a little too big this time (about 1/2 inch dice), but it worked good for the photos 🙂 Put the diced eggplant in a bowl lined with paper towels, tossing with salt as you add to the bowl. It’s time to get the eggplant to sweat.

Eggplant Ragout - The Half-Crunchy Mama

 Let the salted eggplant sweat it out in the bowl while you prep the other ingredients. It should be nice and glistening with visible water droplets before it gets thrown into the pan.

Eggplant Ragout - The Half-Crunchy Mama

Chop and dice an onion. If you somehow missed this tutorial on the interwebs, it will forever change the way you cut onions. Next, mince up about 5 cloves of garlic….more or less depending on your taste. As I’ve said before, we love garlic in this house.

Heat your oil in a deep saute pan over medium heat. Add the onions and garlic to the pan, and saute until the onions are just getting soft, but not browned. I LOVE the smell that fills that house from just this part alone.

Eggplant Ragout - The Half-Crunchy Mama

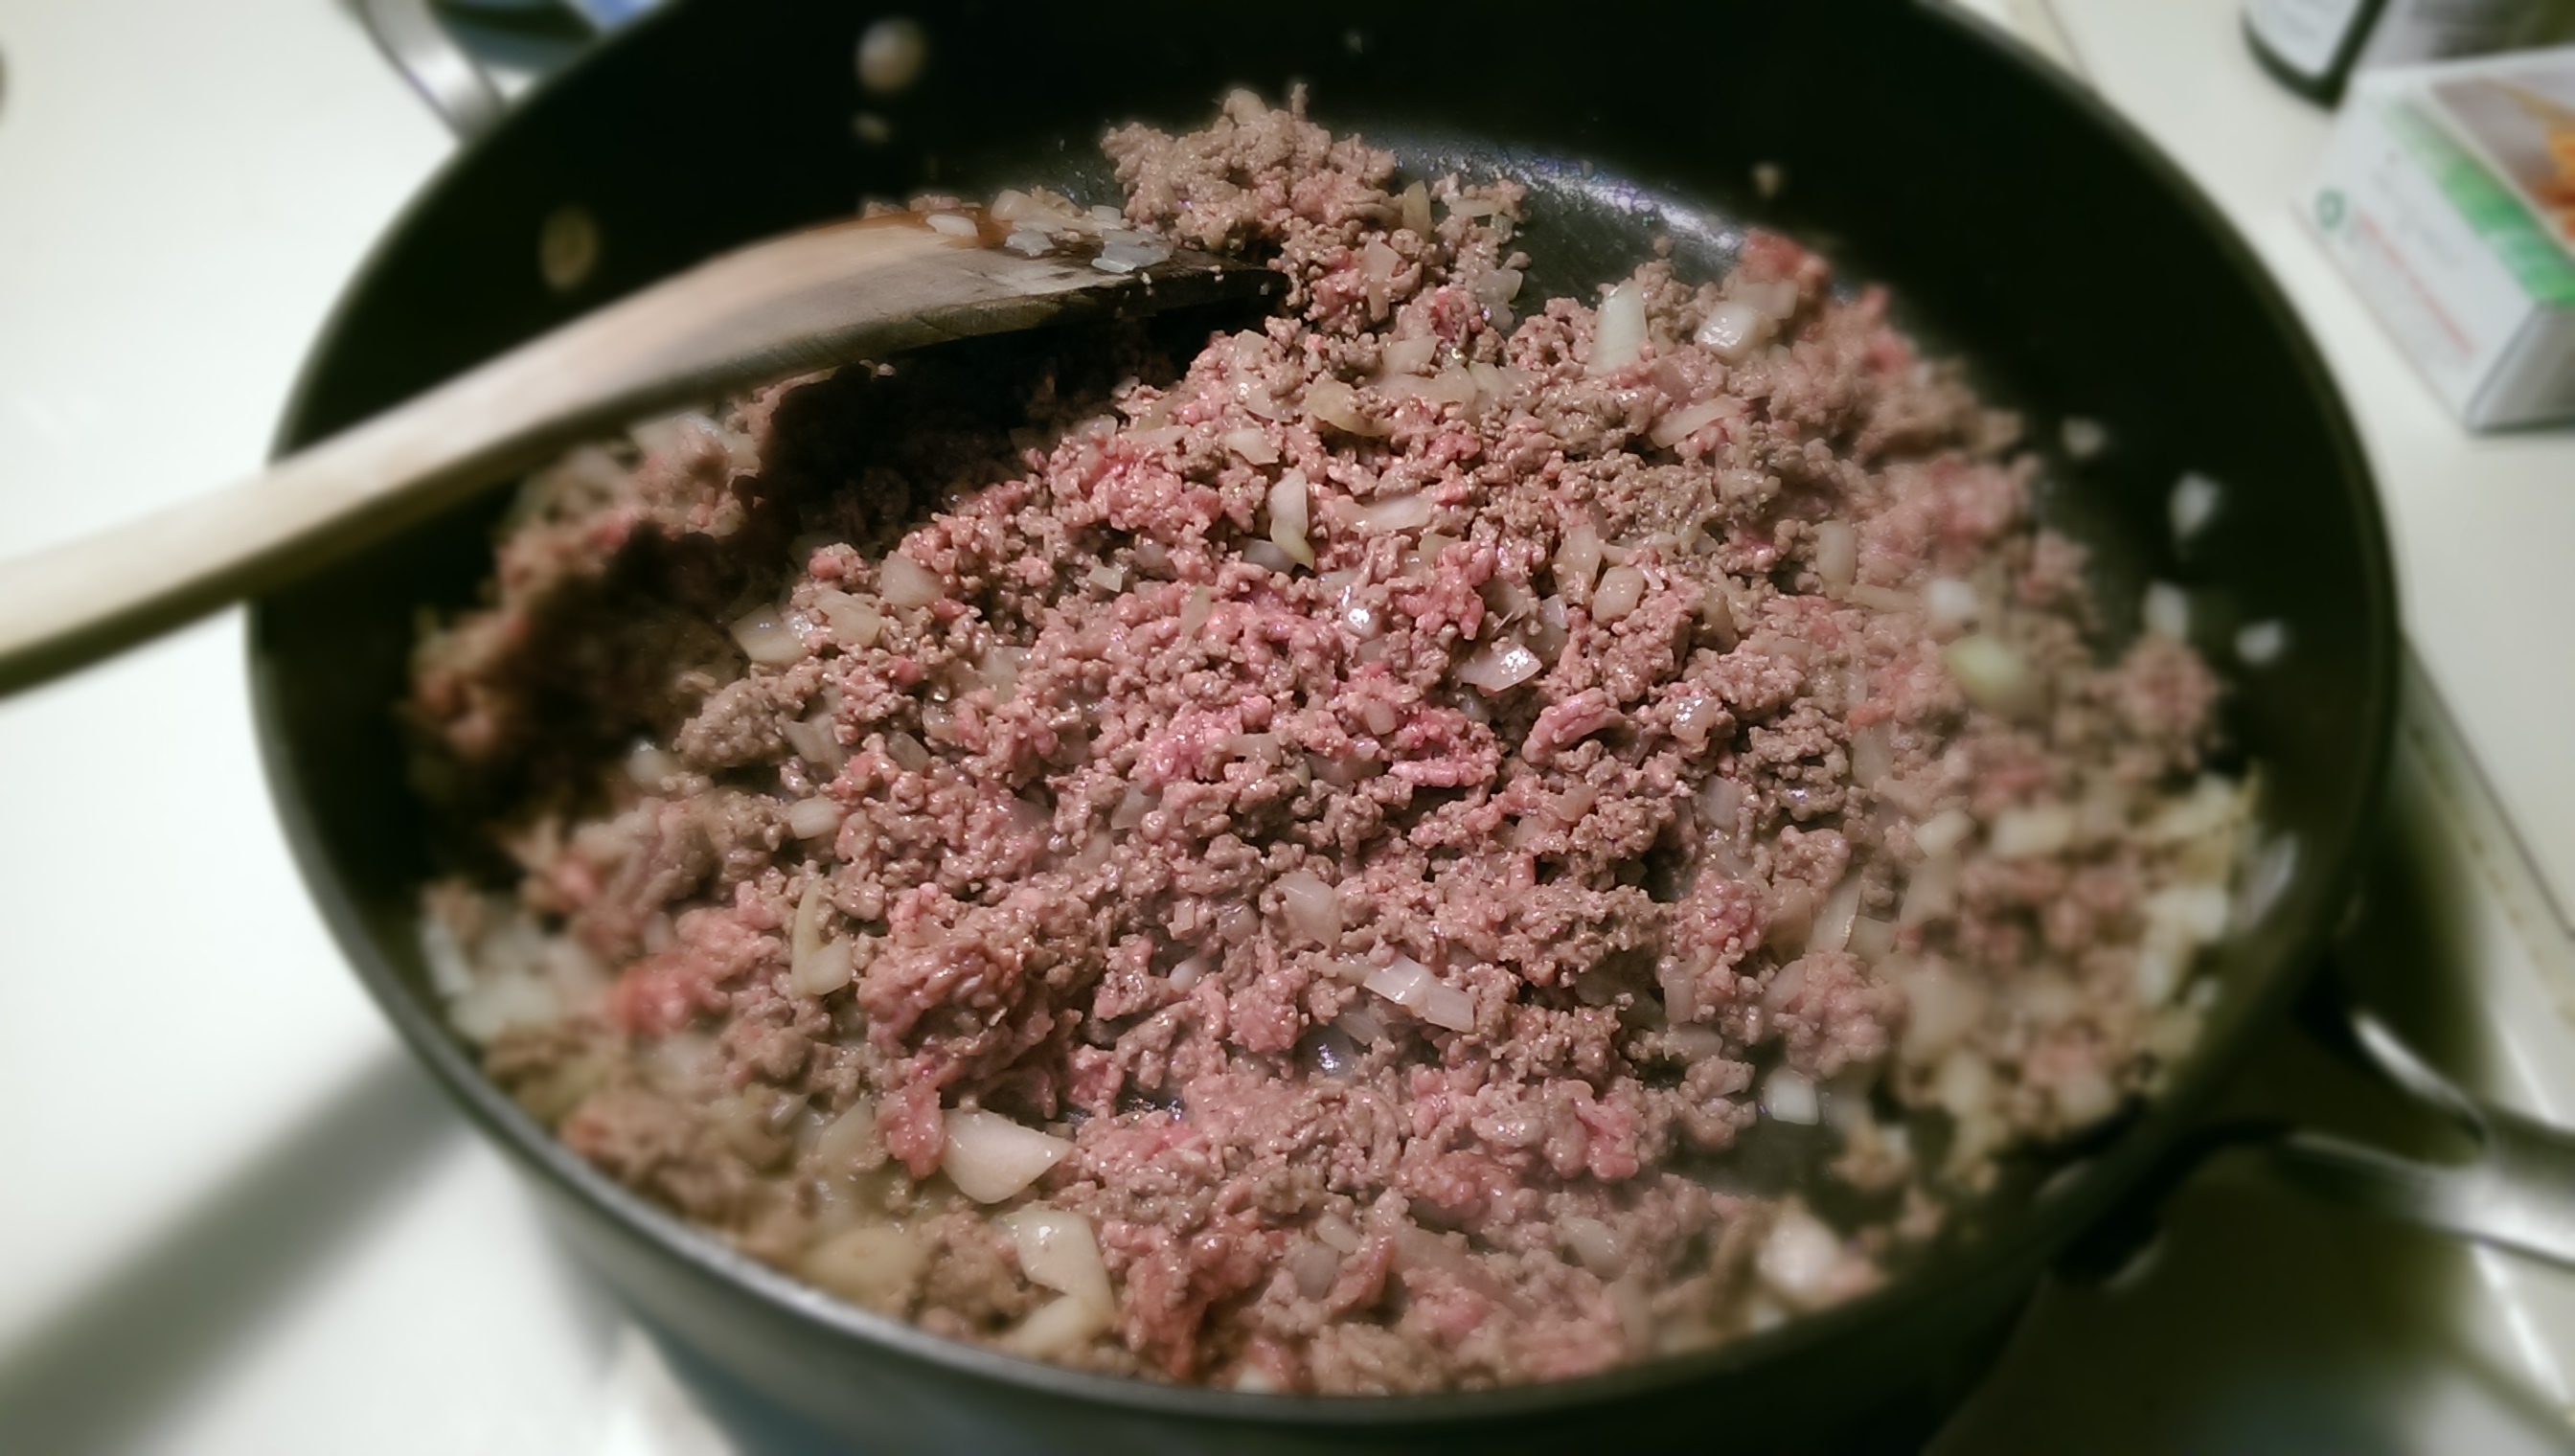
 Throw a pound to a pound and a half of ground beef into the pan and combine, breaking it up. Add some Worcestershire sauce and/or red wine. Yes, I use the “unclean” Worstey sauce on just about anything beefy or pretending to be beef (like ground turkey).  I love the flavor. And I love wine which is why it’s often included in any meaty saucy concoction, but I actually didn’t have any red wine in the house. WHAT?!  Hard to believe, I know, and a shame that I didn’t have any to go along with cooking my ragout. I knew something was missing.

Eggplant Ragout - The Half-Crunchy Mama

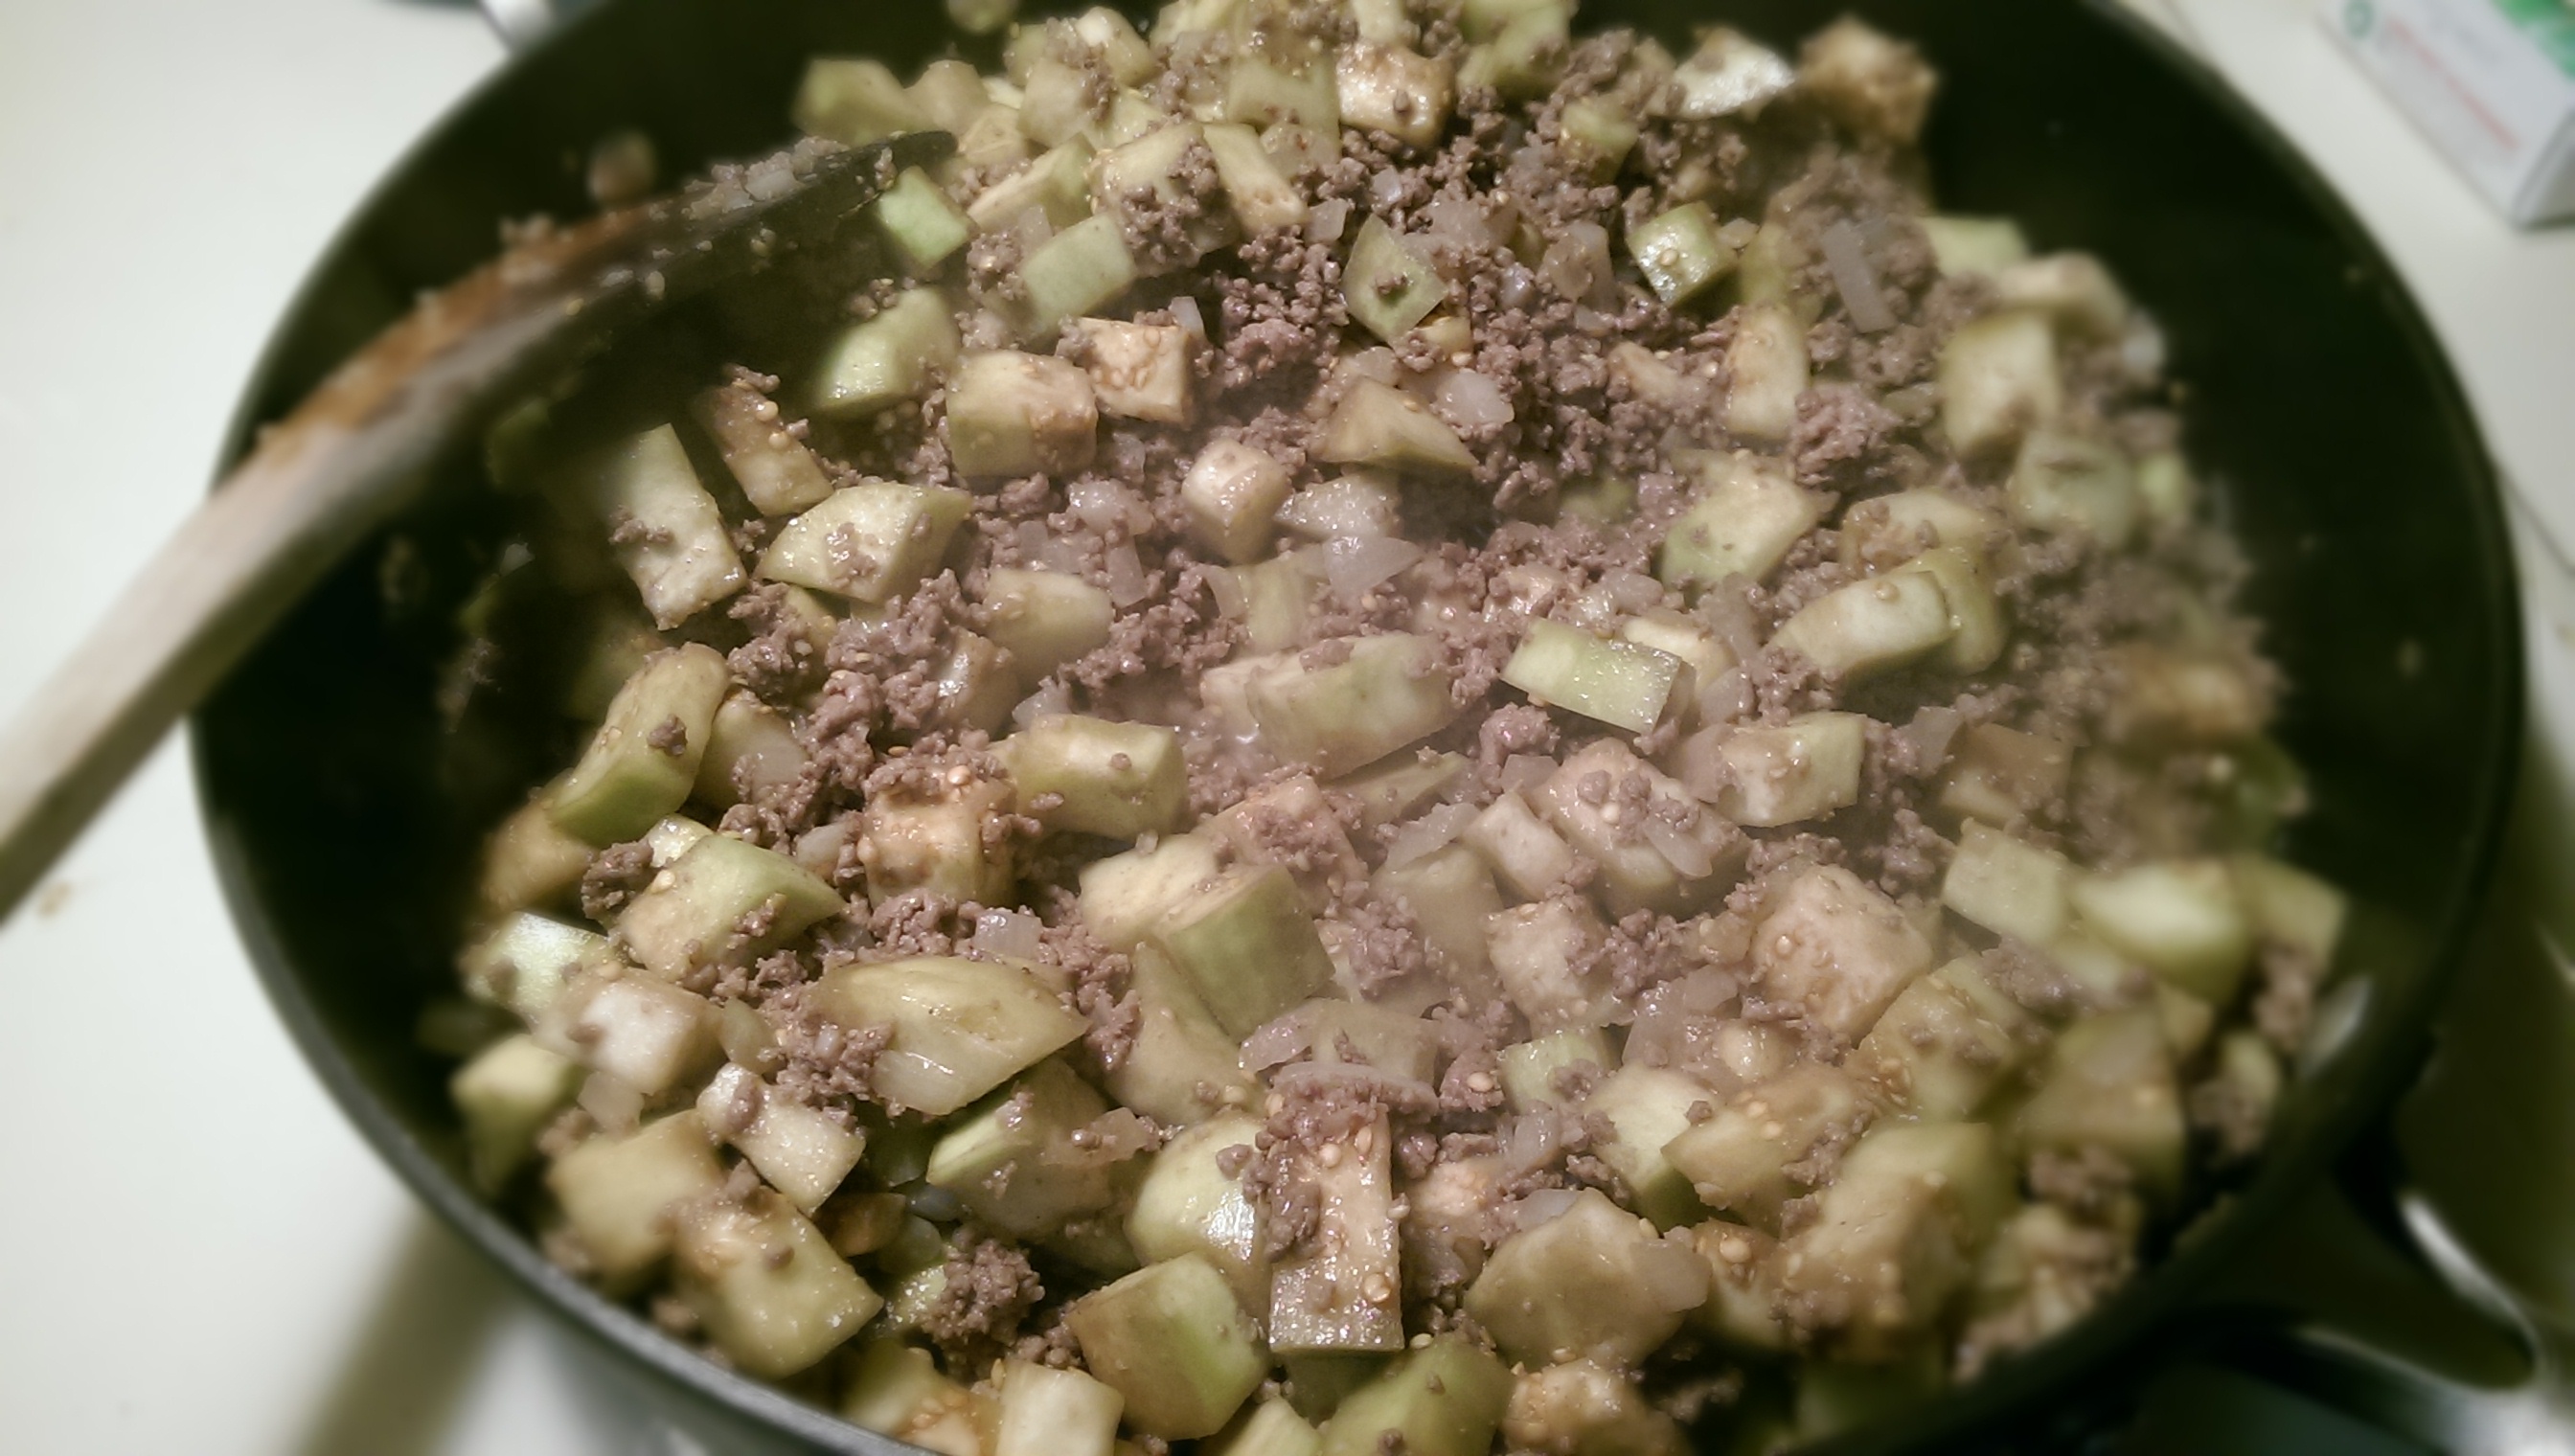
 While the meat is still a little pink, add your (hopefully) very sweaty eggplant to the pan.

Eggplant Ragout - The Half-Crunchy Mama

 Drizzle a generous amount of EVOO over the eggplant, as well as some freshly ground pepper, before combining with the meat mixture. Eggplant absorbs a LOT of oil, so don’t worry about going a little overboard with oiling it up in the pan. Turn the heat up to medium-high and cook 5-8 minutes, stirring often, until the eggplant starts to get softer. (They will be releasing liquid as they cook.)

Eggplant Ragout - The Half-Crunchy Mama

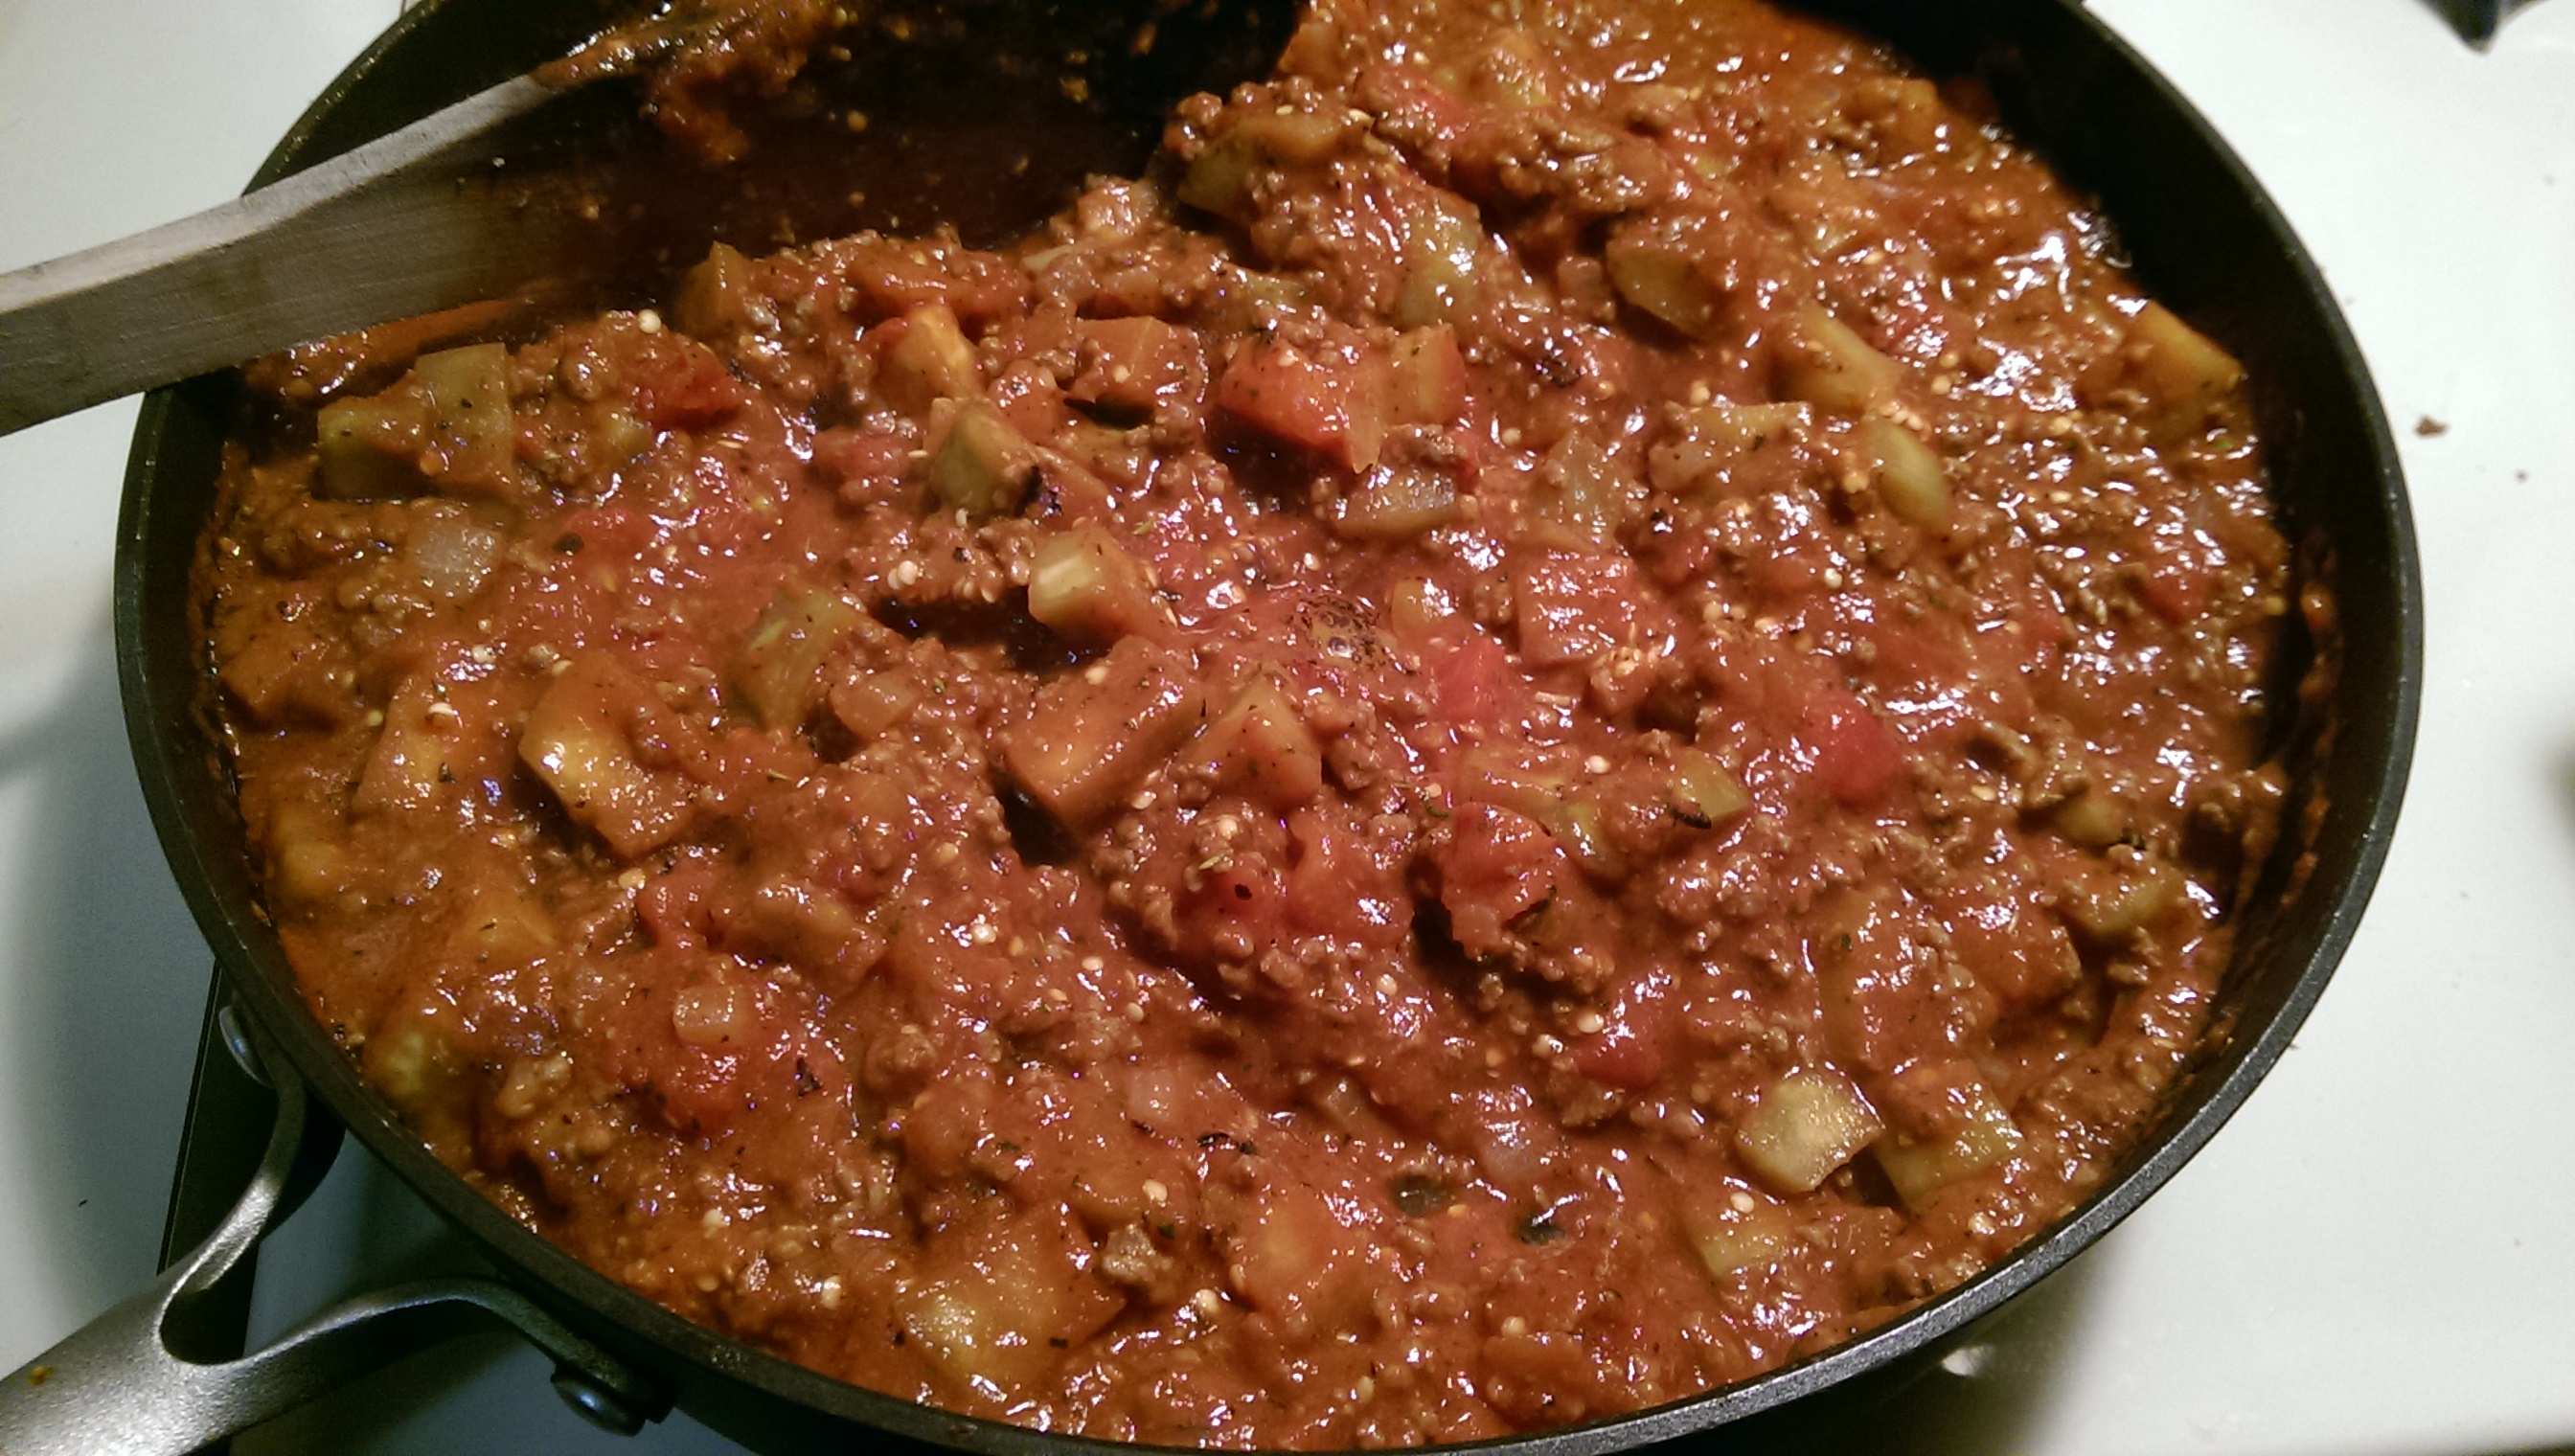
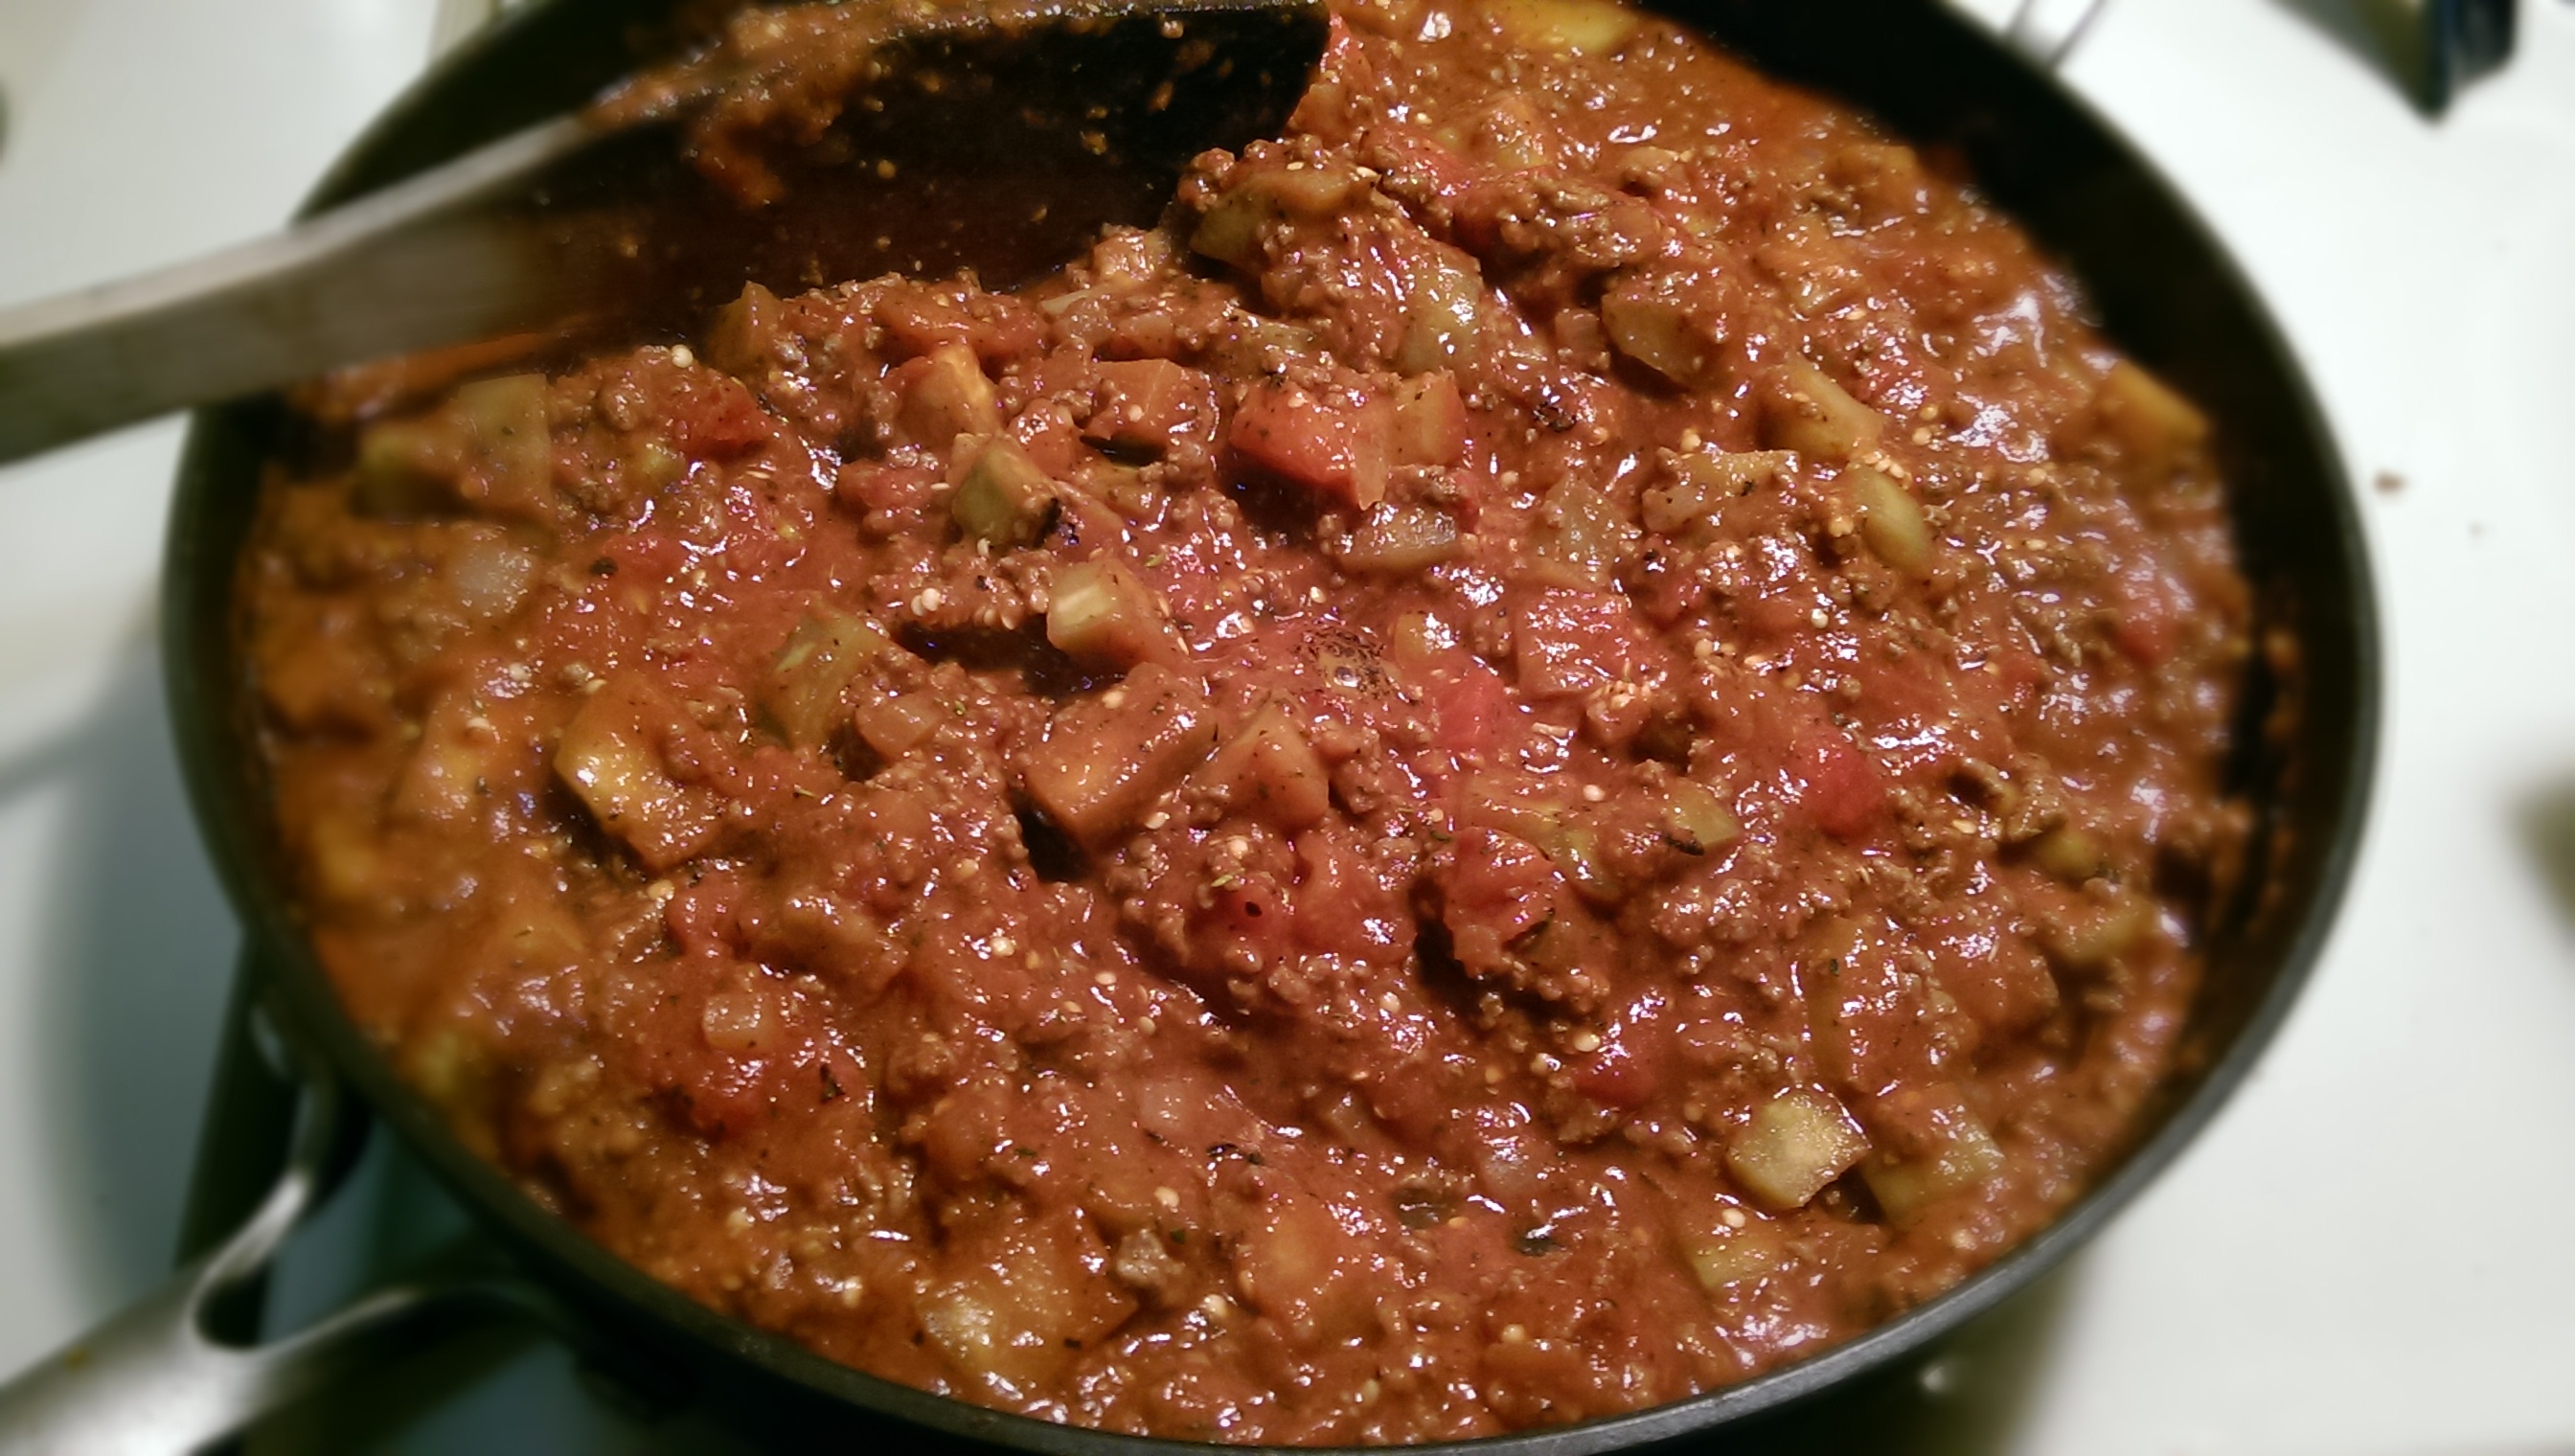
Add the fire-roasted, diced tomatoes, tomato puree, tomato paste, and all the spices. Taste a little of the liquid and add salt and pepper according to your taste buds. I can’t tell you how much to add because I don’t use much salt. Start with maybe 1 teaspoon of salt and several turns around the pan with the pepper grinder and taste it again. Continue until you like the flavor.

You will know it’s ready to simmer when it’s ridiculously thick and you can stand a utensil up in it.

Eggplant Ragout - The Half-Crunchy Mama

 Cover and simmer the sauce until the eggplant basically turns to mush. When you think that it’s getting close to being finished, get going on the pasta. If you are roasting spaghetti squash like I usually do, you should be about ready to take it out of the oven if it’s not already cooling off to get spaghettied.

Eggplant Ragout - The Half-Crunchy Mama

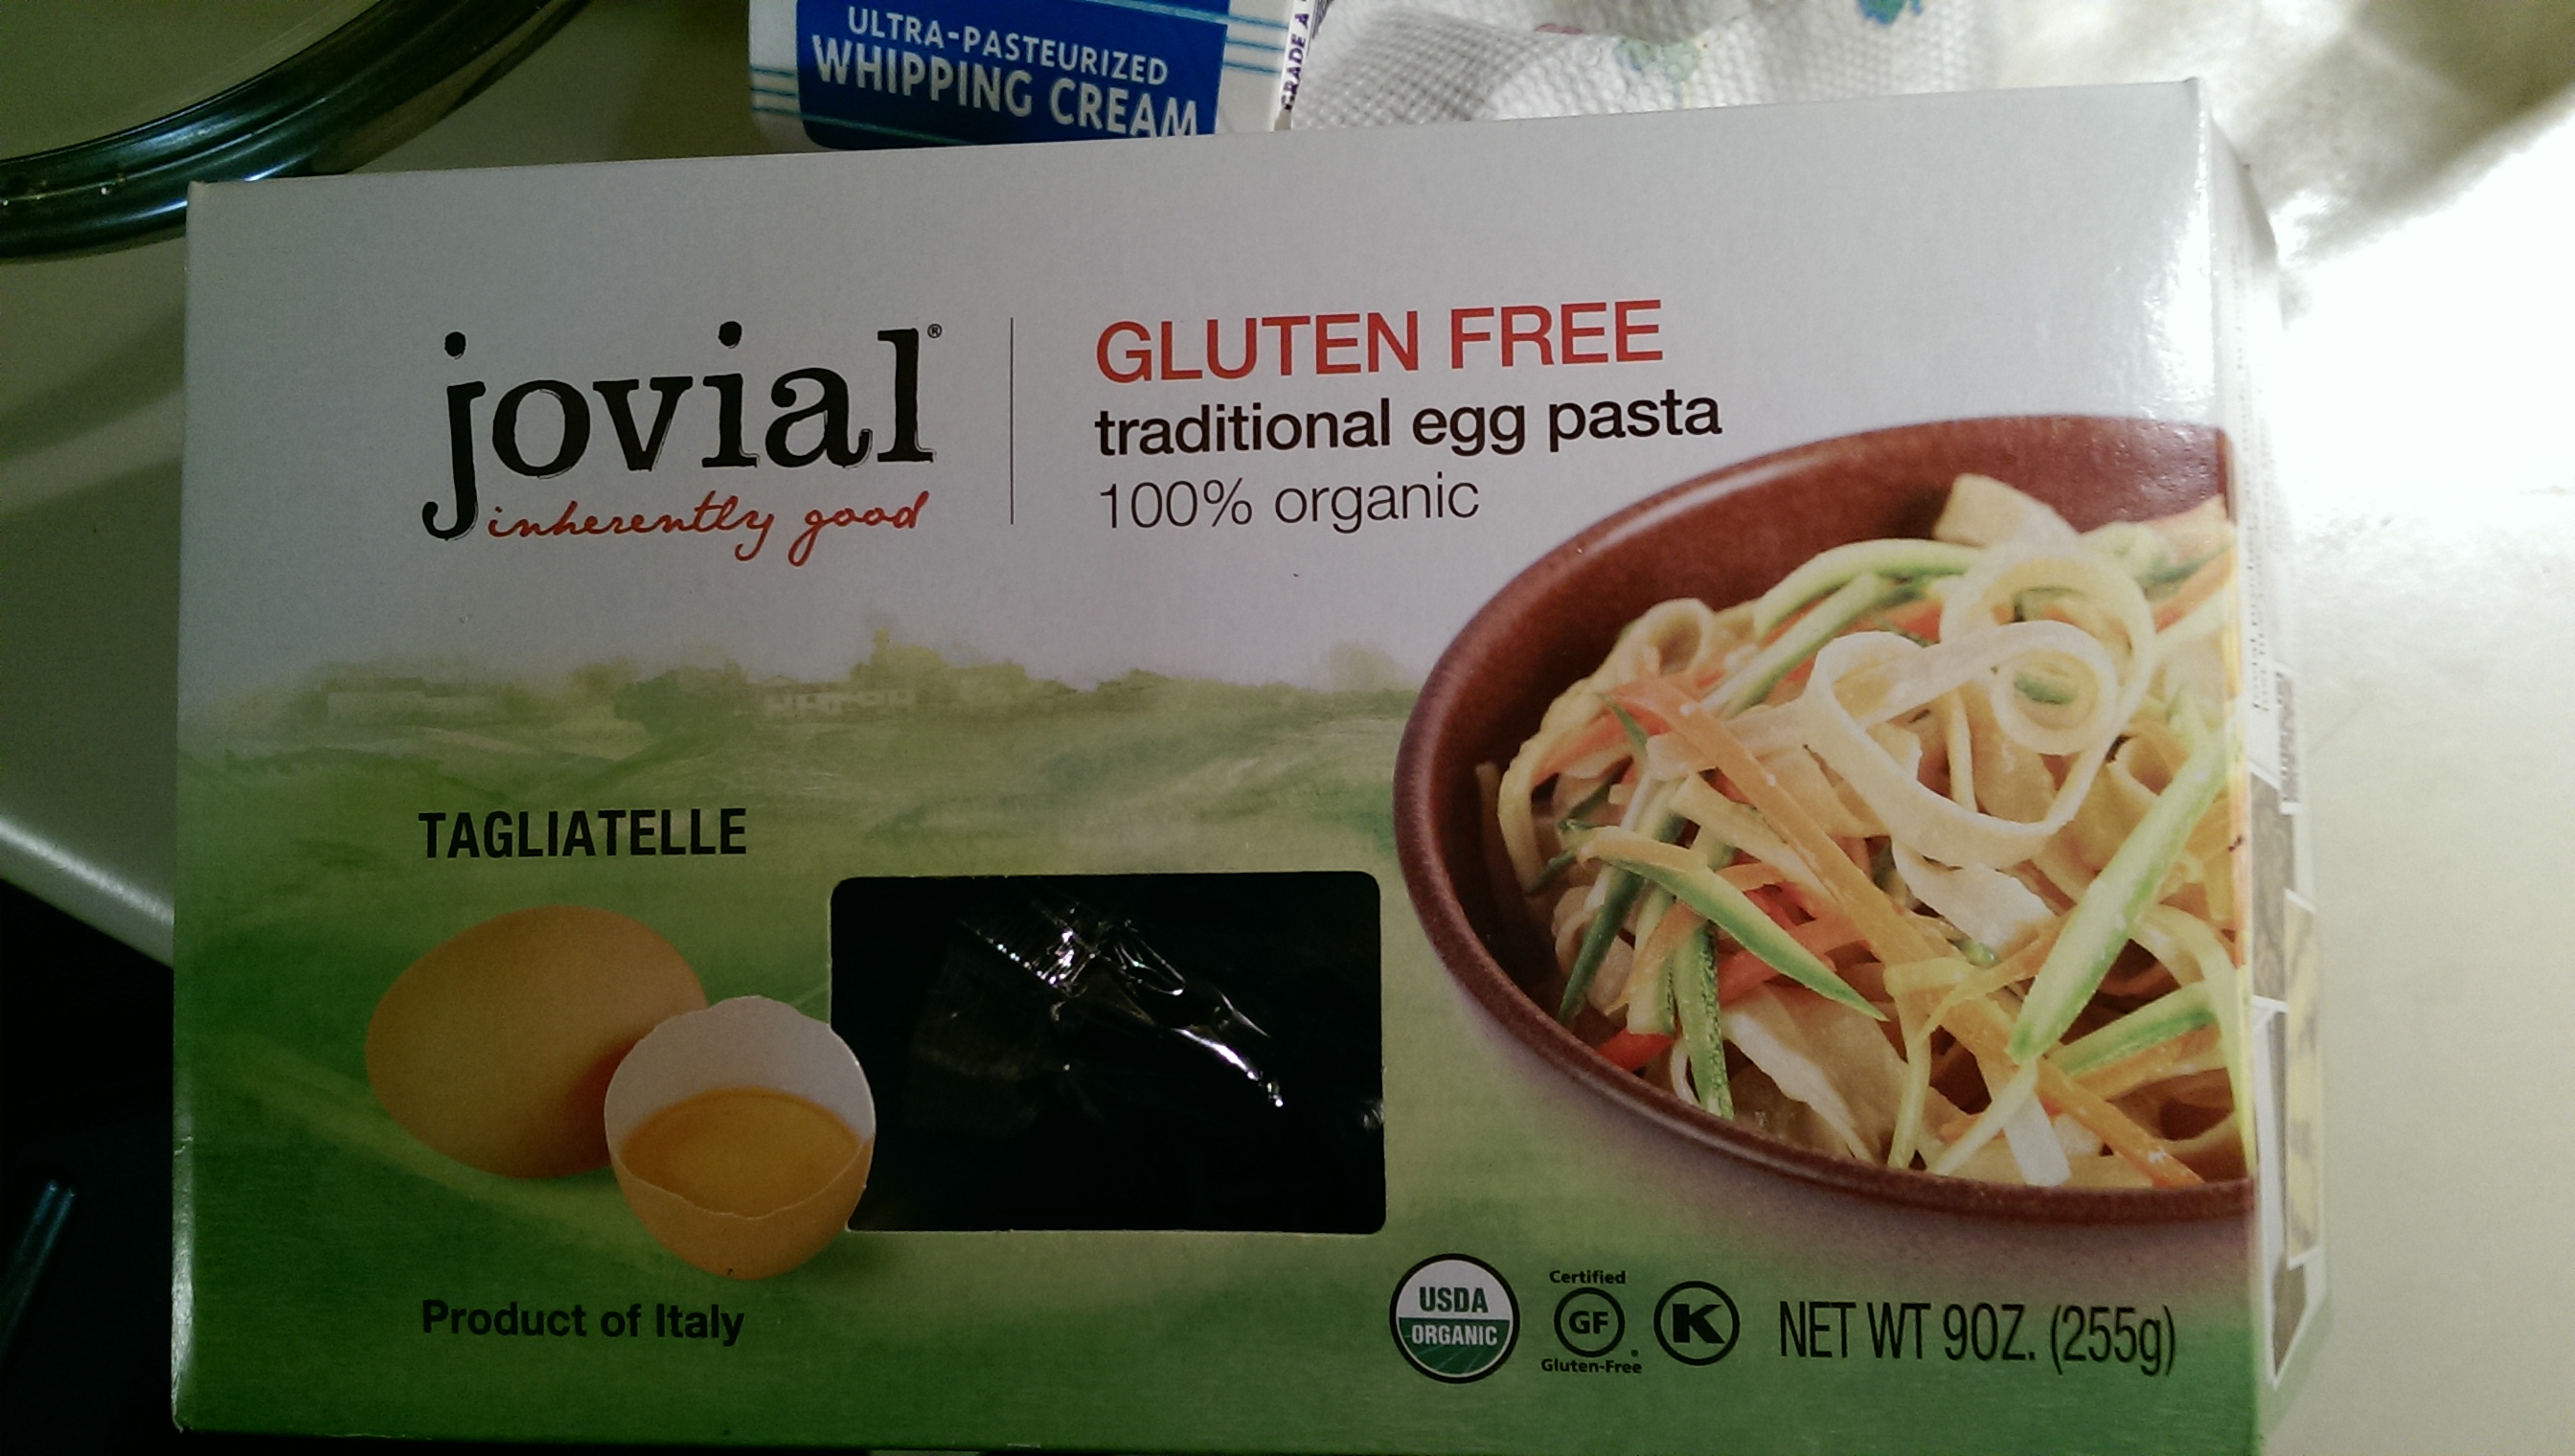
As I mentioned above, Kroger didn’t have any squash and I was pressed for time, so I headed over to the natural food section to scope out what GF pastas they had. They had a few brands that I don’t really care for because they do NOT reheat well and taste horrible as leftovers, so I was starting to get nervous about what I was going to do. Then I spotted this box:
Eggplant Ragout - The Half-Crunchy Mama

 Gluten-free spaghetti made in Italy? Well surely this must be tasty. After all, Italians know their pasta! I cooked it up and I must give it a RAVE review. I have tried almost every brand of GF pasta on the market and can tell you what tastes “real” and what to avoid unless you are going to eat it all right away (no leftovers). Not only did this taste amazing, but it reheats beautifully. Six thumbs up from this household!

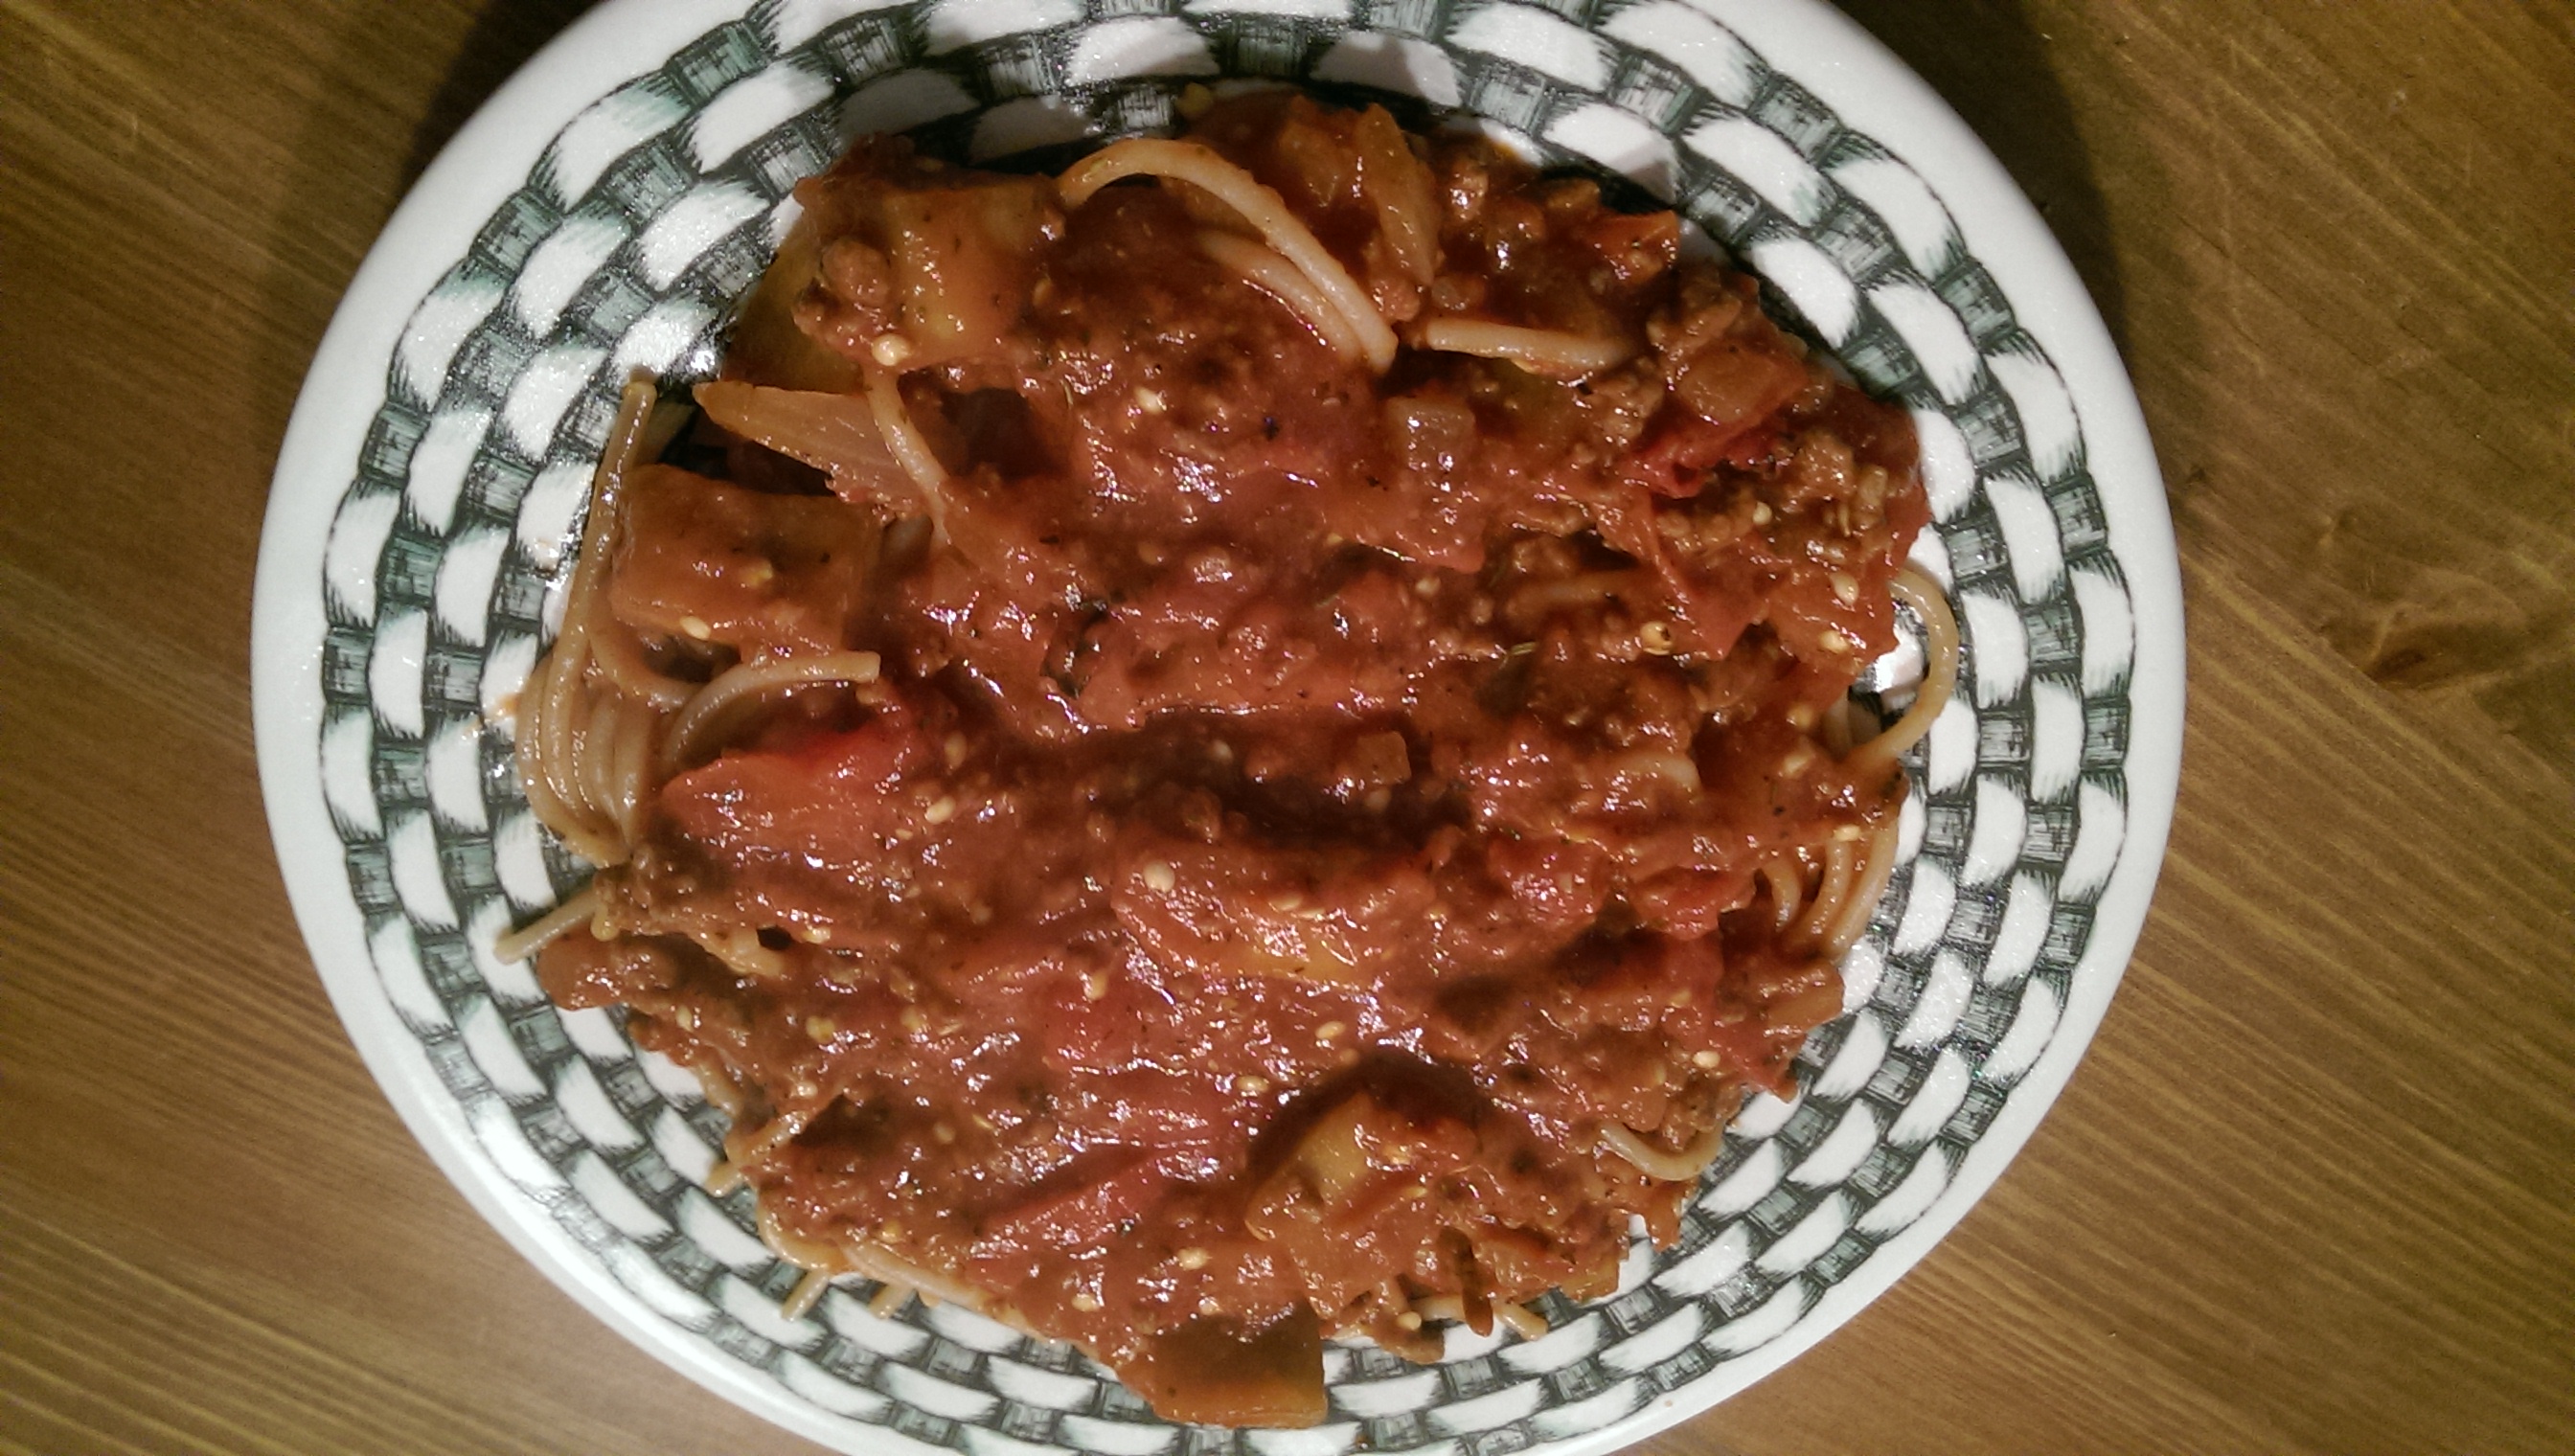
After finishing the pasta (or making spaghetti out of the squash), it’s time to eat! This was the plate I made up for Sugar Bee.

Eggplant Ragout - The Half-Crunchy Mama

 Of course mine needed cheese. Fresh shredded Parmesan-Reggiano….yum.

Eggplant Ragout - The Half-Crunchy Mama

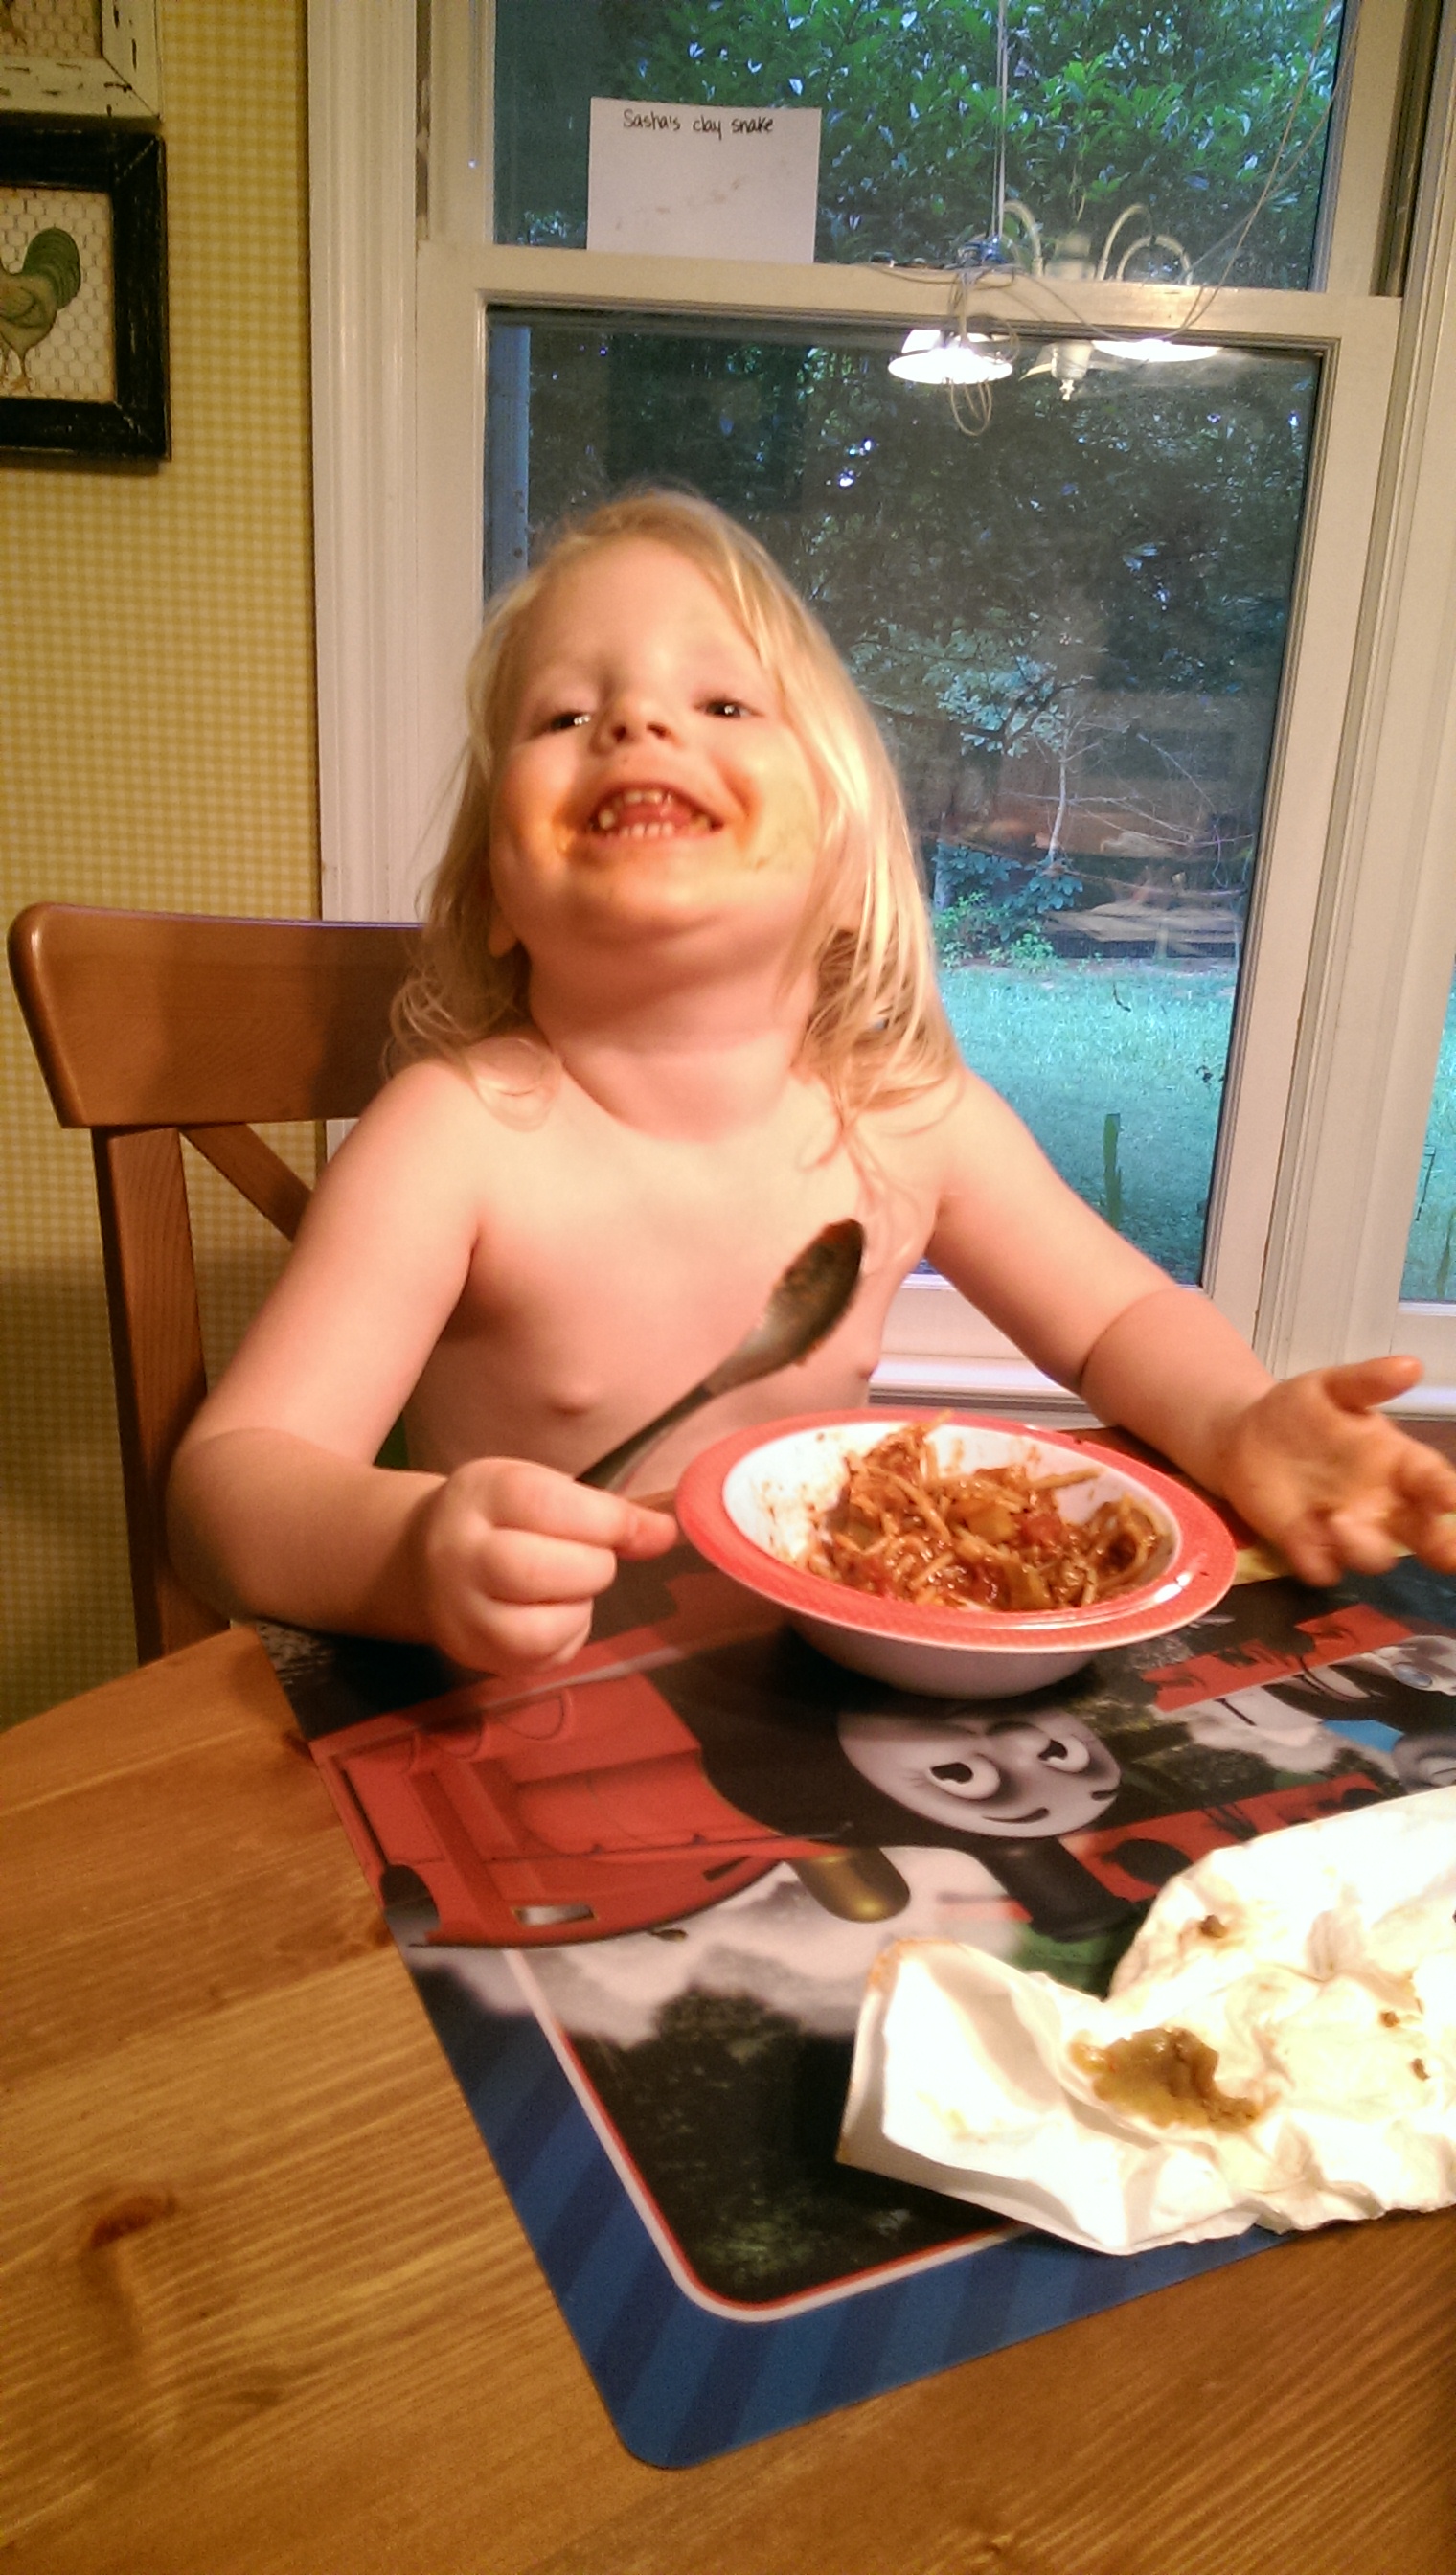
As usual, Sugar Bee approves!

Eggplant Ragout - The Half-Crunchy Mama


Eggplant Ragout

Be sure to dice the eggplant very small or it will take a long time for them to soften. You could also leave the meat out and double the eggplant for a vegetarian meal. If you prefer to make a casserole or want an idea for what to do with the leftovers, scroll down past the recipe details for a cheesy transformation! 

INGREDIENTS
  • 1 large or two small eggplants, peeled and diced small (1/4 inch)
  • 1 medium onion, diced
  • 5 cloves of garlic, minced or pressed
  • Extra-virgin olive oil (several tablespoons, divided)
  • 1-1.5 lbs ground beef
  • 1-2 Tbsp Worcestershire sauce and/or red wine
  • Salt and fresh ground pepper
  • 28-ounce can of fire-roasted diced tomatoes
  • 28-ounce can of tomato puree
  • 2 Tbsp Italian seasoning
  • 1 tsp dried basil
  • 3 ounces tomato paste (about 3 ounces)
  • Pasta of choice or roasted spaghetti squash
  • Cheese for garnish, if desired
DIRECTIONS
  1. Sprinkle peeled and diced eggplant with salt while adding it to a bowl lined with paper towels. Set aside to sweat.
  2. Heat oil (a few turns around the pan) in a deep saute pan over medium heat. Add the onions and garlic and cook until the onions start to get soft, but not brown.
  3. Add ground beef and Worcestershire/wine, and mix well to combine.
  4. When the beef is still slightly pink, add the eggplant, fresh ground pepper, and drizzle a few tablespoons of EVOO all over the eggplant. Increase heat to medium-high and cook, stirring often, for 5-8 minutes until eggplant begins to soften.
  5. Add tomatoes, puree, paste, and spices, and add salt and pepper to taste. (Taste a few times.) Reduce heat to medium-low, cover, and simmer until eggplant starts to get mushy.
  6. When the sauce is almost finished, cook pasta according to package directions or spaghetti the cooled roasted squash.
  7. Serve ragout over pasta and top with cheese, if desired. Enjoy!
*Note: If using spaghetti squash, begin roasting it before making the sauce as it takes time to cook and will need to cool before handling. Here is a link to basic cooking methods. I cut in half, coat flesh with EVOO, and roast cut-side down in the oven at 375ºF for about 30 minutes, depending on size. When cool enough to handle, shred with a fork to make spaghetti-like strands.


Leftovers? Or maybe you want it to be a casserole instead?

Here’s a second meal you can make out of what is leftover or you can just continue here from where I ended the Ragout recipe.

Combine pasta and ragout in the pasta pot or a large bowl. Add to glass baking dish (I used an 8×8-inch one for the leftovers) coated with cooking spray. Pat down with spatula or back of spoon to flatten.

Eggplant Ragout - The Half-Crunchy Mama

 Add a layer of grated Parmesan cheese. I use a grated Parmesan and Romano blend that I get from Trader Joe’s.

Eggplant Ragout - The Half-Crunchy Mama

 Cover with about one cup of shredded cheese. I like the Italian blend one from Publix, but regular shredded mozzarella would be just fine.

Eggplant Ragout - The Half-Crunchy Mama

 Place in preheated oven and bake at 325ºF for 15 minutes. Switch on the broiler for the last minute or two to brown the top. Now you have another meal!

2014-07-19 18.56.48


2 Comments

Lentil and Rice Salad

The days leading up to payday are always a challenge for me. I am the budget and after all these years, I still stink at it. I hope that I can learn someday so we can get back to digging ourselves out of debt. For now, you get to benefit from me having to get creative in the kitchen in order to provide healthy meals to fill our bellies. After rummaging through the refrigerator on Tuesday, I saw enough things in there to work with and get my mind moving. A package of vacuum-packed, precooked lentils, leftover basmati rice, black olives, and some items from the vegetable drawer. I started throwing things together in a bowl and kept adding to it. This was the result: Lentil Rice Salad - The Half-Crunchy Mama Leave it to Trader Joe’s to help a girl out. I am an avid label reader (the crunchy side) and there are some things from there that I won’t touch, but there are lots of things you can find in Trader Joe’s that are not only healthy and cheap, but are real time savers. This is one of them…not that lentils take all that long to cook, but still. I have a three year old and I can use all the help I can get. So I took these and the leftover rice (enough to fill one of those plastic Chinese takeout soup containers, maybe 2 cups?) and popped them in the microwave to get them softened up and brought back to life. Then the creativity came and I was pulling things to the counter left and right. Lentil Rice Salad - The Half-Crunchy Mama I threw in a large handful of bagged, organic shredded carrots, 3/4 can of sliced black olives (Trader Joe’s), 2 tsp minced garlic (from a jar), and 1 small onion finely diced in my chopper – one of my top kitchen favorites that I love so much that I have given it as gifts. The one I have linked is not the same brand, but it’s the same thing (and the one that I buy for people).

Lentil and Rice Salad - The Half-Crunchy Mama

Then I added 2 Tbsp fresh chopped cilantro plus about 1-2 tsp from the squeeze tube, quite a bit of salt and fresh ground pepper, squeezed the juice from two limes and one lemon, and finished it off with a few turns around the bowl of  extra virgin olive oil. And this is what I got. YUM!Lentil Rice Salad - The Half-Crunchy Mama


Lentil Rice Salad

Easy on the budget, this quick protein-filled dish can help stretch your dollars and your time. Sorry for the vagueness in quantities, but this is how I do it 🙂 Thinking back, I wish that I had some English cucumber and/or organic bell pepper lying around, too. That would be even better. Just use your own judgement and taste buds to perfect your own! 

INGREDIENTS
  • Approximately 1 lb of cooked lentils (I used Trader Joe’s 17.6 oz package of steamed and refrigerated lentils)
  • Approximately 2 cups of cooked rice (I had leftover Basmati)
  • Large handful of bagged, shredded carrots (approximately 1-1.5 cups)
  • Sliced black olives, drained (I used about 3 ounces of a 3.8 ounce from Trader Joe’s that I had left in the fridge – more would be better)
  • 2-3 tsp minced garlic (from the jar – time saver!)
  • 1 small onion, very finely diced
  • 2 Tbsp freshly chopped cilantro
  • 1-2 tsp cilantro from the tube (or 1-2 Tbsp more fresh)
  • Juice of 2 limes
  • Juice of 1 lemon
  • Few times around the bowl with EVOO (1-2 Tbsp)
  • Quite a bit of fresh ground pepper and sea salt (start with 1/4- 1/2 tsp each and taste from there)
DIRECTIONS
  1. In medium bowl, stir together lentils and rice. Warm (in microwave) if needed. (yes, I still use a microwave – half-crunchy)
  2. Add the rest of the ingredients, giving a few stirs now and then to combine well.
  3. Taste and add more salt and pepper, if needed. Enjoy!