The Half-Crunchy Mama

Trying to live a natural life with balance


1 Comment

Smoked Salmon and Goat Cheese Frittata

I love channeling my Gram in the kitchen when I use her old cast iron skillet. In fact, there are a lot of times that I’m cooking when I feel like she’s with me, especially around the holidays. I have several of her pans and skillets, but this cast iron one is by far my favorite. I miss her a lot (she passed in 2009, just shy of her 93rd birthday), but I feel her presence every time I use it. My mom says that my fried egg sandwiches taste just like Gram’s and that is the best compliment ever. I don’t use this skillet as often as I should and would like to, but it’s the best thing for frittatas, frying foods (not that I do that very often), and cooking/braising meat. It’s 10.5 inches across and 2 inches deep. Made in the USA, as was almost everything back then.

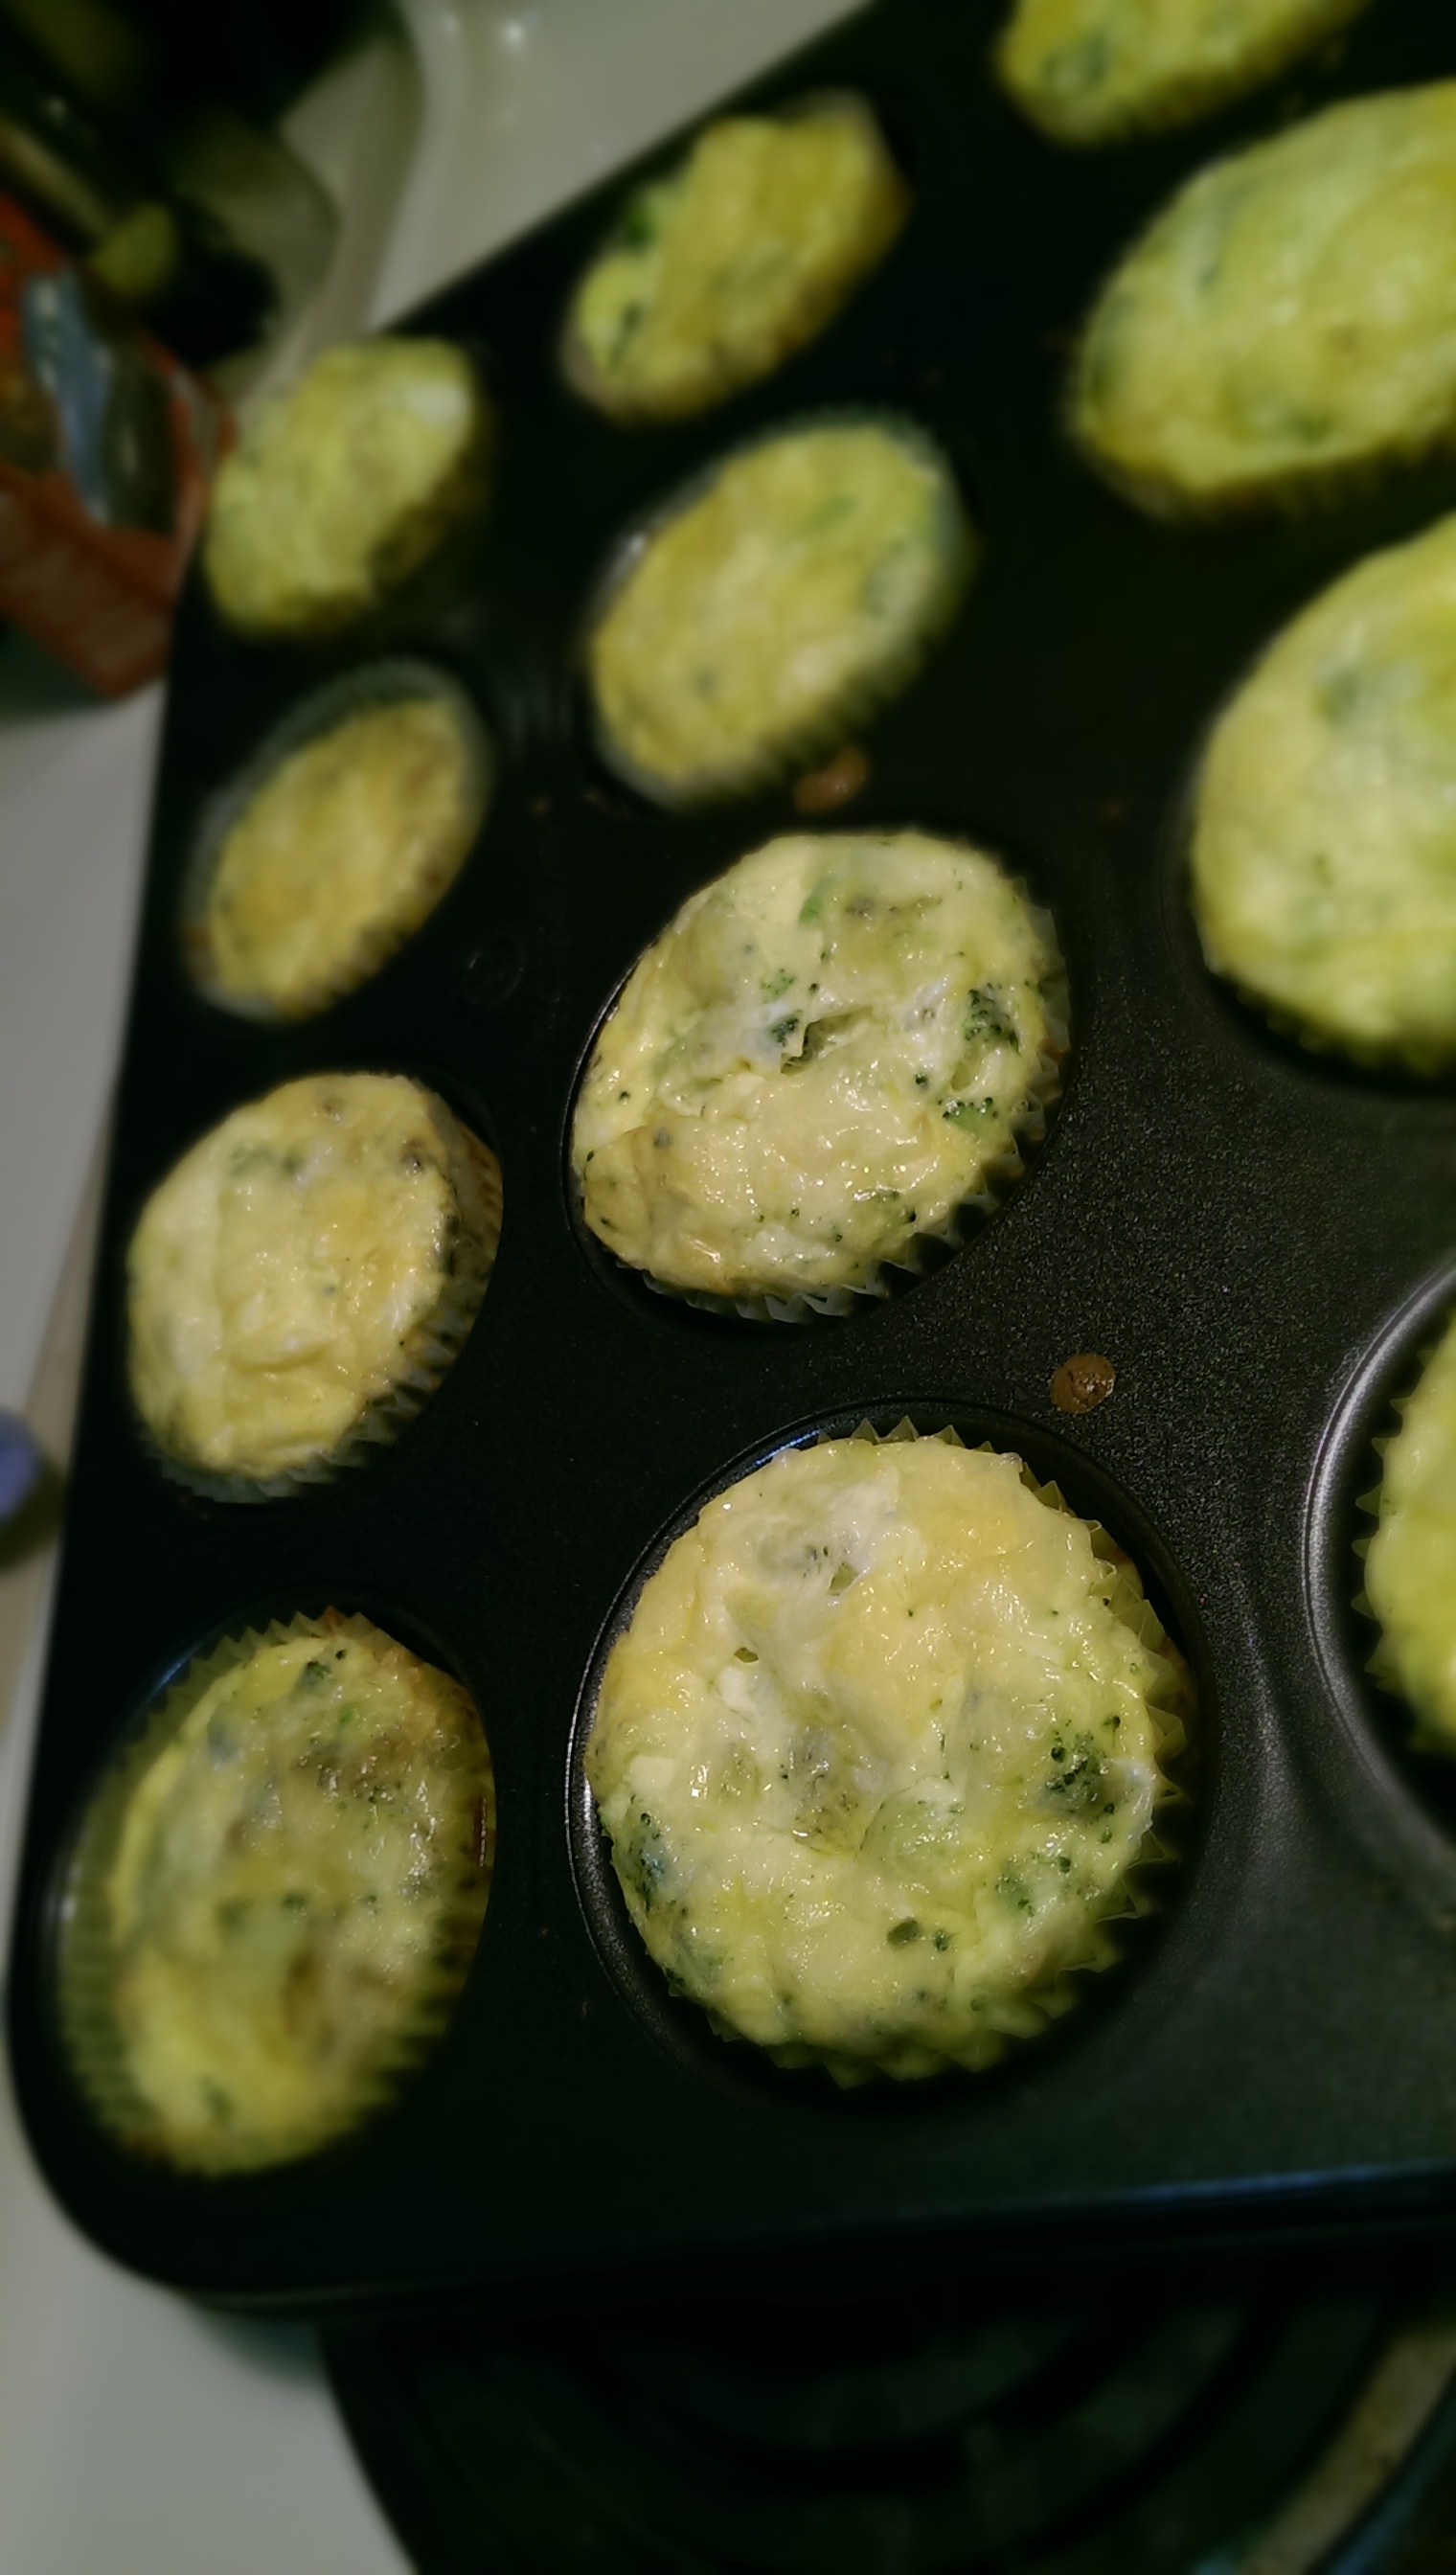
In case you missed my Cheesy Broccoli Egg Muffins post, breakfast is my favorite type of food and I would eat it all day long if I could. My favorite way to eat breakfast for dinner, or brinner, is in the form of a frittata. To me, frittatas are so much tastier than an omelette and way healthier than a quiche. And you can make up any kind of frittata combinations you want! Trust me, I do it all the time. This combination was created based on what was in the fridge since I was feeling too lazy to get to the store. We love all salmon, especially lox, and I usually have a thing or two of goat cheese in the drawer. Easy peasy.

The easiest way that I have found to deal with packaged lox (the pieces can be very sticky to each other) is to take the slab of slices and cut them all in long strips.

Smoked Salmon and Goat Cheese Frittata | The Half-Crunchy Mama

Then I loosen them up and separate them as best as I can. I hate when they all clump together in the egg mix and you are left with huge bites of smoked salmon in random places of the frittata and nowhere else.
Smoked Salmon and Goat Cheese Frittata | The Half-Crunchy Mama

 The same thing goes for the goat cheese. I have struggled a few times with how to handle the brick of cheese that I usually have in the fridge. Of course if you buy or have goat cheese that is already crumbled, this next part won’t apply, but it’s cheaper to purchase this way and now I have a trick to share.

Smoked Salmon and Goat Cheese Frittata | The Half-Crunchy Mama

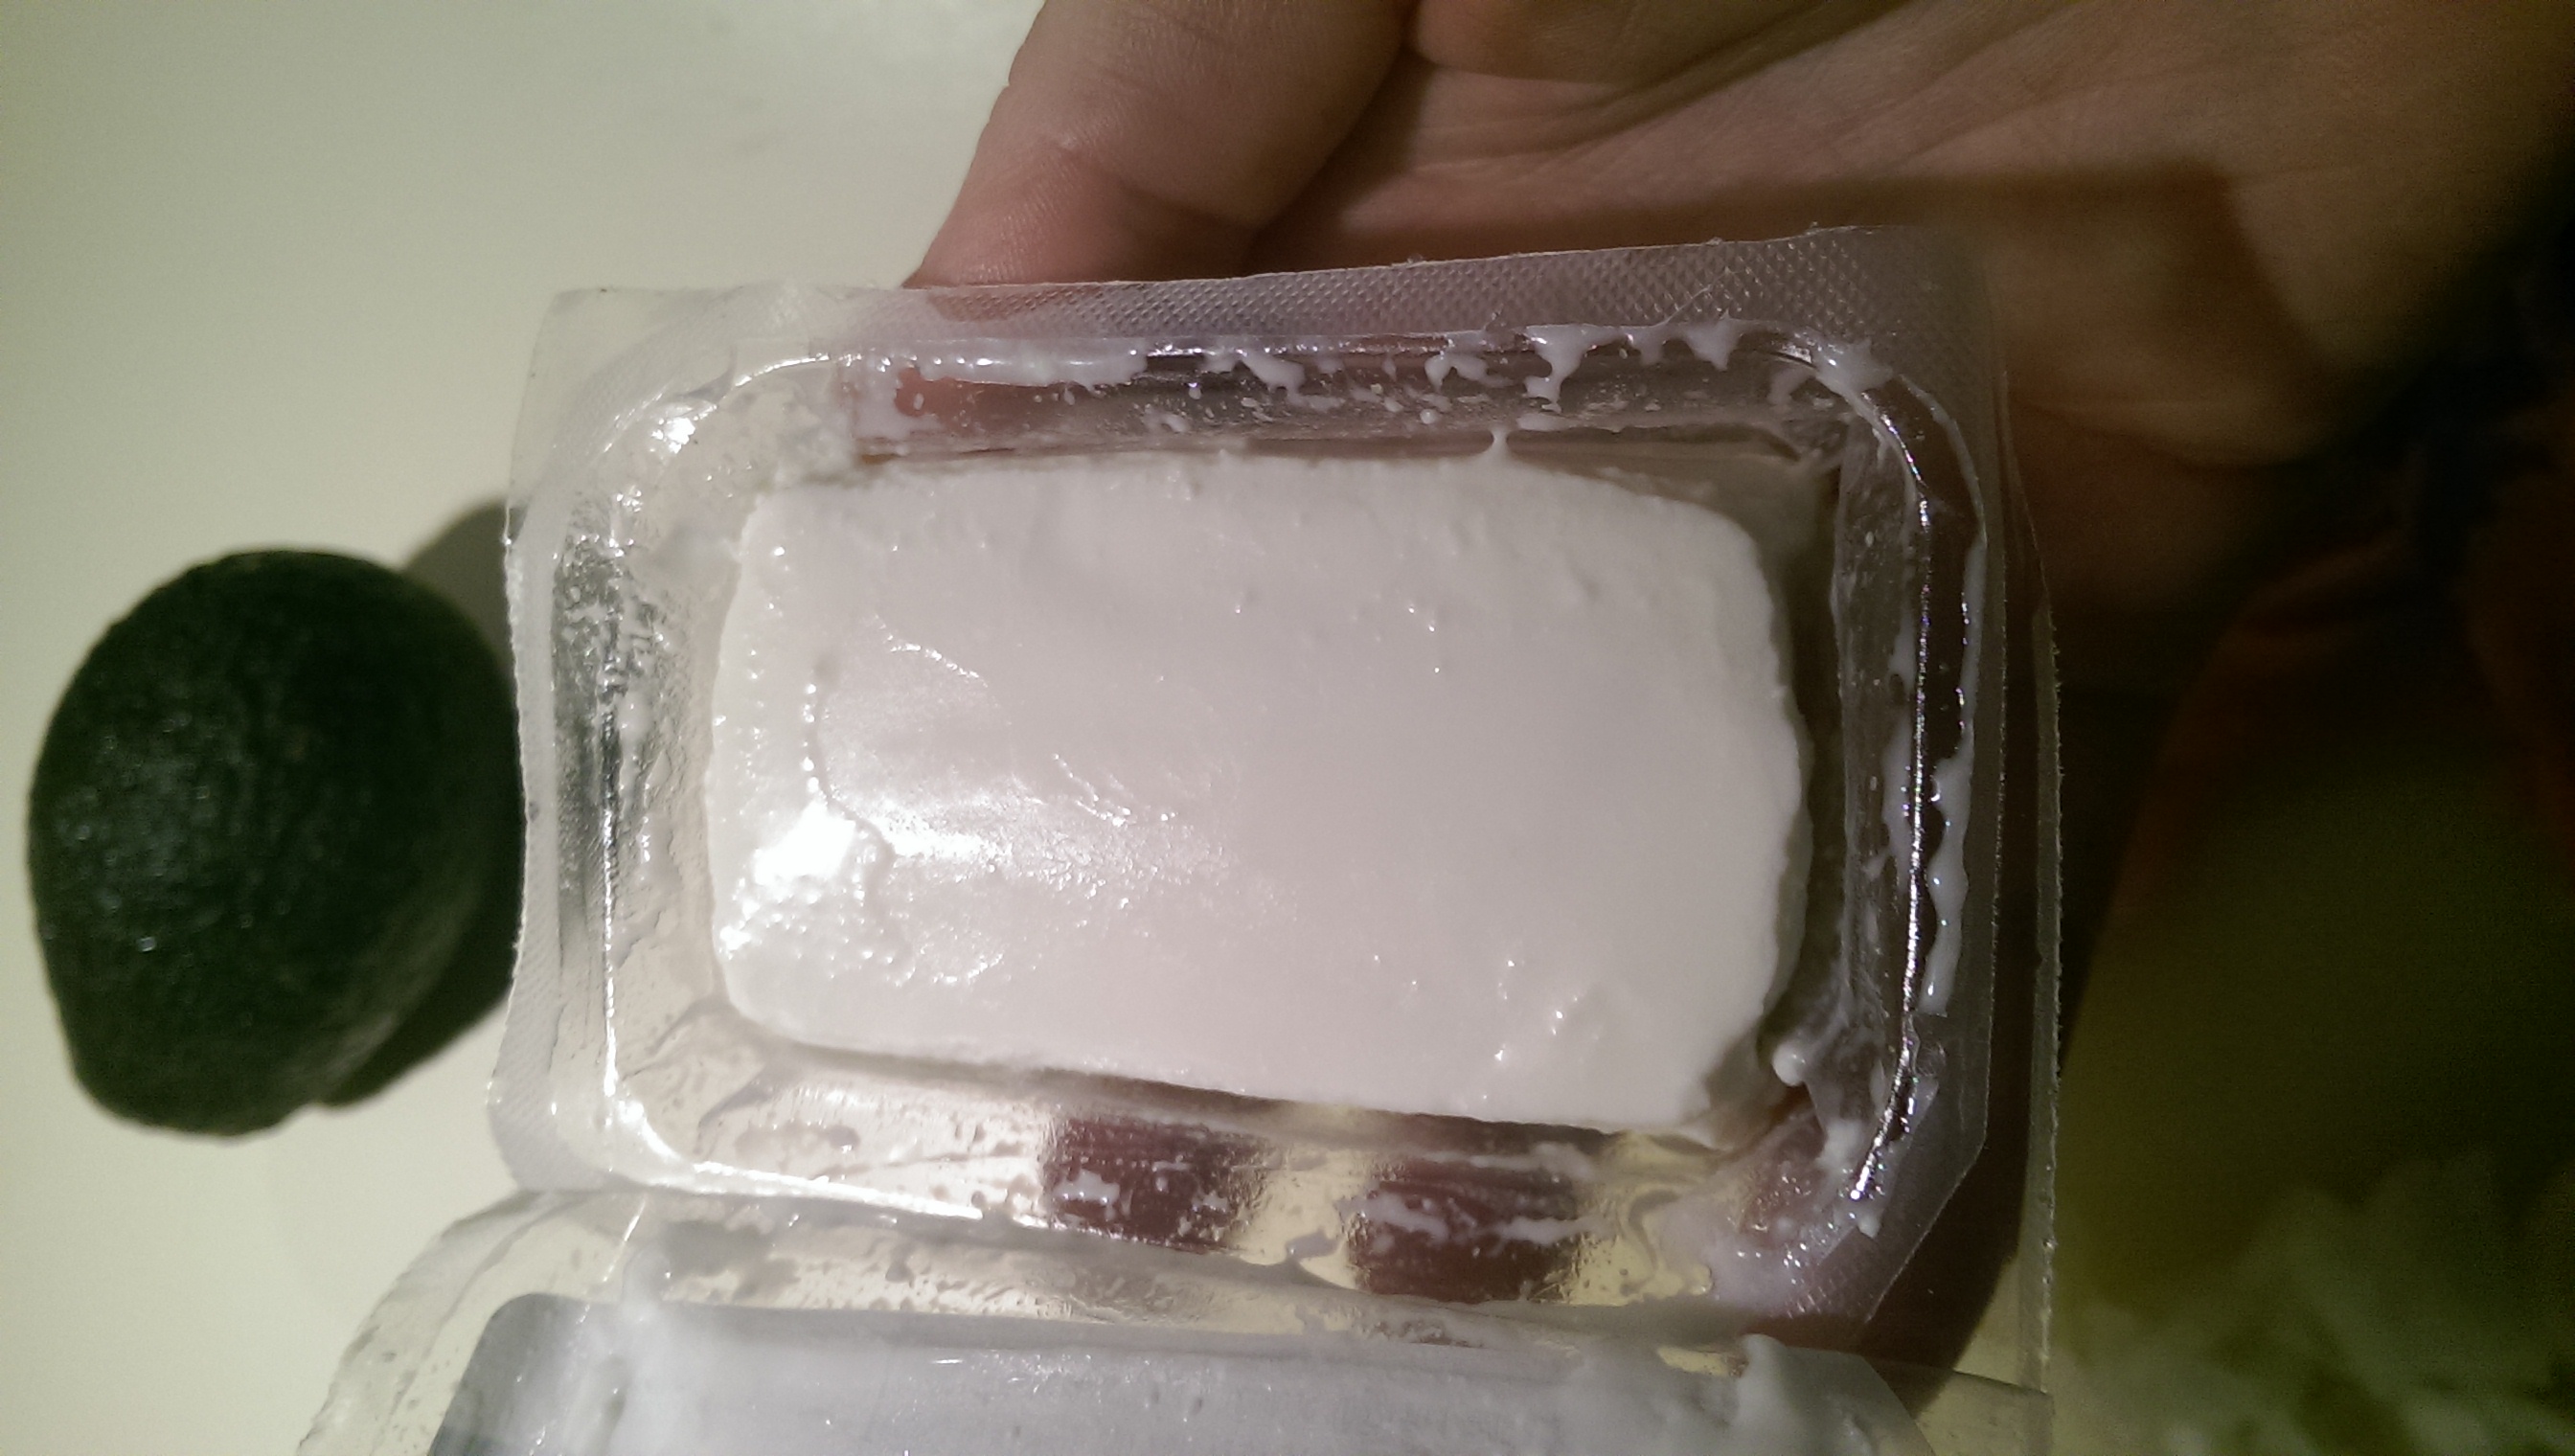
I cut it up while it’s still in the package. Goat cheese is so soft and very difficult to cut no matter what way you want it to be, so I have learned to do it this way if I want it to be close to the size of crumbles. I make cuts both vertically and horizontally in the package, and everything stays in the plastic until I’m ready to dump it in. It still isn’t as perfect as prepackaged crumbles, but you never know what else might be included in those packages to keep the cheese clumps all nicely separated.

Smoked Salmon and Goat Cheese Frittata | The Half-Crunchy Mama

Now I’ll talk about my butter. Unless I’m about to do a bunch of baking for a party or something that will involve a lot of butter, I usually only purchase Kerrygold from the store. If you have time and patience to make your own or spend extra pennies on something better, by all means. For me and my cheap, half-crunchy bum, I’ll go with this one. And I swear it tastes different than the rest of the ones in the dairy case at your regular supermarket. When using cast iron, I don’t bother with anything of low quality. My pan is perfectly seasoned and I’m afraid of using anything that isn’t close to what it has been used to its whole life. You know, like food. Not “organic,” not “non-GMO,” not “grass-fed,” “free-range,” or “rBGH-free” because these things never existed back in Gram’s day. Animals and crops were naturally raised and we dealt with bugs and disease. People still ate. Farmers were respected. People didn’t have all sorts of crazy allergies to food and the environment, and the general population was not nearly as sick as we are today. Okay, I’m getting off my soap box now. Sometimes I just have to rant and get this stuff out.

Smoked Salmon and Goat Cheese Frittata | The Half-Crunchy Mama

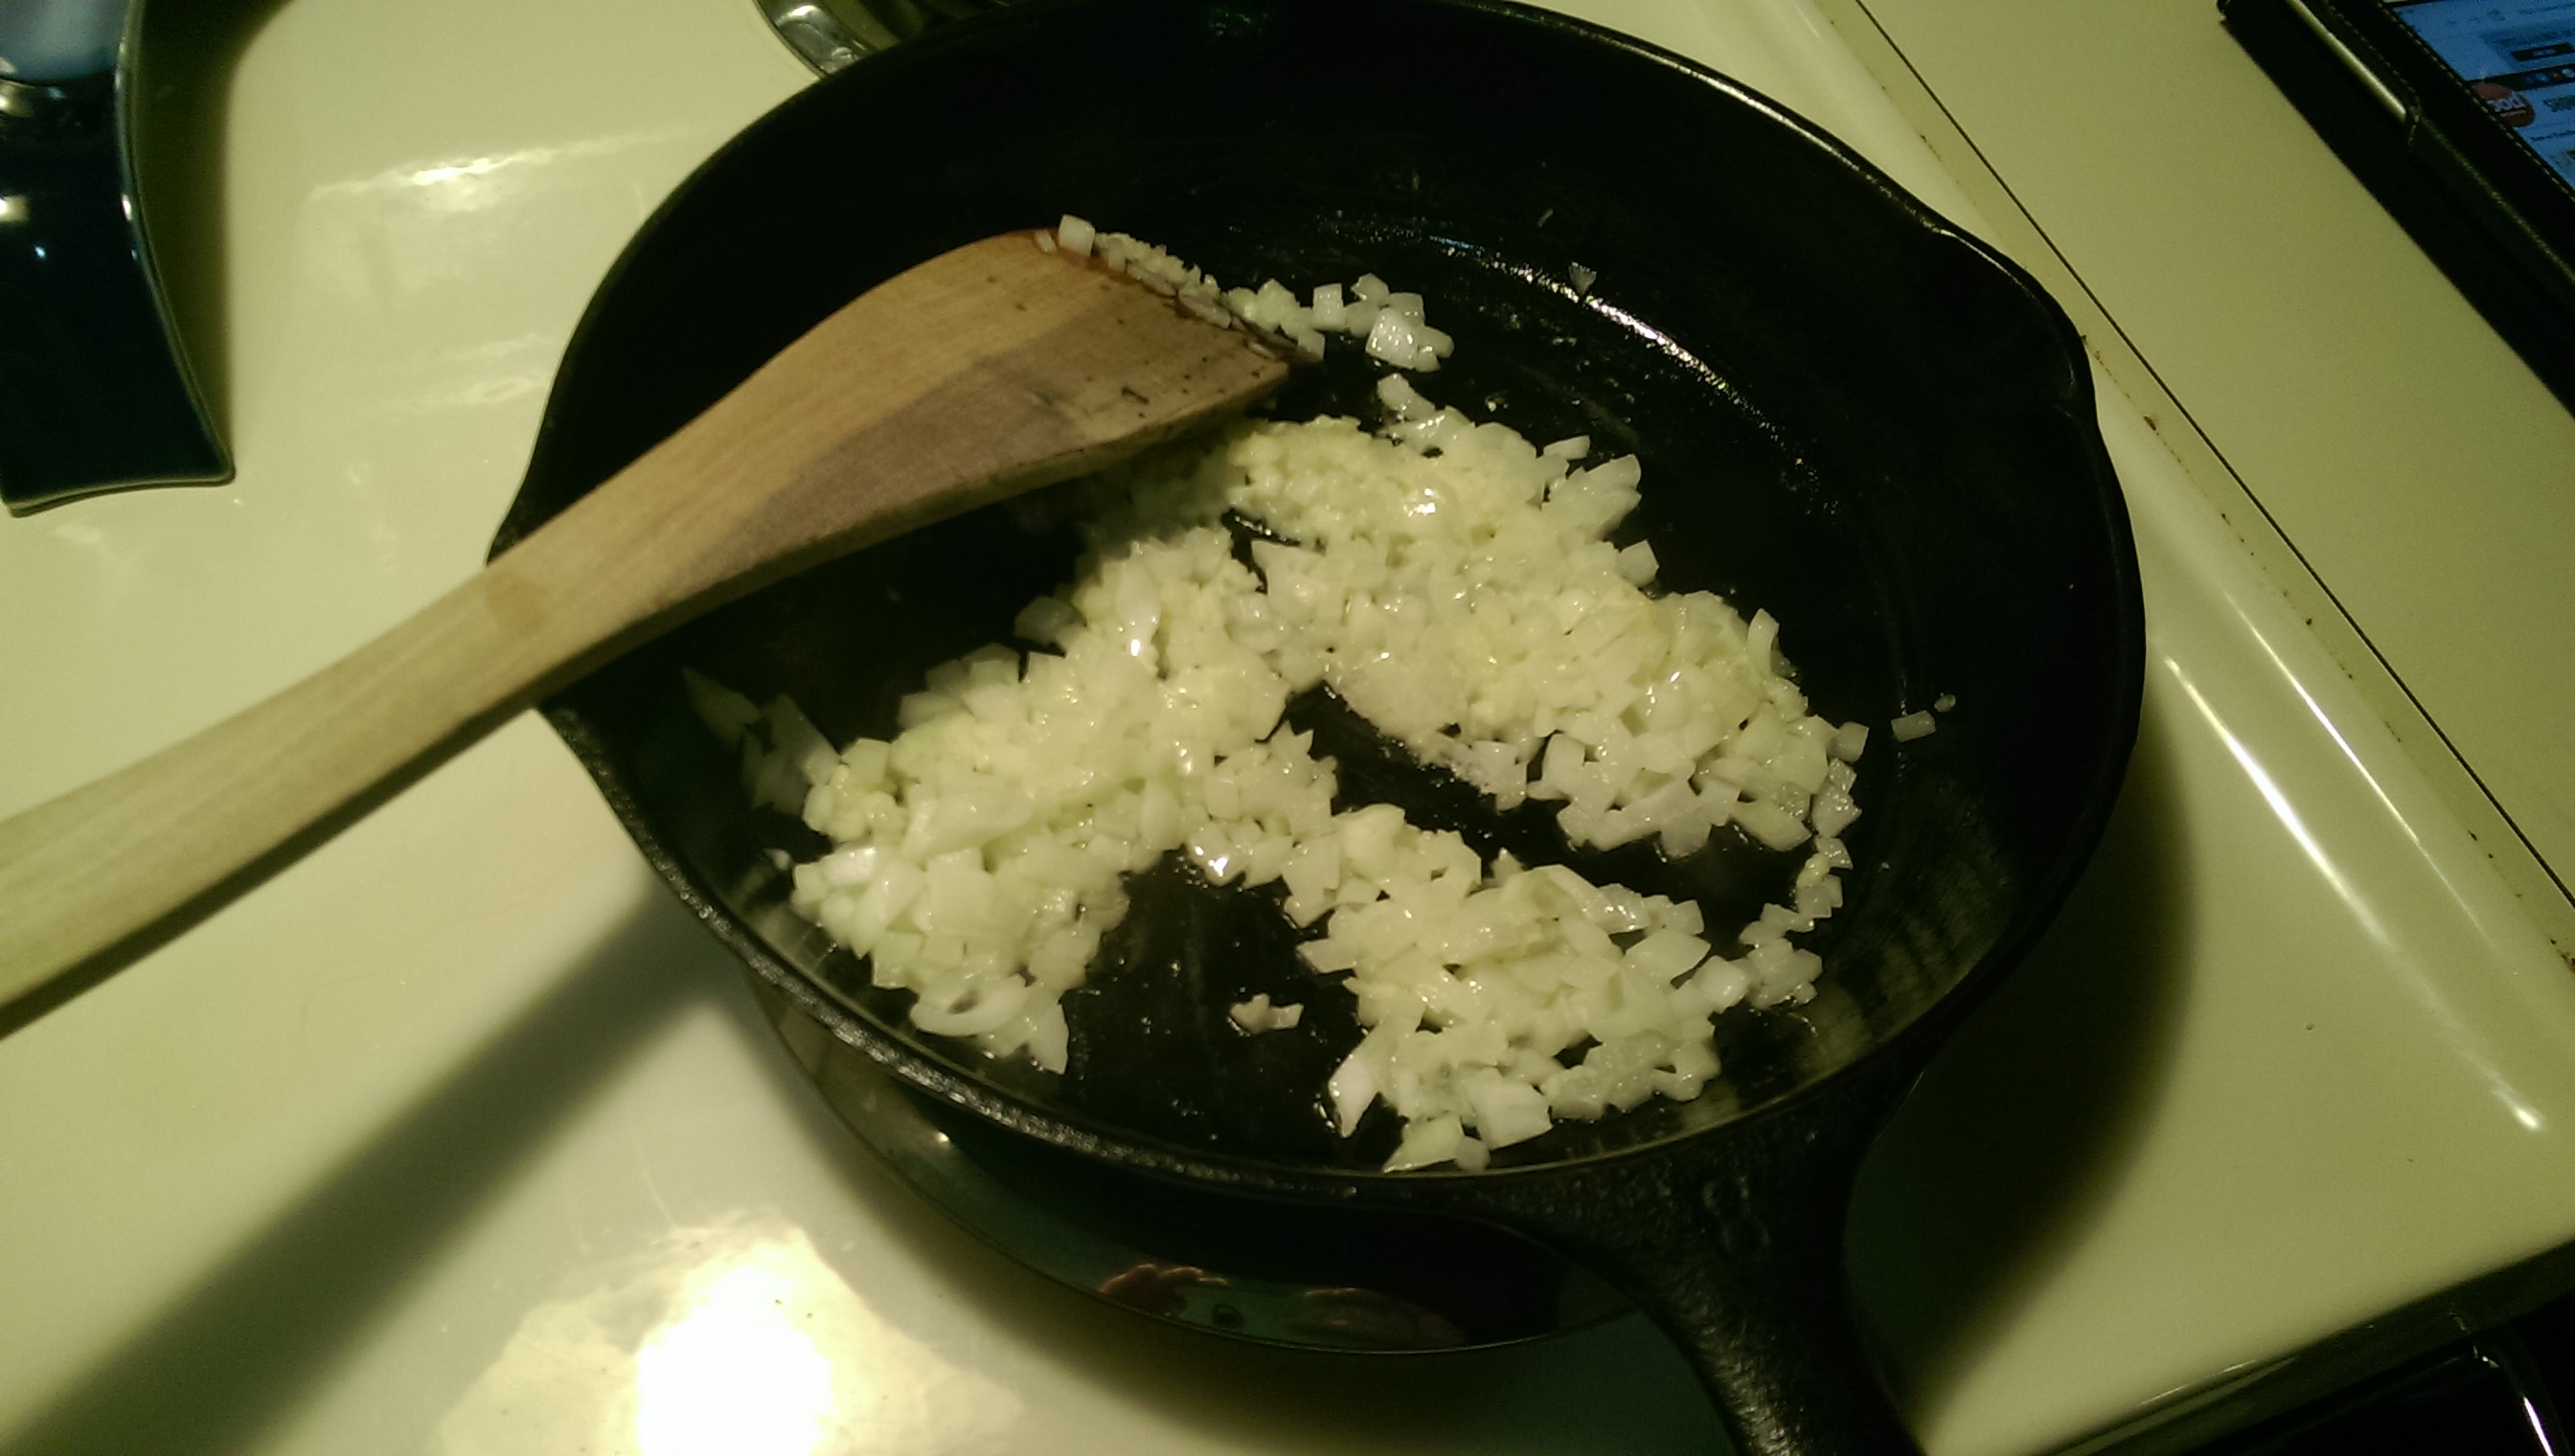
Back to the recipe. After prepping the salmon and cheese, it’s time to get going on the onion and garlic. Chop a small onion finely and mince two cloves of fresh garlic. Melt 1 Tablespoon of butter in the skillet over medium heat. Add the onions and garlic, and saute about 3 minutes.

Smoked Salmon and Goat Cheese Frittata | The Half-Crunchy Mama

 While they are sauteing, whisk 10 eggs in a large bowl with 1/4 milk, if you do dairy, sea salt, and fresh ground pepper. If you don’t do milk and have nothing else to add in its place, use a tablespoon or two of water to help make the eggs fluffy. Add the sliced smoked salmon, the goat cheese, and 2-3 Tbsp dried dill (fresh is WAY better if you have it, but I was all out) to the egg mixture.  Pour egg mixture over the onions and garlic, slightly stirring to combine.

Smoked Salmon and Goat Cheese Frittata | The Half-Crunchy Mama

 Turn the heat up to medium high and cook until the edges start to firm and climb up the side of the pan a little and bubbles start to appear.

Smoked Salmon and Goat Cheese Frittata | The Half-Crunchy Mama

 Transfer it to an oven preheated to 350ºF and bake for about 25 minutes. It should look nice and golden on the top when finished, and a toothpick should come out clean from the middle.

Smoked Salmon and Goat Cheese Frittata | The Half-Crunchy Mama

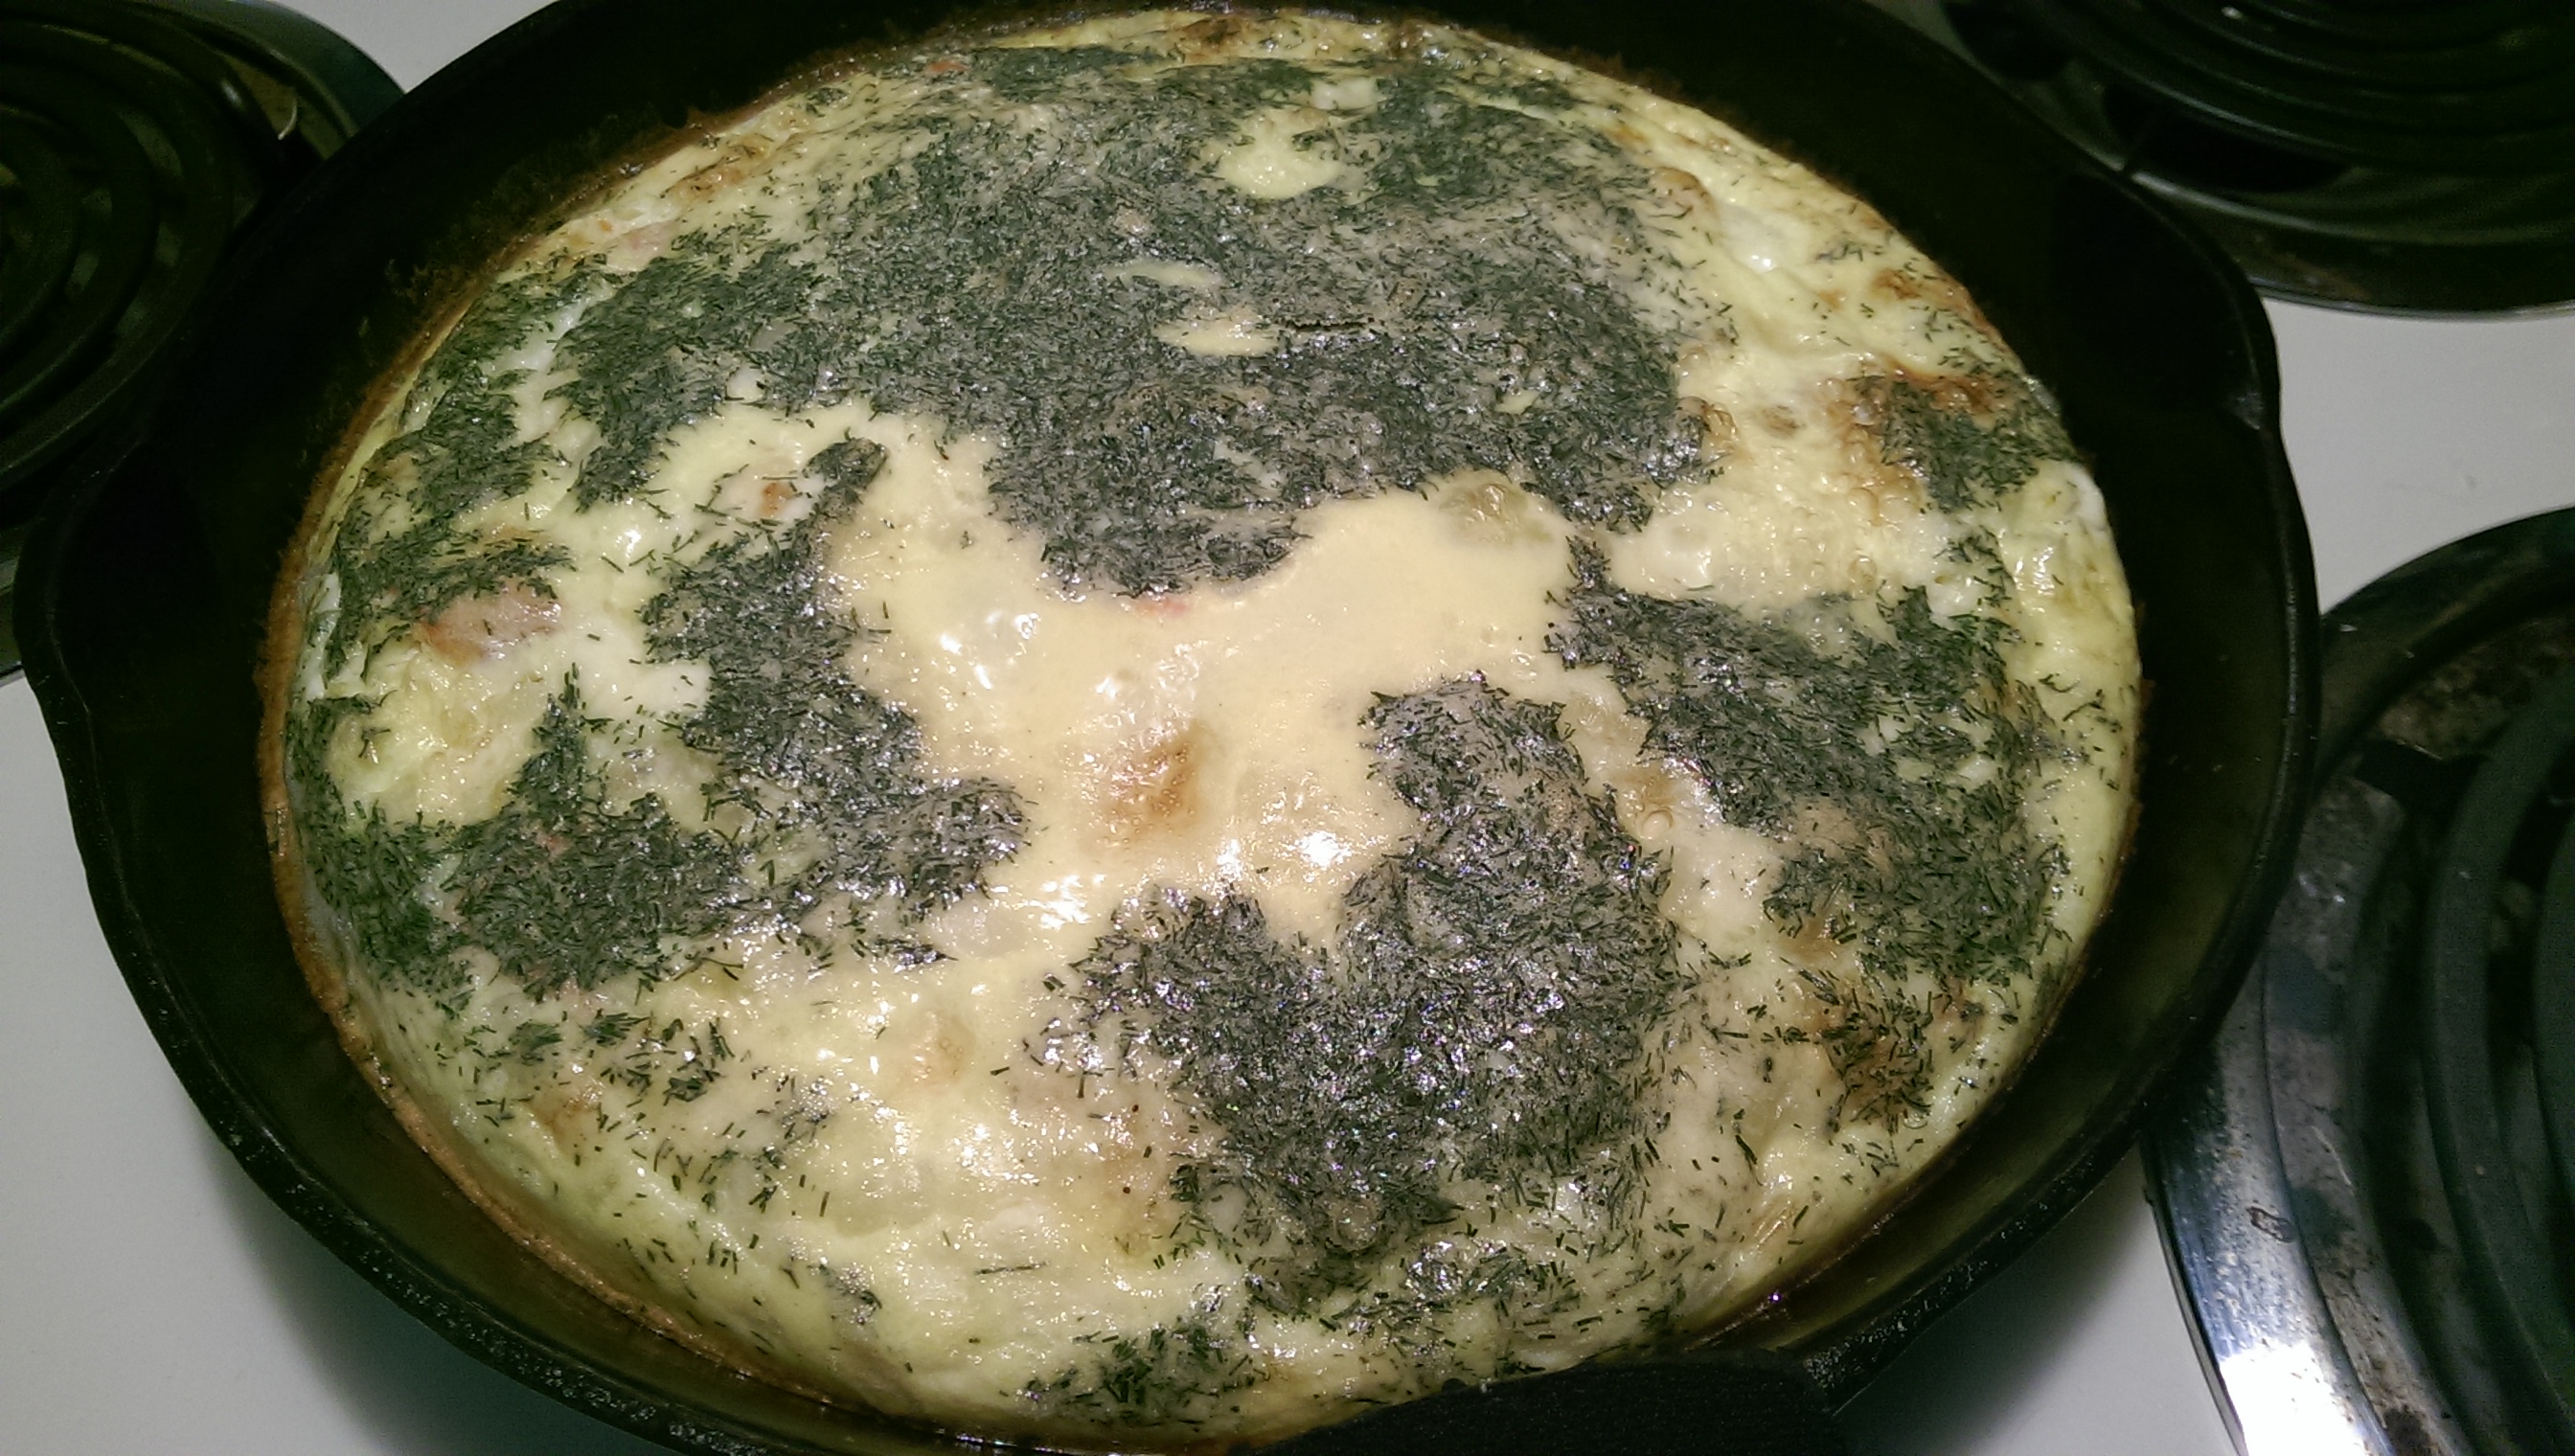
Slice and serve! It goes well with a nice green salad with a mild dressing.

Smoked Salmon and Goat Cheese Frittata | The Half-Crunchy Mama

 One last shot to show how well a wonderfully seasoned pan can work. It helps that this pan is older than me and that I have loved on it just as my Gram did. Once you get used to using one, you will be in love as much as I am.

Smoked Salmon and Goat Cheese Frittata | The Half-Crunchy Mama


 Salmon Goat Cheese Frittata

This simple recipe can help you get dinner on the table in about 35 minutes with very little prep work. It goes well with a small side salad for dinner, and the leftovers are great for any meal!

INGREDIENTS
  • 6 ounce package of smoked salmon, sliced into small strips
  • 4 ounce package of goat cheese, cut into small pieces (or packaged crumbles)
  • 1 small onion, finely diced
  • 2 cloves of garlic, minced
  • 1 Tbsp butter, lard, or oil of your choice
  • 10 eggs
  • 1/4 milk (or other liquid, I’ve only used water)
  • 2-3 Tbsp dill (dried, but fresh would be better)
  • 1/4+ tsp sea salt
  • 1/8+ tsp fresh ground pepper
DIRECTIONS
  1. Preheat oven to 350ºF.
  2. Heat 1 Tbsp butter in a deep or large ovenproof skillet over medium heat. Once melted, saute onions and garlic for about three minutes.
  3. While onions and garlic saute, whisk together the eggs and milk/liquid, salt, and pepper. Add salmon, cheese, and dill to the eggs and stir to combine.
  4. Pour egg mixture over the onions and garlic, give a quick stir, and raise the heat to medium-high. Cook until the edges start to firm and climb up the pan and bubbles start to form.
  5. Transfer pan to the preheated oven and bake for about 25 minutes until golden brown on top and an inserted toothpick comes out clean.
  6. Serve with a lightly dressed green salad. Enjoy!


4 Comments

Cinnamon and Spice Sweet Potato Chips

I have two very good friends of mine that have embarked on their own healing journey after (finally) listening to me and going to my naturopath.  I have some stubborn friends…that I love to death..and their stubbornness is working in their favor. My voodoo doc is really so incredible and I’m beyond thankful for all she has done for me and my family, and now I have been witnessing theCinnamon and Spice Sweet Potato Chips | The Half-Crunchy Mama transformation within these two fantastic and important women in my life.

Their journeys are very different from mine, yet I have tried to give them all the support that I can. My journey was difficult for very different reasons and I didn’t have anyone aside from The Russian (who thought I was even crazier for a bit) and my mom who was all the way back in New York to lean on for support and understanding. I hope that I have helped raise these women up to meet their challenges as they are both very dear to my heart. For some, the natural path can be extremely difficult to walk. Especially when there are serious things to deal with.

Even though I have dietary things to follow (and I’ve been slacking lately and feel like crap), nothing compares to what these two have been dealing with. Interestingly enough, they are ridiculously similar in the way they need to eat, probably for the rest of their lives. I’m used to eating and making strange things for meals and snacks, so I always look forward to getting together with either of their families because with all of our dietary restrictions, we all eat the same way and there are no stupid questions asked like, “What are you eating these days?” or “Why can’t you eat (insert whatever)?” when trying to plan the menu and who is bringing what. No embarrassment, no feelings of needing to explain ourselves, just feelings of acceptance and a level of comfort that puts us all at ease.

So the reason for my post. These two can’t eat much these days. One of them is a lot farther along in her healing and has started adding some foods back in, but there are lots of things that will probably never re-enter her diet. And for my other friend…what a trooper she is trying to be. She keeps testing the limits of her “new” body, but finds out rather quickly that she needs to cut the crap out and find other ways to fulfill her cravings. This is where I come in. Or at least I’m hoping to.

Cinnamon and Spice Sweet Potato Chips | The Half-Crunchy Mama

This past May, my gym had a contest going called “The Biggest Mover.” It was to see who attended the most classes for a month or something, I really don’t remember the rules, but all you had to do was have your instructor initial a paper and then you drop it in a box on the way out. Sure, why not? The first week (I think it ran for 6 weeks), I won that week’s prize. I think that was a random drawing, but I won a nifty gym bag that I have been using since.

I ended up winning the whole damn thing and my prize was the basket in this picture. I was actually pretty excited about it. The loot was 4 cans of coconut water (I don’t like plain ones, but whatever), a bag of goji berries, a bag of golden berries, a bag of shelled hemp seeds, a bag of chia seeds, and a great little cookbook. I have been playing around with the recipes when I have time, and have been hopeful to give my friend some snacking ideas. This one was a big hit with my other friend’s family, and mine.

So I thought she could eat sweet potatoes, but as I was writing this, she tells me she’s going to try and pull them. WTH? I’m putting this out there for her and all my Paleo folks as they are allowed sweets, as I like to call them. I literally told her in our Facebook message, “Maybe with the spices and chia seeds, you can handle them as those additions should handle the inflammation that it casuses. Just my uneducated-i’m-not-a-doctor-but-know-some-things opinion.” Then she reminded me that she can’t do ANY seeds. BULLSH#T! So of course she will leave them out, as will any of you that need to follow the AIP (Autoimmune Protocol for anyone that doesn’t know what that means) diet. Regardless of her leaving them out, at least she can quickly and easily make a potato chip that will satisfy both the need for sweet and salty, with a crunch!

There are a few other recipes from this book that I will be sharing as I work through the book and tweak ones as I see fit. One in particular has been a BIG hit with my other friend’s family and my own, and another I have fixed up a little to be easier to work with and enjoy. Stay tuned for more tasty recipes that can be traced back to this book.

Why chia seeds? Rich in fiber, omega-3s, antioxidants, and amino acids, and almost all the carbs in them count as fiber.

A 1 ounce (28 grams) serving of chia seeds contains:

  • Fiber: 11 grams.
  • Protein: 4 grams.
  • Fat: 9 grams (5 of which are Omega-3s).
  • Calcium: 18% of the RDA.
  • Manganese: 30% of the RDA.
  • Magnesium: 30% of the RDA.
  • Phosphorus: 27% of the RDA.
  • They also contain a decent amount of Zinc, Vitamin B3 (Niacin), Potassium, Vitamin B1 (Thiamine) and Vitamin B2.

Chia can aid in weight loss as they can help reduce food cravings by preventing some of the food that you eat from getting absorbed into your system. This blockage of calorie absorption makes them a great diet helper. They can help you feel fuller faster because they absorb 10 times their weight in water, forming a bulky gel. They are often used as hydration for athletes because the “chia gel” can hydrate the body. They may reduce your blood pressure as evidence has suggested that they can reduce blood pressure. They are rich in Omega-3s, and are the richest plant source of Omega-3 (the vital fats that protect against inflammation—such as arthritis—and heart disease). In fact, they contain more Omega-3 than salmon! They can also be beneficial for diabetics because chia seeds slow down how fast our bodies convert carbohydrates into simple sugars, and studies indicate they can control blood sugar, leading scientists to believe chia seeds may have great benefits for diabetics. And they are easier to digest than flax seeds, and don’t need to be ground up. Give them a try! Add them to yogurt, smoothies, baked goods, anything that you can think of. They are annoying and a pain to clean up (not to mention they can hang out in your teeth – pet peeve!), but they are worth it!


Cinnamon and Spice Sweet Potato Chips

This is a great sweet and slightly salty, crunchy treat to replace store-bought potato chips. I go a little overboard on the spice quantities because we like flavor in this house. Figure out how spicy you want to make them. These are cheap, fast, and easy to make, and barely make it through the day in our house!

INGREDIENTS
  • 3 medium sweet potatoes (about 1 lb)
  • 3 Tbsp EVOO
  • 2 Tbsp chia seeds
  • 1-2 tsp ground cinnamon
  • 1/2 tsp ground ginger
  • 1/4 tsp ground nutmeg
  • Pinch of ground cloves
  • Few pinches of sea salt
DIRECTIONS
  1. Preheat oven to 300ºF.
  2. Peel the potatoes and slice into paper-thin disks, or however thin you can get them. A mandoline would probably be best for this. (I had success using the flat blade from my spiralizer after using a hand-held mandoline slicer last time that made the chips a little too thick and chewy.)
  3. In a large bowl, coat the potato disks with the EVOO and chia seeds. In a small bowl, combine all the spices.
  4. Spread the chips out in a single layer on a rimmed cookie sheet(s) and sprinkle the seasoning over them, and then sprinkle with salt.
  5. Bake for 20-25 minutes until crisp, flipping about halfway through. (I seem to end up baking between 30-35 minutes, so the time depends on your oven and how thick they end up being.)
  6. Store in an airtight container, if you don’t eat them all before nightfall. Enjoy!

Cinnamon and Spice Sweet Potato Chips | The Half-Crunchy Mama


Leave a comment

Creamy Veggie Tagliatelle (yes, it’s gluten free!)

How I came up with this recipe is twofold. It was partially due to what I was craving and knew I had in the house, and the rest was inspired by a recipe used for the photo on this box of pasta. I had found myself scoping out the egg pastas as I was craving some egg noodles, hoping to find some gluten-free ones so that Sugar Bee would be able to eat whatever I ended up making. All of the ones at the particular store I was at contained wheat. This was my very first time trying this brand (whether egg or plain pasta) and the success from this meal was the reason I ended up using this brand for my Eggplant Ragout one night. My thoughts that I shared in that post about choosing the spaghetti are identical to when I first picked this box up. In fact, I’m pretty sure that this was my first experience with Jovial pasta, but egg pasta IS different from regular (as regular as GF can be), so I think those thoughts are still valid here. I took one look at the box and between the “100% organic” and “Product of Italy” on the label, I was sold. Italians know what they are doing with pasta, glutened or not.

Creamy Veggie Tagliatelle - The Half-Crunchy Mama

Upon further inspection of the recipe on the box, I realized I had most of the ingredients at home and I could make a dish like this with minimal investment during this trip to the store. I was getting close to payday, so of course I was short on funds and looking to maximize my spending. This was so cheap, fast, and easy…just how I like my weeknight meals to be.

I took a large zucchini and julienned it, giving me about 3 cups of shredded zucchini. Then I sliced a sweet onion into pieces that mimicked the shreds. That was the extent of my prep work.

I melted 3 tablespoons of Kerrygold butter in a pan over medium heat. I threw in the onion and about 2 teaspoons of minced garlic from a jar, and sauteed for about 2 minutes. I threw in the zucchini shreds and about a cup and a half of  matchstick organic carrots from a bag (no prep!), tossing everything in the butter to coat. After adding some sea salt and fresh ground pepper, I let this all cook for about three minutes until the veggies started to soften a little, but kept their bright colors. I removed the veggie mixture from the pan with a slotted spoon, leaving behind any leftover butter drippings.

Creamy Veggie Tagliatelle - The Half-Crunchy Mama

 I cooked the pasta according to the directions on the box and then returned the saute pan to the stove over low heat. I added 3/4 cup of regular whipping cream and a cup and a half of grated Parmesan-Pecorino cheese, stirring until the cheese had melted. I then returned the veggies to the pan, tossing to coat them well in the creamy cheese sauce.

After cooking and draining the pasta, I returned the noodles to the pot and poured the creamy veggie sauce over them, combining well to plate a perfect summer pasta dish.

Creamy Veggie Tagliatelle - The Half-Crunchy Mama

 The absolute best part? This dish reheated PERFECTLY, unlike a typical Alfredo or cream sauce that you would make for a pasta dish. Bonus!

Creamy Veggie Tagliatelle - The Half-Crunchy Mama


Creamy Veggie Tagliatelle

A jazzed-up version of a recipe on a box of pasta, with extra cheese, added garlic, and lighter cream. I would think you could serve this over spaghetti squash, too, in case you are living completely grain free.

INGREDIENTS
  • 3 Tbsp butter or ghee
  • 1 onion, quartered and thinly sliced
  • 2 tsp minced garlic (I used jarred)
  • 1 large zucchini, julienned (about 3 cups)
  • 1.5 cups matchstick carrots (bagged is perfect)
  • 3/4 cup whipping cream (heavy cream not necessary)
  • 1.5 cups grated Parmesan-Pecorino cheese
  • Sea salt and fresh ground pepper
DIRECTIONS
  1. Melt the butter in a saute pan over medium heat. Add the onions and garlic, cooking for 2 minutes.
  2. Add the zucchini, carrots, salt, and pepper, and toss well to combine and coat in butter. Cook for 3 minutes. Remove from pan with a slotted spoon and set aside.
  3. Cook the GF tagliatelle according to package directions. When finished, drain and return to pot.
  4. While the pasta is cooking, return the saute pan to stove over low heat. Add the cream and grated cheese. Heat until the cheese is melted. Return the veggie mixture to the pan and toss to coat in the sauce, heating until warmed through.
  5. Pour creamy veggie sauce over the cooked pasta and stir to combine well. Serve and enjoy! (Even leftover!)


Leave a comment

Lemony Zucchini Noodle Shrimp Scampi

Lemony Zucchini Noodle Shrimp Scampi

My creation for dinner Saturday night. A bag of frozen cooked shrimp, a few zucchini, some fresh herbs, and items that are always in the house gave birth to deliciousness.

Lemony Zucchini Noodle Shrimp Scampi

As I mentioned in my post for Creamy Zucchini Noodles, I love my spiral slicer. We love zucchini noodles and they are a healthy alternative to pasta for whole food and grain-free diets. So I made some noodles.

I took this next picture to share with you another of my favorite kitchen tools, the Microplane grater. I zested the whole lemon before squeezing all the juice, using both for the sauce.

Lemony Zucchini Noodle Shrimp Scampi

 Aside from making the noodles and handling the lemon, the only prep that was needed was getting the garlic ready for the mincer. My favorite kind of meals are ones that are fast, cheap, and easy. This one checks all of those boxes.

As usual, I tossed the noodles in olive oil that was preheated in a skillet over medium heat. I shook some salt and fresh ground pepper over it and cooked them for about 5 minutes until they softened, but were still a little firm. I removed the pan from the burner and set it aside.

Lemony Zucchini Noodle Shrimp Scampi

 Then it was time for the sauce. I melted 4 tablespoons of butter (I use Kerrygold) over medium-low heat and then added 6 cloves of freshly minced garlic, cooking for about 2 minutes. Then I added 1/4 cup of white wine, the lemon juice, and zest, bringing it to a boil.

Lemony Zucchini Noodle Shrimp Scampi

After about a minute or two of boiling, I added the thawed shrimp. I heated the shrimp in the sauce over medium until they were heated through. (You can tell when they are heated enough when they have shrunk a little and the sauce starts to boil again.) I removed the shrimp from the pan with a slotted spoon and set them aside. Then I added a tablespoon of gluten-free flour (Bob’s Red Mill), whisking constantly to combine. I also added a little salt and fresh pepper after the flour.

Lemony Zucchini Noodle Shrimp Scampi

Once the sauce had thickened, I returned the shrimp to the pan and coated them in the buttery lemon sauce.

Lemony Zucchini Noodle Shrimp Scampi

I threw in about 2 tablespoons each of freshly chopped parsley and basil from the garden, tossing well to coat the shrimp.

Lemony Zucchini Noodle Shrimp Scampi

I divided the zucchini noodles into our bowls and topped them with the Lemony Shrimp Scampi. Oh. my. It was so good that this is the fastest turnaround for a recipe post from me. Ever.

Lemony Zucchini Noodle Shrimp Scampi


Lemony Zucchini Noodle Shrimp Scampi

The amount of shrimp should probably be for three servings, but I only had two servings of noodles (portion size is not something the Russian and I do well), so I would suggest that you add another zucchini to the noodles if you don’t want to eat 6 ounces of shrimp in one meal. Another thought that I had was it may not be easy to find a 12 ounce package of shrimp, so if you can only find a 16 ounce one, use two additional zucchini and increase all the sauce ingredients slightly. If you are friend of mine, you can probably eat the portions that this recipe makes – perfect for two!

INGREDIENTS
  • 2 medium zucchini, cut into noodles with a spiral slicer (or julienne peeler)
  • 1-2 Tbsp extra-virgin olive oil
  • 4 Tbsp butter or ghee
  • 6 cloves of garlic, freshly minced
  • 1/4 c white wine, preferably on the dry side
  • Freshly squeezed juice of one lemon (about 2 1/2 Tbsp)
  • Zest of one lemon (about 1 tsp)
  • 12 ounce package of frozen cooked shrimp, thawed and drained
  • 1 Tbsp gluten-free all-purpose flour
  • 2 Tbsp chopped parsley
  • 2 Tbsp chopped basil
  • Salt and fresh ground pepper
DIRECTIONS
  1. Heat EVOO in a skillet over medium heat. Add zucchini, salt, and pepper to pan and toss to coat. Cook for 5 minutes until noodles have softened, but are still firm and bright green. Remove from heat and set aside.
  2. Melt butter in another skillet over medium-low heat. Add garlic and cook for about two minutes until garlic is soft and fragrant, but not browned. Add wine, lemon juice, and zest. Bring to a boil and cook for about 1 minute.
  3. Turn heat to medium and add the shrimp, tossing to coat. Cook until heated through (when visibly shrinking and liquid starts to boil again). Remove shrimp with a slotted spoon and set aside.
  4. Add flour, salt and pepper (to taste) to the lemon butter sauce and whisk constantly until flour dissolves and sauce thickens.
  5. Return shrimp to pan, add fresh herbs, and toss to coat.
  6. Serve zucchini noddles topped with shrimp, drizzling extra sauce over the top. Enjoy!


3 Comments

Eggplant Ragout

Get excited!! It’s a true original from The Half-Crunchy Mama. I apologize to my readers (especially my Facebook fans that knew about this for a few weeks) for taking so long with this post. Back-to-back weddings, a few weeks with Sugar Bee out of summer camp, and my job workload has left me with about a dozen drafted posts that aren’t close to publication time. But hey, I’m finally getting this one out to you! Better late than never and I think you will find it was worth the wait.

I have varied my eggplant ragout so many times through the years. For this particular batch, I worked with what I had in the house. You can switch up the spices, add some red wine, use sauce from a jar, improvise! That’s what I’m always doing in the kitchen. About 95% of the time that I make this dish, it gets served over oven-roasted spaghetti squash. I couldn’t find one in Kroger and was in no mood to go to another store that evening, so I went with a gluten-free pasta. I kind of prefer it on the squash, but it will be just as delicious served over any pasta you choose (but I would go for the squash). There are a lot of things that you can do to make this your own. Hopefully, it will still look similar to this in the pan when it’s finished and ready to fill your belly.

Eggplant Ragout - The Half-Crunchy Mama

The most exciting part of making my ragout this time around was that it was made with two freshly grown eggplants picked right from my very own container garden.  #humblebrag One large one would probably be enough. Feel free to adjust the quantity of both the beef and the eggplant based on the ratio that you want to have in your sauce.

Peel, slice, and dice the eggplant.

Eggplant Ragout - The Half-Crunchy Mama

Dice it even smaller than this. I left them a little too big this time (about 1/2 inch dice), but it worked good for the photos 🙂 Put the diced eggplant in a bowl lined with paper towels, tossing with salt as you add to the bowl. It’s time to get the eggplant to sweat.

Eggplant Ragout - The Half-Crunchy Mama

 Let the salted eggplant sweat it out in the bowl while you prep the other ingredients. It should be nice and glistening with visible water droplets before it gets thrown into the pan.

Eggplant Ragout - The Half-Crunchy Mama

Chop and dice an onion. If you somehow missed this tutorial on the interwebs, it will forever change the way you cut onions. Next, mince up about 5 cloves of garlic….more or less depending on your taste. As I’ve said before, we love garlic in this house.

Heat your oil in a deep saute pan over medium heat. Add the onions and garlic to the pan, and saute until the onions are just getting soft, but not browned. I LOVE the smell that fills that house from just this part alone.

Eggplant Ragout - The Half-Crunchy Mama

 Throw a pound to a pound and a half of ground beef into the pan and combine, breaking it up. Add some Worcestershire sauce and/or red wine. Yes, I use the “unclean” Worstey sauce on just about anything beefy or pretending to be beef (like ground turkey).  I love the flavor. And I love wine which is why it’s often included in any meaty saucy concoction, but I actually didn’t have any red wine in the house. WHAT?!  Hard to believe, I know, and a shame that I didn’t have any to go along with cooking my ragout. I knew something was missing.

Eggplant Ragout - The Half-Crunchy Mama

 While the meat is still a little pink, add your (hopefully) very sweaty eggplant to the pan.

Eggplant Ragout - The Half-Crunchy Mama

 Drizzle a generous amount of EVOO over the eggplant, as well as some freshly ground pepper, before combining with the meat mixture. Eggplant absorbs a LOT of oil, so don’t worry about going a little overboard with oiling it up in the pan. Turn the heat up to medium-high and cook 5-8 minutes, stirring often, until the eggplant starts to get softer. (They will be releasing liquid as they cook.)

Eggplant Ragout - The Half-Crunchy Mama

Add the fire-roasted, diced tomatoes, tomato puree, tomato paste, and all the spices. Taste a little of the liquid and add salt and pepper according to your taste buds. I can’t tell you how much to add because I don’t use much salt. Start with maybe 1 teaspoon of salt and several turns around the pan with the pepper grinder and taste it again. Continue until you like the flavor.

You will know it’s ready to simmer when it’s ridiculously thick and you can stand a utensil up in it.

Eggplant Ragout - The Half-Crunchy Mama

 Cover and simmer the sauce until the eggplant basically turns to mush. When you think that it’s getting close to being finished, get going on the pasta. If you are roasting spaghetti squash like I usually do, you should be about ready to take it out of the oven if it’s not already cooling off to get spaghettied.

Eggplant Ragout - The Half-Crunchy Mama

As I mentioned above, Kroger didn’t have any squash and I was pressed for time, so I headed over to the natural food section to scope out what GF pastas they had. They had a few brands that I don’t really care for because they do NOT reheat well and taste horrible as leftovers, so I was starting to get nervous about what I was going to do. Then I spotted this box:
Eggplant Ragout - The Half-Crunchy Mama

 Gluten-free spaghetti made in Italy? Well surely this must be tasty. After all, Italians know their pasta! I cooked it up and I must give it a RAVE review. I have tried almost every brand of GF pasta on the market and can tell you what tastes “real” and what to avoid unless you are going to eat it all right away (no leftovers). Not only did this taste amazing, but it reheats beautifully. Six thumbs up from this household!

After finishing the pasta (or making spaghetti out of the squash), it’s time to eat! This was the plate I made up for Sugar Bee.

Eggplant Ragout - The Half-Crunchy Mama

 Of course mine needed cheese. Fresh shredded Parmesan-Reggiano….yum.

Eggplant Ragout - The Half-Crunchy Mama

As usual, Sugar Bee approves!

Eggplant Ragout - The Half-Crunchy Mama


Eggplant Ragout

Be sure to dice the eggplant very small or it will take a long time for them to soften. You could also leave the meat out and double the eggplant for a vegetarian meal. If you prefer to make a casserole or want an idea for what to do with the leftovers, scroll down past the recipe details for a cheesy transformation! 

INGREDIENTS
  • 1 large or two small eggplants, peeled and diced small (1/4 inch)
  • 1 medium onion, diced
  • 5 cloves of garlic, minced or pressed
  • Extra-virgin olive oil (several tablespoons, divided)
  • 1-1.5 lbs ground beef
  • 1-2 Tbsp Worcestershire sauce and/or red wine
  • Salt and fresh ground pepper
  • 28-ounce can of fire-roasted diced tomatoes
  • 28-ounce can of tomato puree
  • 2 Tbsp Italian seasoning
  • 1 tsp dried basil
  • 3 ounces tomato paste (about 3 ounces)
  • Pasta of choice or roasted spaghetti squash
  • Cheese for garnish, if desired
DIRECTIONS
  1. Sprinkle peeled and diced eggplant with salt while adding it to a bowl lined with paper towels. Set aside to sweat.
  2. Heat oil (a few turns around the pan) in a deep saute pan over medium heat. Add the onions and garlic and cook until the onions start to get soft, but not brown.
  3. Add ground beef and Worcestershire/wine, and mix well to combine.
  4. When the beef is still slightly pink, add the eggplant, fresh ground pepper, and drizzle a few tablespoons of EVOO all over the eggplant. Increase heat to medium-high and cook, stirring often, for 5-8 minutes until eggplant begins to soften.
  5. Add tomatoes, puree, paste, and spices, and add salt and pepper to taste. (Taste a few times.) Reduce heat to medium-low, cover, and simmer until eggplant starts to get mushy.
  6. When the sauce is almost finished, cook pasta according to package directions or spaghetti the cooled roasted squash.
  7. Serve ragout over pasta and top with cheese, if desired. Enjoy!
*Note: If using spaghetti squash, begin roasting it before making the sauce as it takes time to cook and will need to cool before handling. Here is a link to basic cooking methods. I cut in half, coat flesh with EVOO, and roast cut-side down in the oven at 375ºF for about 30 minutes, depending on size. When cool enough to handle, shred with a fork to make spaghetti-like strands.


Leftovers? Or maybe you want it to be a casserole instead?

Here’s a second meal you can make out of what is leftover or you can just continue here from where I ended the Ragout recipe.

Combine pasta and ragout in the pasta pot or a large bowl. Add to glass baking dish (I used an 8×8-inch one for the leftovers) coated with cooking spray. Pat down with spatula or back of spoon to flatten.

Eggplant Ragout - The Half-Crunchy Mama

 Add a layer of grated Parmesan cheese. I use a grated Parmesan and Romano blend that I get from Trader Joe’s.

Eggplant Ragout - The Half-Crunchy Mama

 Cover with about one cup of shredded cheese. I like the Italian blend one from Publix, but regular shredded mozzarella would be just fine.

Eggplant Ragout - The Half-Crunchy Mama

 Place in preheated oven and bake at 325ºF for 15 minutes. Switch on the broiler for the last minute or two to brown the top. Now you have another meal!

2014-07-19 18.56.48


Leave a comment

Balsamic Roasted Brussels Sprouts

Brussels sprouts. Yes, they are spelled with an ‘s’ on the end, as in the capital of Belgium. I didn’t realize that until I started cooking them as an adult. Usually people love or hate these little baby cabbages. We LOVE them. In fact, I have always liked them, even as a kid. My mom would cook some for dinner every now and then, and my dad and I were the only ones that would really eat any. My sister would hide hers in the bottom of her milk to escape eating the few that she was given. The ones my mom cooked weren’t even fresh and I still ate them. Crazy, if you ask me.

I make them all the time in a variety of ways, but they are almost always roasted one way or another in the oven. Roasting them makes them soften and caramelize a little to give them a slight bit of sweet. Through the years, I have fed many a friend at my house. Feeding people makes me happy. Silence at my dinner table fills me up, knowing that everyone is just enjoying the meal. All too often I have heard, “I can’t believe I am eating Brussels sprouts….and I like them!” People can always trust me, especially when it comes to food. I will never lie about food. I take food very seriously.

This particular night, I didn’t have my usual ingredients handy for my favorite and most popular Roasted Brussels Sprouts with Pecans (with a few modifications), so I got creative. Balsamic vinegar adds such depth to foods, so I figured it should be a good choice for the sprouts.

First off is to wash the sprouts. Obvious, I know, but I mention this because I do a little more than just rinse them off. I let them soak for a few minutes in a bowl of water. Those layers of leaves can store a little more dirt than you would think. Then I take a few out at a time to the cutting board, cut the bottoms off, and halve them. The outer layer of leaves often fall off and that’s just fine. I usually want those to fall off because if they don’t, I remove them anyway. If leaves aside from those outer ones fall off, I just scoop those up and place them in the bowl with the halved sprouts.  They crisp up something delicious in the oven.

Balsamic Roasted Brussels Sprouts

 Toss them in the bowl with extra virgin olive oil, salt, and fresh pepper. Spread them out on a jelly roll pan (the technical name for this type of baking sheet) and place them cut side down.

Balsamic Roasted Brussels Sprouts - The Half-Crunchy Mama

 Bake in a preheated oven at 375ºF for 20-25 minutes. They should look like this when they are almost finished:

Balsamic Roasted Brussels Sprouts

 Add a few teaspoons of balsamic vinegar over them and stir with a spatula to spread it around. Watch out, though! The vinegar gets really strong on a hot pan and can burn your nose.

Balsamic Roasted Brussels Sprouts

 These are even good leftover…I like to eat my leftover sprouts right from the fridge.


Balsamic Roasted Brussels Sprouts

Just one of several ways you can roast these baby cabbages up in the oven. The balsamic vinegar adds a complex sweetness to the sprouts. 

INGREDIENTS
  • 2 lbs Brussels Sprouts
  • 2 Tbsp extra virgin olive oil
  • Sea salt and fresh ground pepper
  • 2 tsp balsamic vinegar
DIRECTIONS
  1. Cut the bottoms off of the sprouts and halve them. Discard outer leaf layers if discolored.
  2. Combine in bowl with EVOO, salt and pepper.
  3. Spread out on a jelly roll pan or baking sheet, cut side down.
  4. Roast in 375ºF oven for 20-25 minutes until somewhat browned.
  5. Drizzle balsamic vinegar over them and stir. Place back in oven for 2-3 minutes. Enjoy!


2 Comments

Lentil and Rice Salad

The days leading up to payday are always a challenge for me. I am the budget and after all these years, I still stink at it. I hope that I can learn someday so we can get back to digging ourselves out of debt. For now, you get to benefit from me having to get creative in the kitchen in order to provide healthy meals to fill our bellies. After rummaging through the refrigerator on Tuesday, I saw enough things in there to work with and get my mind moving. A package of vacuum-packed, precooked lentils, leftover basmati rice, black olives, and some items from the vegetable drawer. I started throwing things together in a bowl and kept adding to it. This was the result: Lentil Rice Salad - The Half-Crunchy Mama Leave it to Trader Joe’s to help a girl out. I am an avid label reader (the crunchy side) and there are some things from there that I won’t touch, but there are lots of things you can find in Trader Joe’s that are not only healthy and cheap, but are real time savers. This is one of them…not that lentils take all that long to cook, but still. I have a three year old and I can use all the help I can get. So I took these and the leftover rice (enough to fill one of those plastic Chinese takeout soup containers, maybe 2 cups?) and popped them in the microwave to get them softened up and brought back to life. Then the creativity came and I was pulling things to the counter left and right. Lentil Rice Salad - The Half-Crunchy Mama I threw in a large handful of bagged, organic shredded carrots, 3/4 can of sliced black olives (Trader Joe’s), 2 tsp minced garlic (from a jar), and 1 small onion finely diced in my chopper – one of my top kitchen favorites that I love so much that I have given it as gifts. The one I have linked is not the same brand, but it’s the same thing (and the one that I buy for people).

Lentil and Rice Salad - The Half-Crunchy Mama

Then I added 2 Tbsp fresh chopped cilantro plus about 1-2 tsp from the squeeze tube, quite a bit of salt and fresh ground pepper, squeezed the juice from two limes and one lemon, and finished it off with a few turns around the bowl of  extra virgin olive oil. And this is what I got. YUM!Lentil Rice Salad - The Half-Crunchy Mama


Lentil Rice Salad

Easy on the budget, this quick protein-filled dish can help stretch your dollars and your time. Sorry for the vagueness in quantities, but this is how I do it 🙂 Thinking back, I wish that I had some English cucumber and/or organic bell pepper lying around, too. That would be even better. Just use your own judgement and taste buds to perfect your own! 

INGREDIENTS
  • Approximately 1 lb of cooked lentils (I used Trader Joe’s 17.6 oz package of steamed and refrigerated lentils)
  • Approximately 2 cups of cooked rice (I had leftover Basmati)
  • Large handful of bagged, shredded carrots (approximately 1-1.5 cups)
  • Sliced black olives, drained (I used about 3 ounces of a 3.8 ounce from Trader Joe’s that I had left in the fridge – more would be better)
  • 2-3 tsp minced garlic (from the jar – time saver!)
  • 1 small onion, very finely diced
  • 2 Tbsp freshly chopped cilantro
  • 1-2 tsp cilantro from the tube (or 1-2 Tbsp more fresh)
  • Juice of 2 limes
  • Juice of 1 lemon
  • Few times around the bowl with EVOO (1-2 Tbsp)
  • Quite a bit of fresh ground pepper and sea salt (start with 1/4- 1/2 tsp each and taste from there)
DIRECTIONS
  1. In medium bowl, stir together lentils and rice. Warm (in microwave) if needed. (yes, I still use a microwave – half-crunchy)
  2. Add the rest of the ingredients, giving a few stirs now and then to combine well.
  3. Taste and add more salt and pepper, if needed. Enjoy!


1 Comment

Cheesy Broccoli Egg Muffins

I love to eat breakfast any time of the day. And by breakfast, I mean eggs. I could eat eggs three times a day and never get bored. There are so many ways to eat them! I even have an entire Pinterest board dedicated to recipe ideas that involve eggs; Breakfast Anytime. Most of them are frittatas (my favorite things to create) and muffin things like this one, but there are some others on there that I make quite often, like this Kale and Feta Egg Bake recipe. You should check it out. But you won’t find any other kinds of breakfast recipes, like the carbtastic ones, because we don’t really eat food like that in our house. I have never been a pancake/waffle/french toast kind of person, except maybe a few times when I was pregnant. I blame my Sugar Bee for that.

Speaking of Sugar Bee, she’s a broccoli fiend. This kid goes through phases of obsessions (like all toddlers), but the broccoli one seems to be pretty consistent. The odd part to me is that her preferred way to eat it is raw with hummus, which completely thrills me as eating raw foods retains their nutrients. Steaming is the next best option, but raw broccoli maintains its high levels of vitamins A ,C, and K, and none of the other bonuses (calcium, iron, fiber, and the cancer-fighting sulforaphane) have a chance to deteriorate like they do when cooked. Of course in this recipe, the broccoli is steamed before a quick bake in the eggs, but I couldn’t help rambling on about the reasons for my broccoli love. Now on to the recipe!

Everyone complains about egg muffins sticking to the pan, but I haven’t found using liners to be a much better solution. This time, I decided to spray the liners with cooking spray (yes, I use PAM – gasp! – and Trader Joe’s makes a good coconut oil one but coconut and eggs don’t go together) to see if that would make a difference. It did help make the paper a lot easier to remove from the muffins…no little pieces left behind after removing the liner…especially in the ridges along the sides where little pieces would hide. I don’t care much for paper in my food.

Cheesy broccoli muffins

After setting up the liners, preheat the oven to 375ºF and get a pot of water heating up to steam the broccoli. I use a stainless pot with a steam insert similar to this one, but it’s a lot nicer than mine. (That’s why there’s no picture. I really need a new one.) Chop up about 2 cups of broccoli into small pieces and steam for a few minutes, just until you can poke a fork through and there is a bright green mess looking at you when you lift the lid.

Cheesy broccoli muffins

In a large bowl, crack in 8 eggs and whisk together. I like to add a little water to make it fluffy. Add about 1 Tablespoon dried chives. I didn’t have any fresh on hand, but if you do, always go with fresh herbs. Add salt, pepper, garlic powder, a few circles around the bowl of sriracha (or other hot sauce), and shredded cheese. I used a cheddar/Mexican blend, but any flavor will do. Add the steamed broccoli and stir to combine.

Cheesy broccoli muffins

Spoon into the muffin liners so they are almost full and top with more cheese. You can never have too much cheese. Unless you can’t eat cheese. And that thought just makes me sad.

Cheesy broccoli muffins

 I had some left in the bowl after filling the 12 muffin liners, so I grabbed one of these little ramekins and poured the rest in. (If you don’t have a small ovenproof baker or two to use, you might want to omit an egg or some of the broccoli or cheese from the recipe.) This made a nice portion for the Russian when he got home from school that night.

Cheesy broccoli muffins

Bake for 12-15 minutes. The magic number for me was 14, but my oven is so old, just check on it and use your judgement. They should fluff up and be pretty when they are done, with a slight golden sheen.Cheesy broccoli muffins

  So yummy! I couldn’t stop eating them. I think I had three for dinner that night. Sugar Bee enjoyed hers, too!

Cheesy broccoli muffins


Cheese Broccoli Egg Muffins

Breakfast can be any time and any place with these portable, protein-filled muffins. Broccoli is high in vitamins, fiber, protein, and cancer-fighting nutrients. This is a tasty way to get more broccoli into your diet. Superfood!

INGREDIENTS
  • 2 cups chopped broccoli
  • 8 eggs
  • Splash of water
  • 1 Tbsp chives (dried)
  • 1 tsp garlic powder
  • A few circles of sriracha, or hot sauce of your choice
  • Salt and pepper (to taste)
  • 1.5 cups shredded cheese, divided
DIRECTIONS
  1. Preheat oven to 375ºF. Add cupcake liners to 12-muffin baking tin. Spray liners with cooking spray.
  2. Steam broccoli for 2-5 minutes, until can be pierced with a fork and are still bright green. Remove from heat.
  3. In large bowl, whisk together eggs and water. Add chives, garlic powder, hot sauce, salt, pepper, and 1 cup of cheese. Stir to combine.
  4. Spoon mixture into muffin liners and top with the remaining 1/2 cup cheese. Bake 12-15 minutes. Muffins will fluff up and have a few golden spots on them when done. Enjoy!


5 Comments

Creamy Zucchini Noodles

This recipe is a huge favorite with the Russian and I. After I made it once to try it out, I added it into my regular rotation of dishes. It’s fast, cheap, and easy, all very important characteristics with everything I’m juggling these days, and his eyes light up whenever I mention making it again. There is little doubt that once Sugar Bee* gets over her “it has skins” phase about everything put in front of her that she will be chowing down on this one, too. She still loves avocado (her first food) and is a total veggie-head. Don’t be fooled by the word “creamy” in the title. This dish is non-dairy, gluten-free, vegetarian, paleo-friendly, you name it and it probably fits, like nearly every recipe I will ever post.

The recipe originates from the blog of Empowered Sustenance. Her original recipe can be found here. She is an amazing resource and I have really enjoyed her posts. You should follow her blog, too!

First, I have to mention (brag) that the zucchini used for this blog was successfully grown in my own container garden. This is only my second year taking a crack at growing my own food and I’m quite impressed with myself. If I actually had time, I would research a lot about how to successfully grow each individual crop and spend a lot more time tending to the plants. I’m sure I would probably have actual garden beds, a greenhouse, and compost everything, but containers are about all I can handle at this point in my life. Just take a look at this beauty!!

2014-07-06 17.29.57

Now let me focus your attention on one of the best things ever invented, next to the Kitchen Aid  stand mixer. I LOVE this thing! You can spiral fruits and vegetables into noodles or chips in minutes. It’s so easy to use and clean. If you don’t have one, go buy it. Now. Amazon usually has the best price. Look, I’ve even given you a place to click and get one here. If you are a clean eater, paleo, or GFer and you still don’t have one, I’m not sure we can talk anymore. You should have had this yesterday. But if you don’t have one, you can use a julienne peeler like this one to make the noodles.

Creamy zucchini noodles

Another nifty item to have is an avocado saver. There are those rare occasions where we actually have half an avocado left in our house and this thing actually works. You do have to pull it real tight to make sure air can’t get to the flesh, and there might still be a little discoloration when you get to it, but it’s a very thin layer that scrapes off very easily.

Creamy zucchini noodles

This was after two days in the saver in the fridge. I think that’s pretty darn good! The lighting  in this picture stinks, but as you will see in the picture down below in this post after it’s been scraped into the bowl, it was still nice and green. The only thing was that those little stripes appeared. TWO DAYS. Here it is on Amazon, but I bought mine in Publix. My mom found one for herself up in NY at Stop N Shop, so I’m sure you can get one anywhere. Do it.

Creamy zucchini noodles

To make the zucchini noodles, trim the ends off the zucchini, position it in the slicer, and turn the handle. Yep, this is really hard stuff here.

2014-07-06 17.34.54

I like to make my noodles on the short side. When I first started making this, I would make them too long, making cooking, mixing, and even eating them a little difficult. I break them off after a few turns and drop them in the bowl. Then I turn and make some more. One of the easiest things going on in my world of cooking prep.

Creamy zucchini noodles

When you are done making the zucchini noodles, it’s time to cook them. Heat the EVOO in a saute pan over medium heat. Add the zucchini noodles, some Italian seasoning and garlic powder, and turn the noodles around in the pan to coat them in the oil and spices.

Creamy zucchini noodles

While the zucchini is cooking, get the sauce ready. Scoop the avocado into a medium-sized bowl with juice from half a lemon, a giant tablespoon of mayo (you could use yogurt, if tolerable), salt, and fresh ground pepper to taste.

2014-07-06 18.24.06-1

Mash the ingredients together with a fork until it looks like a creamy guacamole.

2014-07-06 18.26.57

When the zucchini has finished cooking, it should still have a nice green color and be soft, but not mushy. Remove it from the heat and let it stand a minute or two. Don’t let it cool too long as the warmth from the zucchini helps the creamy avocado sauce to coat the noodles.

Creamy zucchini noodles

 After it has cooled for a few minutes, add it to the bowl of creamy sauce and stir to combine. I try to drain some of the oil off of the noodles before placing them in the bowl or the sauce can get too runny. Serve immediately and enjoy!

Creamy zucchini noodles

* Sugar Bee is what I call my three-year-old daughter. I actually call her My Sweet Sugar Bee, but this shortened version will work fine for my blog.


Creamy Zucchini Noodles

These quantities make two servings if made as a side dish, one if you eat it all by yourself as a meal…which you might want to do after the first time you make it. This is easily doubled and since I have found that it does last until the next day, I usually make a double batch. I have also sauteed fresh garlic in the oil before adding the zucchini for extra flavor (then omitting the garlic powder). We love garlic! Happy cooking!

INGREDIENTS
  • 1-2 tsp extra virgin olive oil (or the oil/fat of your choice)
  • 1 medium zucchini, made into noodles with a spiral slicer or  julienne peeler
  • 1 tsp Italian seasoning
  • 1/2-1 tsp garlic powder
  • 1/2 ripe avocado
  • Juice of half a lemon, freshly squeezed
  • 1 heaping Tbsp of mayonnaise (or yogurt)
  • Salt and pepper to taste
DIRECTIONS
  1. Heat oil in saute pan over medium heat. Add the zucchini, Italian seasoning, and garlic powder, tossing to coat. Saute for 3-5 minutes until noodles have softened, but not mushy and are still bright green.
  2. While noodles are cooking, mash avocado with the remaining ingredients in a bowl with a fork until it has the consistency of a creamy guacamole.
  3. When zucchini is finished cooking, remove from heat and let cool for 1-3 minutes. Add to the bowl with the avocado mixture, allowing some of the oil to drain off. Stir to coat noodles and serve. Enjoy!


5 Comments

The Half-Crunchy Mama’s Baba Ghanoush

Yay! A recipe post! I’m glad you’re back. Food always brings people back.

The Russian* and I are obsessed with eggplant. Seriously obsessed. My daughter, now almost three, has eaten eggplant since she could eat food that only needed to be mashed a little before swallowing. Her favorite recipe is what I call “Eggplant Ragu” and I will surely post that one as soon as I make it again so  I can write it down. When they are 10 for $10 at Kroger, we are eating eggplant in a variety of ways. I like to slice and grill it, marinate with other veggies for a variety of dishes (one of several ratatouille recipes, eggplant parm, eggplant lasagna, eggplant salads…all future postings), and of course, baba ghanoush. If I could figure out how to freeze eggplants, we would be set! Hmmm….might have to start researching and experimenting.

They way I like to cook is kind of like how I get my news. I read a few different sources and make my own decisions on how to move forward. My recipes are usually a little from this recipe, a little from another, and some other piece or two from yet a different one, all mixed together with my own knowledge of cooking and what tastes good and works together. After reading several different recipes, I decided that I had enough information to make my own. I must say the first batch was pretty damn fantastic. After half a dozen or so batches, they seem to only get better.

One “mistake” I apparently made was cutting the eggplant before roasting it. Sometimes I read a little too fast and miss an important item. Kind of like when I’m supposed to read directions or instructions for putting something together. Well, after my maiden batch, I was pretty sure that this is the best way to do it and that everyone else made the mistake by keeping the eggplant whole.

First, slice the eggplant in half lengthwise.

The Half-Crunchy Mama's Baba Ghanoush

Then oil up the cut side with some EVOO.

The Half-Crunchy Mama's Baba Ghanoush

Place it cut side down on a nonstick baking sheet.

The Half-Crunchy Mama's Baba Ghanoush

Bake it for about 25 minutes or so, depending upon how big it is (or they are if you are making a double batch). You want the eggplants to have some give when you push on the skins…usually anywhere between 20-30 minutes. They should look nice and golden and be pretty smushy. Perfect for going into the food processor.

The Half-Crunchy Mama's Baba Ghanoush

 Now you will want to let them cool off before scooping out the insides, unless you’re impatient (I don’t know anyone like that). In that case, you will need a towel or something to protect your hand. However, I suggest giving them at least a few minutes. That will give you time to set everything else up.

Get out your food processor. I have a small one and large one, but it’s almost easier to make it in two batches than drag the huge one out. And clean it.

You will also need EVOO, that’s extra-virgin olive oil for those of you that have never watched any of Rachael Ray‘s shows. Sadly, much to the disappointment of all of my chef friends, she’s the one that actually got me cooking and helped me to realize how much I love to cook. In addition to the olive oil, grab a lemon, a few cloves of garlic, tahini (I like this one and you can get it in most stores), pepper (preferably fresh ground), and Kosher or sea salt. Yep, that’s all that’s in it. Gluten-free, vegan, vegetarian, paleo, whatever your eating preferences or restrictions are, you can eat this! Unless you’re just picky and are afraid to try delicious things to put in your belly.

The Half-Crunchy Mama's Baba Ghanoush

 Now for the fun part.

Hopefully the eggplant(s) are cooled off now. Scoop out the insides into the food processor with a spoon. Now, I’m not really one for measuring anything. I go with how I feel, so sometimes my measurements are estimates. Taste as you go, stick your finger in and taste, and then adjust accordingly. Salt is the biggest thing I have a hard time with and I often under salt my food. It’s better than putting too much in.

For a single eggplant batch, I usually add two cloves of garlic run through the press (even though it’s going to get blended, it helps to distribute better), a heaping tablespoon of tahini, 1/2 of a fresh squeezed lemon, 1-2 tablespoons of EVOO, 1/2-1 teaspoon of sea salt, and a few circles of the pepper grinder around the heap of ingredients waiting to be blended.

The Half-Crunchy Mama's Baba Ghanoush

 You don’t want to process it too much or it will get really runny. I like it to be thick enough to pick up a bunch on the end of a baby carrot, not having to scoop it up with a spoon because it slides off.

The Half-Crunchy Mama's Baba Ghanoush

 Hopefully you will get something that looks as beautiful as this when you are finished and have plated it…or put it in a plastic or glass container that can be sealed up. Store it in the refrigerator and enjoy for several days to come!

The Half-Crunchy Mama's Baba Ghanoush

 Remember, there are no preservatives, so enjoy it sooner rather than later. Clean and fresh food is best!

* This is the endearing term for my Moscow-born husband that will be regularly used when discussing anything to do with him in my posts.

The Half-Crunchy Mama’s Baba Ghanoush

These quantities are for a single batch. I usually double everything, so multiplying ingredients does not affect the taste as happens sometimes with recipes. For two or twenty, Baba away!

 INGREDIENTS:

1 Eggplant (FYI, to pick a proper eggplant, it should feel heavy for its size and give a little when you squeeze it)
2 Cloves of garlic, minced or pressed
1 Tbsp tahini
1/2 Fresh-squeezed lemon
1 Tbsp extra-virgin olive oil, plus some for oiling the eggplant before roasting
1/2-1 tsp kosher or sea salt, to taste (I have used both at different times, so this one is your choice)
Several turns of fresh ground pepper, to taste

 DIRECTIONS:

1. Preheat oven to 400°F.
2. Slice the eggplant in half lengthwise. Coat cut side with olive oil. Place cut-side down onto baking sheet and bake in oven for about 25 minutes. Total time could be anywhere between 20 and 30 minutes, depending upon size. The  eggplant is ready to be removed when there is lots of give when pressing on the skin with your finger. Allow to cool.
3. Once cooled, scoop insides of eggplant into food processor bowl. Add the remaining ingredients and blend until combined and the preferred consistency has been reached. (Be careful not to over-process or it will be like soup.)
4. Store in airtight container for up to a week in the refrigerator. Enjoy!